About the workspace toolbar
Use the workspace toolbar to perform a variety of actions in the workspace, such as adding files, connecting remote participants, and more.
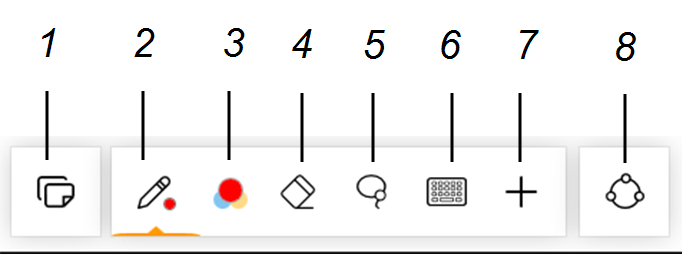
Number | Description |
|---|---|
1 | Manage pages. See Adding and managing workspace pages. |
2 | Change the pen tool’s settings, such as the ink color, style, and thickness. See Writing and drawing in the workspace. |
3 | Select the ink color. You can customize and save up to six different colors. If you’re using a SMART Board interactive display, selecting an ink color in SMART TeamWorks Room overrides the interactive display’s pen color. |
4 | Enable the eraser tool and select the eraser size. |
5 | Enable the lasso tool. Use this tool to select an area of digital ink to move, resize, or rotate. |
6 | Open the on-screen keyboard. |
7 | Show the additional tools. See Additional tools. |
8 | Connect to a whiteboard or share whiteboard. |
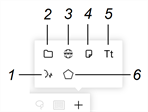
Icon | Description |
|---|---|
1 | Use voice commands to complete common tasks within TeamWorks Room. See Using Hey, TeamWorks voice commands. |
2 | Insert and present a variety of file types in a workspace page. See Inserting and working with files. |
3 | Add a web browser object to the workspace page. See Inserting and using web browsers. |
4 | Insert sticky notes in the workspace. See Inserting and using sticky notes. |
5 | Add text to the workspace page. See Adding text to the workspace. |
6 | Insert a shape. See Inserting and working with shapes. |