Writing, drawing and erasing
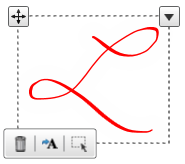
When you write or draw in an application or on the desktop, the digital ink becomes an object that you can erase, move and otherwise manipulate.
In addition to writing or drawing in various types of digital ink, you can write or draw in disappearing digital ink and draw spotlights, magnifiers and shapes.
Note
You can write in, draw in, erase and manipulate digital ink when SMART Ink is running (see Getting started) and your computer is connected to a SMART interactive product.
You can write or draw in most applications and on the desktop.
Note
If you are writing or drawing in a Microsoft Office application, see Using SMART Ink with Microsoft Office.
To write or draw in digital ink
Open the SMART Ink dynamic toolbar in full mode (see Opening the dynamic toolbar).
OR
Open the SMART Touch Inking Tool dynamic toolbar in full mode (see Starting the SMART Touch Inking Tool).
Press Pens
.
Press Pen Options
, and then select one of the following pens:
Icon
Name
Standard pens
Pen
Highlighter
Calligraphic pen
SMART Notebook pens 1
Crayon
Creative pen
Text pen 2
Paint brush
Note
For information on the magic pen and shape recognition pen, see Writing and drawing in disappearing digital ink, Drawing spotlights, and Drawing magnifiers.
Set the color and line properties for the pen:
Property
Standard pen
Highlighter
Calligraphic pen
Crayon
Creative pen
Text pen
Paint brush
Color
Yes
Yes
Yes
Yes
Yes 3
Yes
Yes
Line style
Yes
No
No
No
No
No
No
Line start
Yes
No
No
No
No
No
No
Line end
Yes
No
No
No
No
No
No
Thickness
Yes
Yes
Yes
Yes
Yes
Yes
Yes
Transparency
Yes
No
Yes
No
No
Yes
No
Write or draw in digital ink.
Note
When you write or draw in digital ink on the desktop, the digital ink appears inside a SMART Ink Note. You can move and close the SMART Ink Note as you would any other window.
If SMART Notebook is installed, you can use photographs or other picture files to create personal creative pens.
To add a personal creative pen
Save the Bitmap, GIF, JPEG, PNG or TIFF picture file you want to use for a personal creative pen in a location you can access from the computer on which SMART Ink is installed.
Open the SMART Ink dynamic toolbar in full mode (see Opening the dynamic toolbar).
OR
Open the SMART Touch Inking Tool dynamic toolbar in full mode (see Starting the SMART Touch Inking Tool).
Press Pens
.
Press Pen Options
, and then select Creative Pen
.
Press Color Options
.
Press Add
 .
.The Open dialog box appears.
Browse to the picture file you saved in step 1, and then press Open.
SMART Ink adds a creative pen based on the picture file.
To delete a personal creative pen
Open the SMART Ink dynamic toolbar in full mode (see Opening the dynamic toolbar).
OR
Open the SMART Touch Inking Tool dynamic toolbar in full mode (see Starting the SMART Touch Inking Tool).
Press Pens
.
Press Pen Options
, and then select Creative Pen
.
Press Color Options
.
Press and hold the personal creative pen, and then press Delete.
If SMART Notebook is installed, you can use the magic pen to write or draw in digital ink that disappears after a few seconds.
To write or draw in disappearing digital ink
Open the SMART Ink dynamic toolbar in full mode (see Opening the dynamic toolbar).
OR
Open the SMART Touch Inking Tool dynamic toolbar in full mode (see Starting the SMART Touch Inking Tool).
Press Pens
.
Press Pen Options
, and then select Magic Pen
.
Set the color and line thickness for the magic pen.
Write or draw in digital ink using the magic pen.
The digital ink disappears after a few seconds.
If SMART Notebook is installed, you can create a spotlight to highlight content on the screen. You do this by drawing a circle or oval using the magic pen.

To draw a spotlight
Open the SMART Ink dynamic toolbar in full mode (see Opening the dynamic toolbar).
OR
Open the SMART Touch Inking Tool dynamic toolbar in full mode (see Starting the SMART Touch Inking Tool).
Press Pens
.
Press Pen Options
, and then select Magic Pen
.
Set the color and line thickness for the magic pen.
Draw a circle or oval around the portion of the screen you want to display using the magic pen.
A spotlight appears.
Optionally, press the spotlight’s edge, and then drag outward or inward to make the spotlight larger or smaller.
When you’re done with the spotlight, press Close
 .
.Tip
Alternatively, you can open the Spotlight tool from the toolbox (see Using the Spotlight tool).
If SMART Notebook is installed, you can magnify content on the screen by drawing a square or rectangle with the magic pen.

To draw a magnifier
Open the SMART Ink dynamic toolbar in full mode (see Opening the dynamic toolbar).
OR
Open the SMART Touch Inking Tool dynamic toolbar in full mode (see Starting the SMART Touch Inking Tool).
Press Pens
.
Press Pen Options
, and then select Magic Pen
.
Set the color and line thickness for the magic pen.
Use the magic pen to draw a square or rectangle around the portion of the screen you want to magnify.
A magnifier appears.
Optionally, do the following:
Press within the magnifier and then drag to move it.
Press the magnifier’s edge, and then drag outward or inward to make the magnifier larger or smaller.
Drag the slider below the magnifier to zoom in and out.
When you’re done with the magnifier, press Close
 .
.Tip
Alternatively, you can open the Magnifier tool from the toolbox.
If SMART Notebook is installed, you can use the shape recognition pen to draw circles, ovals, squares, rectangles, triangles and arcs. SMART Ink converts your drawings to the appropriate shapes.

Note
In SMART Notebook, the shapes are converted to SMART Notebook objects. In other applications and on the desktop, the shapes remain digital ink.
To draw a shape
Open the SMART Ink dynamic toolbar in full mode (see Opening the dynamic toolbar).
OR
Open the SMART Touch Inking Tool dynamic toolbar in full mode (see Starting the SMART Touch Inking Tool).
Press Pens
.
Press Pen Options
, and then select Shape Recognition Pen
.
Set the color and line thickness for the shape recognition pen.
Draw a shape using the shape recognition pen.
If SMART Ink recognizes your drawing as a circle, oval, square, rectangle, triangle or arc, it converts the drawing to that appropriate shape.
The procedure for erasing digital ink depends on the type of SMART interactive product that you’re using:
Interactive product(s) | Procedure |
|---|---|
Interactive flat panels | |
SMART Board 8000i‑G5 |
|
SMART Board 8000i‑G4 SMART Board 8000i‑G3 |
|
SMART Board 6000 |
|
SMART Board 4000 |
|
Interactive whiteboards | |
SMART Board 800 |
|
SMART Board M600 |
|
SMART Board 600 |
|
Other interactive products | |
LightRaise 60wi2 LightRaise 60wi |
|
SMART Podium |
|
On the following SMART interactive products, two users can write, draw and erase at the same time:
SMART Board 8000i‑G5 series interactive flat panels
SMART Board 8000i-G3 and 8000i-G4 series interactive flat panels
SMART Board 6000 series interactive flat panels
SMART Board 4000 series interactive flat panels
SMART Board 800 series interactive whiteboards
SMART Board M600 series interactive whiteboards
LightRaise 60wi and 60wi2 interactive projectors
SMART Board 6000 series and 8000i-G5 series interactive flat panels have Pen ID, which enables two users to specify colors and other settings for their pens independently.
You can manipulate digital ink objects that you created with SMART Ink.
To select an object
Press the object once.
A border appears around the object.

To select multiple objects
Press the first object once.
A border appears around the object.

Press Select
 on the border.
Drag a rectangle around the objects you want to select.
To select all objects
Press the first object once.
A border appears around the object.

Press the arrow
on the border, and then select Select All.
To clear the selection of objects
Press the arrow
on the border, and then select Select None.
To move objects
Select the objects.
Drag the objects to a new location.
Tip
You can also flick the objects to move them quickly.
To cut or copy and then paste objects
Select the objects.
Press the arrow
on the border, and then select Cut or Copy.
Paste the objects in another application.
To delete objects
Select the objects.
Press Delete
 on the border.
Tip
You can also erase digital ink to delete it (see Erasing).
Keywords |
|
Related documents |


 , and then select an eraser size.