Adding shapes to lesson pages
In addition to creating freehand shapes by drawing digital ink, you can create shapes using the following tools:
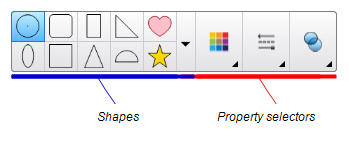
Shapes tool: Use this tool to create many different standard shapes.
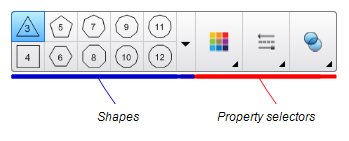
Regular Polygons tool: Use this tool to create a polygon shape.
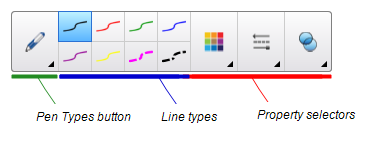
Shape Recognition Pen tool: Use this tool to draw a shape on the lesson page and have Notebook convert it to a more perfected shape.
If you’re using shapes to teach geometry, you can display and edit a shape’s side lengths and vertices, as well as display its interior angles.
Note
The Eraser tool doesn’t remove shapes. Delete a shape or line to remove it.
You can use the Shapes tool to create a variety of shapes, including perfect circles, squares, triangles, other geometric shapes, hearts, check marks and Xs.
You can add a shape to your page, and then edit its properties using the Properties tab. Alternatively, you can customize a shape’s outline color, fill color, line thickness, and other properties from the toolbar, and then add it to your page.
To create a shape
Select Shapes
 .
.The Shapes tool buttons appear.

Select a shape on the toolbar.
OR
Select
and then select a shape.
Optionally, customize the shape using the property selectors.
Note
You can also customize the shape using the Properties tab.
Select where you want to place the shape in the page area and drag it until the shape is the size you want.
Tips
You can create perfect circles, squares, triangles and other shapes by holding down SHIFT as you draw the shape.
You can select a shape while the Shapes tool
 is active without having to switch to the Select tool
 . Select the shape once, and a selection rectangle appears around the shape.
In addition to creating shapes using the Shapes tool, you can create regular polygons with 3 to 15 sides using the Regular Polygons tool.
To create a shape with the Regular Polygons tool
Select Regular Polygons
 .
.The Regular Polygons tool buttons appear.

Select a shape on the toolbar.
OR
Select
and then select a shape.
Note
The number in the shape indicates its number of sides.
Optionally, customize the shape using the property selectors.
Note
You can also customize the shape using the Properties tab.
Select where you want to place the shape in the page area and drag it until the shape is the size you want.
You can use the Shape Recognition Pen tool to draw circles, ovals, squares, rectangles, triangles, and arcs.
To draw a shape
Select Pens
 .
.
Select Pen Types, and then select Shape Recognition Pen.
Draw a shape on the page.
If SMART Notebook software recognizes your drawing as a circle, oval, square, rectangle, triangle, or arc, it adds the shape to the page.

You can display a shape’s side lengths. If you edit the displayed length, SMART Notebook recalculates and displays the lengths of the other sides.
Notes
If you display these lengths and then edit the shape’s vertices (see DisplayAndEditShapeVertices), SMART Notebook Math Tools updates the labels and displays the new side lengths.
You can also display interior angles (see DisplayInteriorAngles).
Select the shape.
Tap the shape’s menu arrow, and then select Show/Hide Side Lengths.
SMART Notebook Math Tools calculates the lengths based on the ruler’s default units.
Note
To hide side lengths, tap the shape’s menu arrow, and then select Show/Hide Side Lengths again.
If you haven’t done so already, display the side lengths.
Double-click the side length you want to change.
Type the new length.
Tap somewhere else on the page.
SMART Notebook Math Tools recalculates and displays the lengths of the other sides.
You can edit the position of a shape’s vertices. If you’re displaying the shape’s interior angles or side lengths, SMART Notebook Math Tools updates the labels and displays the new interior angles or side lengths automatically.
To display the vertices of a shape
Select the shape.
Tap the shape’s menu arrow, and then select Show/Hide Vertices.
A red circle replaces each of the shape’s vertices.
To edit the vertices of a shape
If you haven’t done so already, display the shape’s vertices.
Drag a red circle to move that vertex.
When you finish editing the shape’s vertices, tap anywhere else on the page.
To hide the vertices of a shape
Select the shape.
Tap the shape’s menu arrow, and then select Show/Hide Vertices again.
You can display the interior angles of a shape.
Notes
If you display these angles and then edit the vertices of the shape (see Displaying and editing a shape’s vertices), SMART Notebook updates the labels and displays the new interior angles.
You can also display side lengths (see To display side lengths).
To display interior angles
Select the shape.
Tap the shape’s menu arrow, and then select Show/Hide Interior Angles.
Note
To hide interior angles, tap the shape’s menu arrow, and then select Show/Hide Interior Angles again.
To change an object’s fill
Select the object.
If the Properties tab isn’t visible, press Properties
 .
.Select Fill Effects.
Select a fill style:
Fill style
Procedure
None (transparent)
Select No fill.
Solid color
Select Solid fill.
Do one of the following:
Select one of the 40 colors in the palette.
Tap More, and then select a color in the dialog.
Tap the eyedropper
 , and then select a color on the screen.
Gradient of two colors
Select Gradient fill.
For each color, do one of the following:
Select one of the 40 colors in the palette.
Tap More, and then select a color in the dialog.
Tap the eyedropper
 , and then select a color on the screen.
Select an option in the Style drop-down list.
Pattern
Select Pattern fill.
Select a pattern.
Tap Foreground color, select a color in the dialog, and then press OK.
Tap Background color, select a color in the dialog, and then press OK.
Picture
Select Image fill.
Tap Browse.
A dialog appears.
Browse to and select the picture you want to use as a background, and then press Open.
Note
If you insert a large picture, a dialog may appear and prompt you to either reduce the picture’s file size or retain the picture’s file size. For more information, see Setting image preferences to reduce file size.
Select Keep image size to keep the picture’s size, regardless of whether the picture is larger or smaller than the object.
OR
Select Scale image to fit to resize the picture to fit the object.
Optionally, drag the Object transparency slider to the right to make the object transparent.
Tip
You can also change an object’s properties using the property selectors on the toolbar.
To change an object’s fill using the Fill button
From the toolbar, select Fill
 and then select a color.
Select the object you want to apply the fill to.
Repeat step 2 for each object you want to apply the fill to.
To change line style
Tap the object.
If the Properties tab isn’t visible, tap Properties
 .
.Tap Line Style.
Change the object’s line style.
To add animation
Tap the object.
If the Properties tab isn’t visible, tap Properties
 .
.Tap Object Animation.
Tap options in the Type, Direction, Speed, Occurs and Repeats drop-down lists.