Assigning Lumio lessons in Google Classroom
When you share a lesson, it behaves differently depending on whether the recipients are signed into Lumio as teachers or students:
Teachers receive a fresh copy of the lesson with no student work included.
Students receive a current copy of the lesson, so if they worked on the lesson in class, their work is included.
The procedure below explains how to assign Lumio files to students in Google Classroom. To share a copy of your file with another teacher, see Sharing lessons with other teachers.
To assign a lesson in Google Classroom
Sign in to Google Classroom, select the class where you’d like to share the lesson, and then select Classwork.

A list of the classwork you’ve posted appears.
Note
If you’re using an iPad, be sure to sign in to Google Classroom through your web browser rather than using the Google Classroom app. (When you use the app, you’re unable to access Lumio files.)
Click Create and select Assignment.
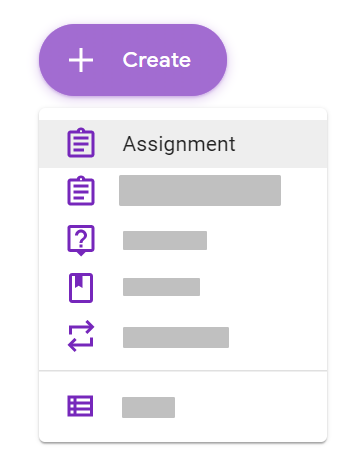
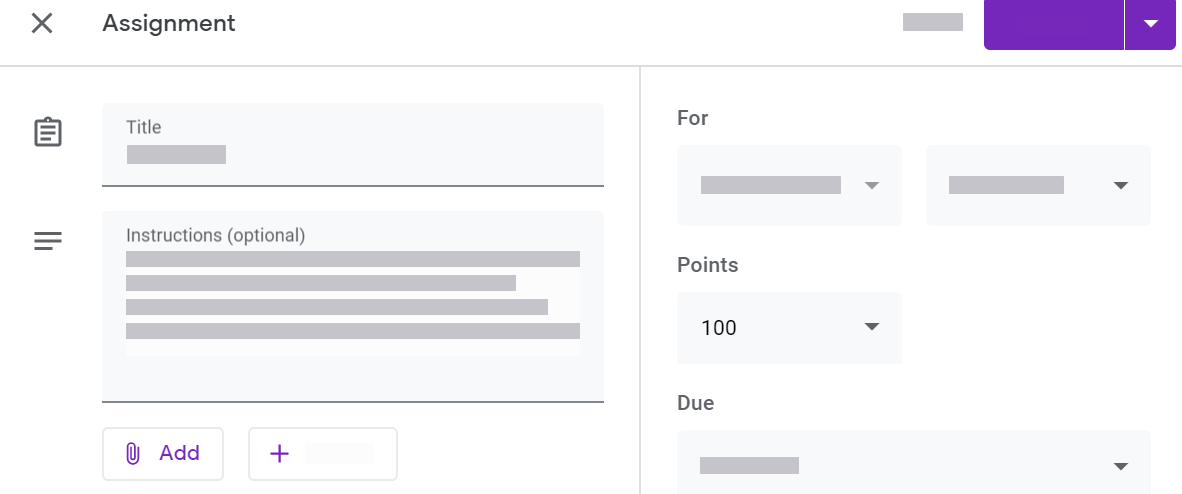
An assignment template appears.
Enter a title and fill in any other information that you’d like to include, such as instructions or a due date.
Open Lumio in a new browser tab.
Create a new session or find an existing session you want to assign.
Copy the session link from Lumio and paste it into the assignment template in Google Classroom.
Click Assign.
The assignment appears in your Classwork list and in each student’s view of Google Classroom.
Students can click the attachment and sign into Lumio to open the session you’ve assigned.
Note
If your students are using an iPad, they need to sign in to Google Classroom through a web browser rather than using the Google Classroom app. (When you use the app, you’re unable to access Lumio files.)