Adding ready-made resources
Use ready-made resources to help students activate prior knowledge or question and reflect on what they’ve learned. Ready-made resources also include various graphic organizers and manipulatives that you can add and customize for your lesson. Check out the teacher guide for some instructional ideas for using ready-made activities in your Lumio lessons.
Lumio includes a variety of ready-made activities:
Type | Description | |
|---|---|---|
Activating Prior Knowledge | Ready-made Shout it Out!, Response, and Handout activities you can add to your lesson to help students activate their prior knowledge of the subject. | |
Questioning & Reflection | Ready-made Shout it Out!, Response, and Handout activities you can add to your lesson to help students reflect on the subject and make connections. | |
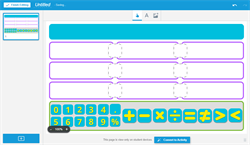
Manipulatives | Interactive activities, such as base ten blocks, coins, and word-making exercises that you can customize for your lesson. | |
Graphic Organizers | Graphic organizer templates to capture the students’ ideas, show student thinking, and create artifacts of meaningful discussions. | |
Use ready-made manipulatives or graphic organizers templates in your lesson. You can use the templates as-is or customize them for your lesson.
To add a ready-made manipulative or graphic organizer
Click
 New to start creating a new lesson file.
OR
To add the activity to an existing lesson, open the lesson in Editing mode, browse to the page that you want the activity to follow and click Add
 .
.The Add page window appears.

Under Ready-made resources, select either Manipulatives or Graphic Organizers.
The Manipulatives or Graphic Organizers template window opens.
Select the template that you’d like to use.
The template opens in Editing mode.

You can customize the activity as needed before you convert it to an activity and deliver it to your class.
Click
 Convert to Activity to make the manipulative or graphic organizer interactive.
Note
For ready-made manipulatives, be sure to delete any objects you might have moved while testing the activity. Objects you’ve moved around the page before converting it to an activity will appear as is. To delete a manipulative object that you have moved, select the object, tap the object’s menu
 , then select Delete.
To customize a ready-made manipulative or graphic organizer
After adding a ready-made activity, you can use these Editing mode tools at the top of the page to move and edit existing labels and add new labels or images:
Tool
Description

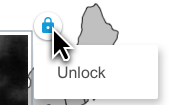
Use to select an object in the ready-made activity template. In these templates, objects are locked when you select them. To edit them, tap the lock icon and select Unlock. Then you can move the object or edit it to suit your needs.


Use to add your own text to the ready-made activity.

Use to add an image to the ready-made activity.
Ready-made activities are loaded with questions or tasks designed to get students thinking critically and creatively about the topic you’re teaching.
Select Activating Prior Knowledge to add an activity at the beginning of a lesson to help students engage based on what they already know.
Select Questioning & Reflection to add an activity to the middle or end of a lesson to help students reflect on what they just learned.
To add a ready-made activity
Click
 New to start creating a new lesson file.
OR
To add the activity to an existing lesson, open the lesson in Editing mode, browse to the page that you want the activity to follow and click Add
 .
.The Add page window appears.

Under Ready-made activities, choose Activating Prior Knowledge or Questioning & Reflection.
The Activating Prior Knowledge or Questioning & Reflection window appears.
In both windows, activities are organized by type and include Shout It Out!, Response, and Handout activities.
Select the activity you’d like to use.
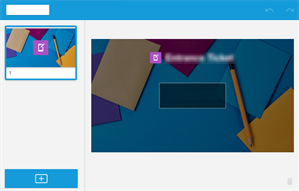
The ready-made activity opens in Editing mode.

Click Edit to make changes to the activity.
OR
Click Preview to test the activity.