Setting up and playing a Response assessment
Create a formative assessment to test student understanding so you can guide learning effectively.
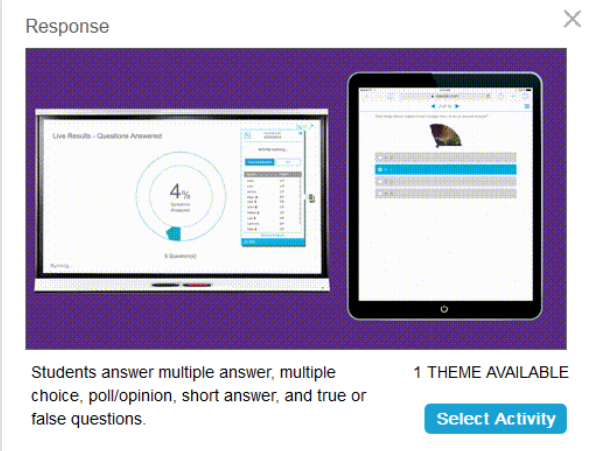
Here is an example of a Response assessment. The screen on the left shows the classroom display, which show how far students are in answering quiz questions. The screen on the right shows a student device with questions appearing.

This example was created by entering a set of questions about fractions.
Follow these instructions to create your own version of this activity. When you’re done, tap Preview to see how the activity will appear to students.
Click
 New to start creating a new lesson file.
OR
To add the assessment to an existing lesson, open the lesson in Editing mode, browse to the page that you want the activity to follow and click Add
 and select Response.
The Response assessment editor opens.
Select the question type for the first question. You can choose multiple choice, true or false, multiple answer, poll/opinion or short answer.
Note
The question type determines the answer format. For example, a multiple-choice quiz gives four potential answers from A through D, while a true or false quiz will give only True and False answers for students to select.
Tip
Spark plan users can use Lumio AI Assist to generate questions.
Enter a question and its answers. You can use up to 150 characters.
Note
Each question requires at least two answers.
Tip
To add an image, tap Image
 .
.Select the correct answer for the question you just added.
Use the Add Question button to continue adding questions. Above the Enter a question text box, you can change the question type for each question that you add. To go back and edit questions, use the Previous button.
When you’re done adding questions, click Next to review all your questions.
Select the delivery type from the SELECT MODE options.
Independent work: students can complete the assessment asynchronously. This is the default mode.
Live in-class: students start and end the assessment at the same time.
(Optional) Add a title or instructions to the activity.
Click Finish.
The assessment loads and then appears on a new lesson page.
Direct students to lumioclass.com and have them connect their devices to your class so that they can participate in the assessment.
If you selected Independent work mode, the activity can then be assigned to students to complete at their own pace—students can tap START to begin the assessment.
OR
If you selected Live in-class mode, tap Start for class to begin the assessment after student devices are connected
The assessment appears on students’ devices, showing the first question.
Students select their answers and tap the arrow in the bottom right of their screens to advance to the next question.
As students answer questions, a live feed of assessment progress appears at the display.
When all questions have been answered, students tap Submit all Answers and then tap Submit again to confirm their submission and complete the assessment.
Tips
The activity controls appear on the left-hand side of the page:
Use Activity settings
 to display the class ID and see a list of connected students, contributions, and to pause and end the activity.
Use Reset
 to erase activity data and start over.
To end the activity, tap End Activity and then tap End and Review in the End Activity? dialog that appears.
Question-by-question results appear on the classroom display.
Use the arrow in the bottom right corner of the screen to move to the next question’s results.
When you are finished reviewing results with the class, you have the following options:
Export results – tap Export Results in the bottom right corner of the screen to save assessment results in a Microsoft Excel file.
Reset the activity – tap Reset
 in the Delivery mode control bar on the left to reset the assessment.
When you end the assessment, students get instant feedback on their devices for each question.
Students can review results by:
Using the arrows at the top of their screen to scroll through the questions to see how they did on each one.
Tapping the hamburger menu in the top right corner to display results for all of the questions together with the percentage of questions answered correctly at the bottom of the screen.