Create digital signage
SMART Control lets you deliver the right content to the right screens at the right time, without disrupting instruction or increasing staff workload. Schools and districts can schedule announcements, rotate content, and target screens by location, role, or time of day. Morning announcements can run automatically in hallways and lobbies, student recognition can display during passing periods, and critical messages can reach the right screens while avoiding classrooms during instruction.
To create digital signage for your organization, add items to your content library, build playlists, and set schedules.
Supported content types include URLs, images (JPEG, JPG, PNG, GIF), video (MP4 and WebM), PDFs, and audio (M4A, AAC, and MP3) files.
To get started, open the signage feature using one of the following methods:
From the home page, click Signage in the main section or from the side panel.
OR
Click Menu

 Signage.
 Upload to the content library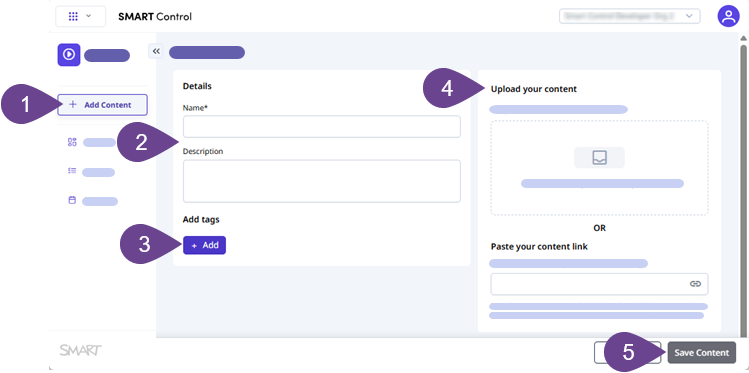
Click Add content.
Add a name and an optional description for the content.
Add tags to help identify the content, such as the month or the location where it should appear.
Upload your content using one of the following methods:
Click Click here or drag and drop a file into the box. Files must be less than 200 MB.
OR
Paste a link to the content.
Note
Some content types may need formatting or publishing adjustments to display correctly as signage.
SeeContent tips
Click Save.
The content appears in the content library.
Content tipsUse the following tips when uploading signage content:
Content type | Guidance |
|---|---|
All content |
|
Images |
|
Video files | |
PDFs |
|
Google Slides | |
Canva files |
|
Web pages |
|
Create a playlistClick Playlists.
Click Create playlist.
Add a name and an optional description for the playlist.
From the Content list, search for or scroll to the content you want to add, then click the plus button.
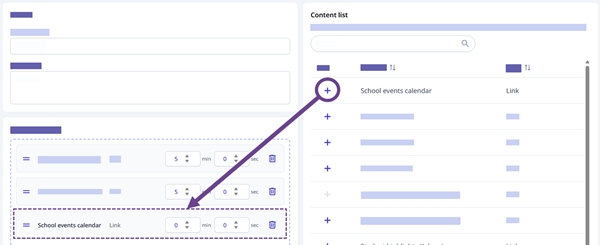
Enter a duration for each content item. For audio and video files, the duration adjusts automatically to the file length. For URLs and other content, the default duration is 15 seconds—adjust this so the content plays as expected.

Note
For multi-page content such as PDFs, multiply the number of pages by your desired seconds per page to get the total duration. For example, for a 3-page PDF where you want each page visible for 10 seconds, set the duration to 30 seconds.
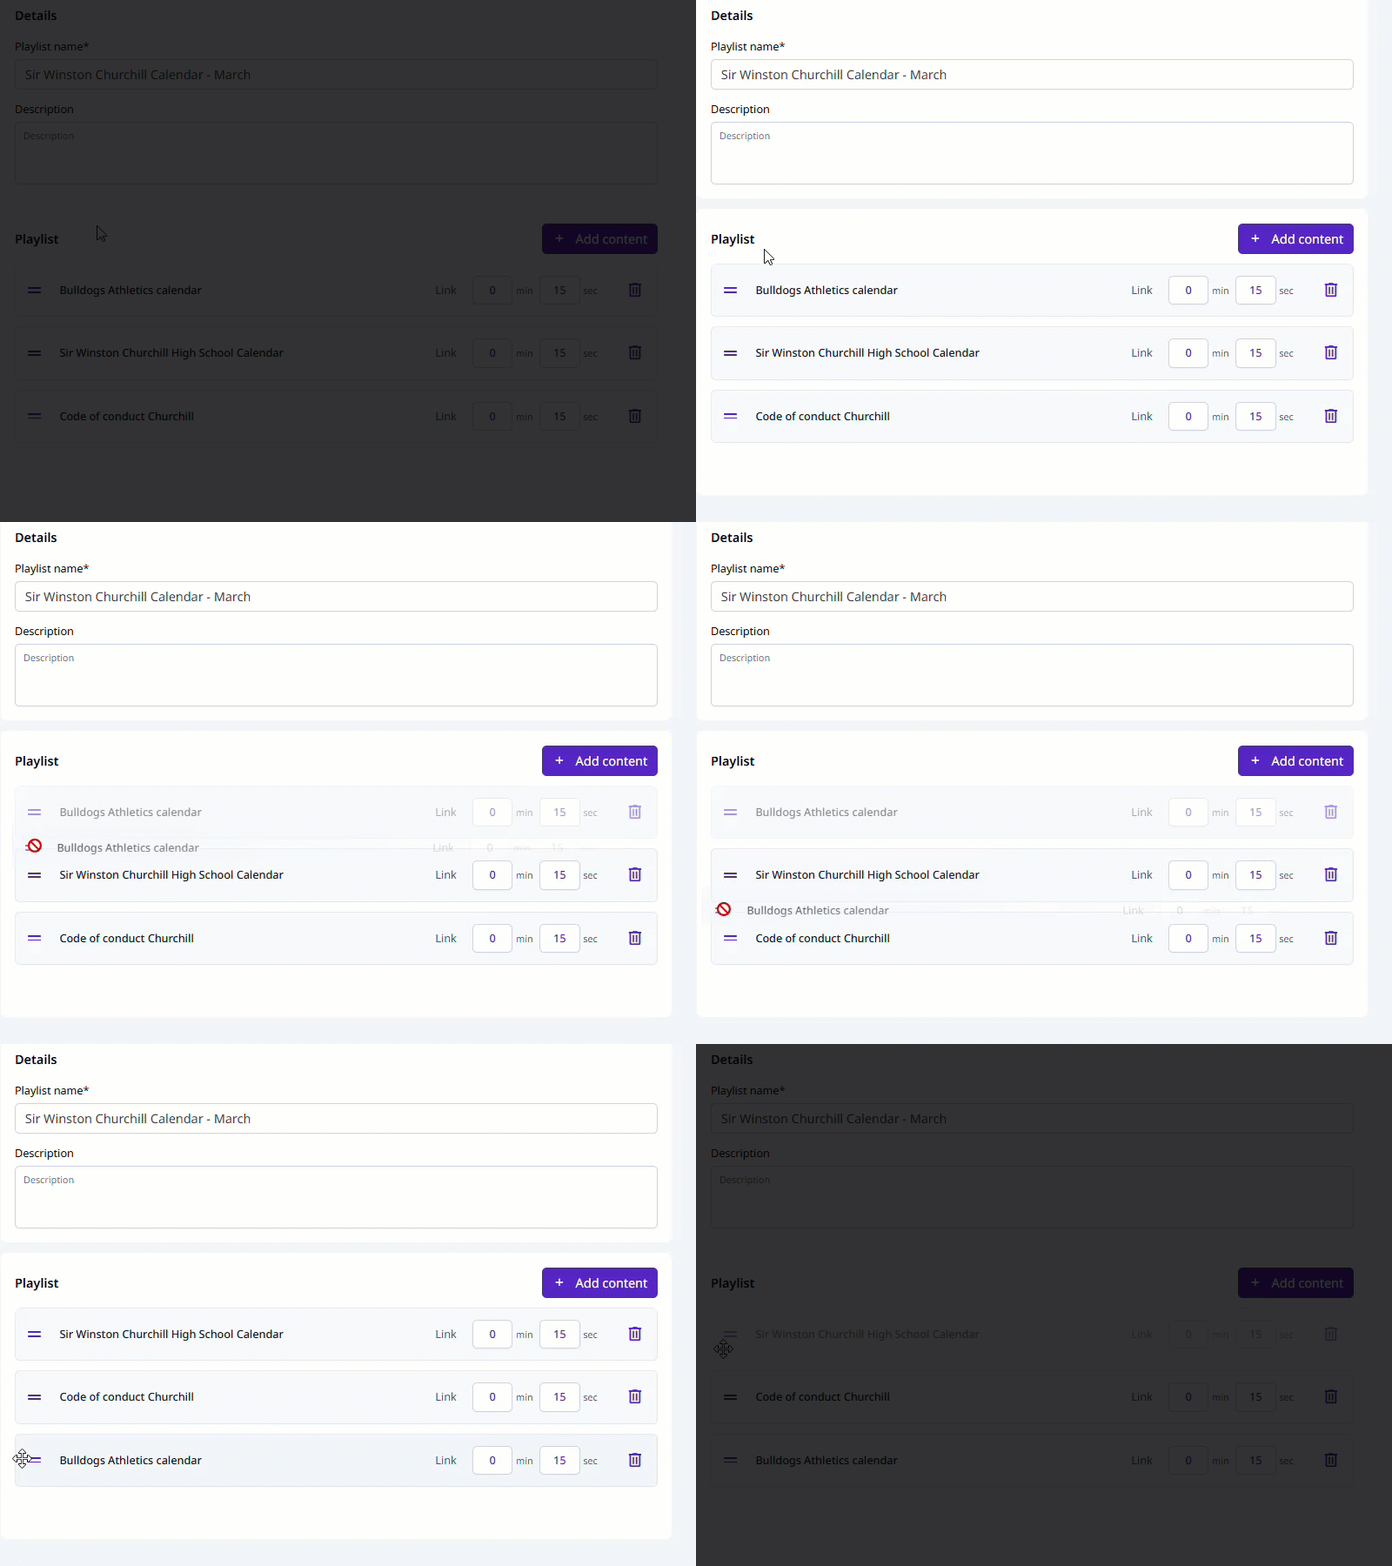
OptionalDrag and drop content items to change their order in the playlist.
Click Save playlist.
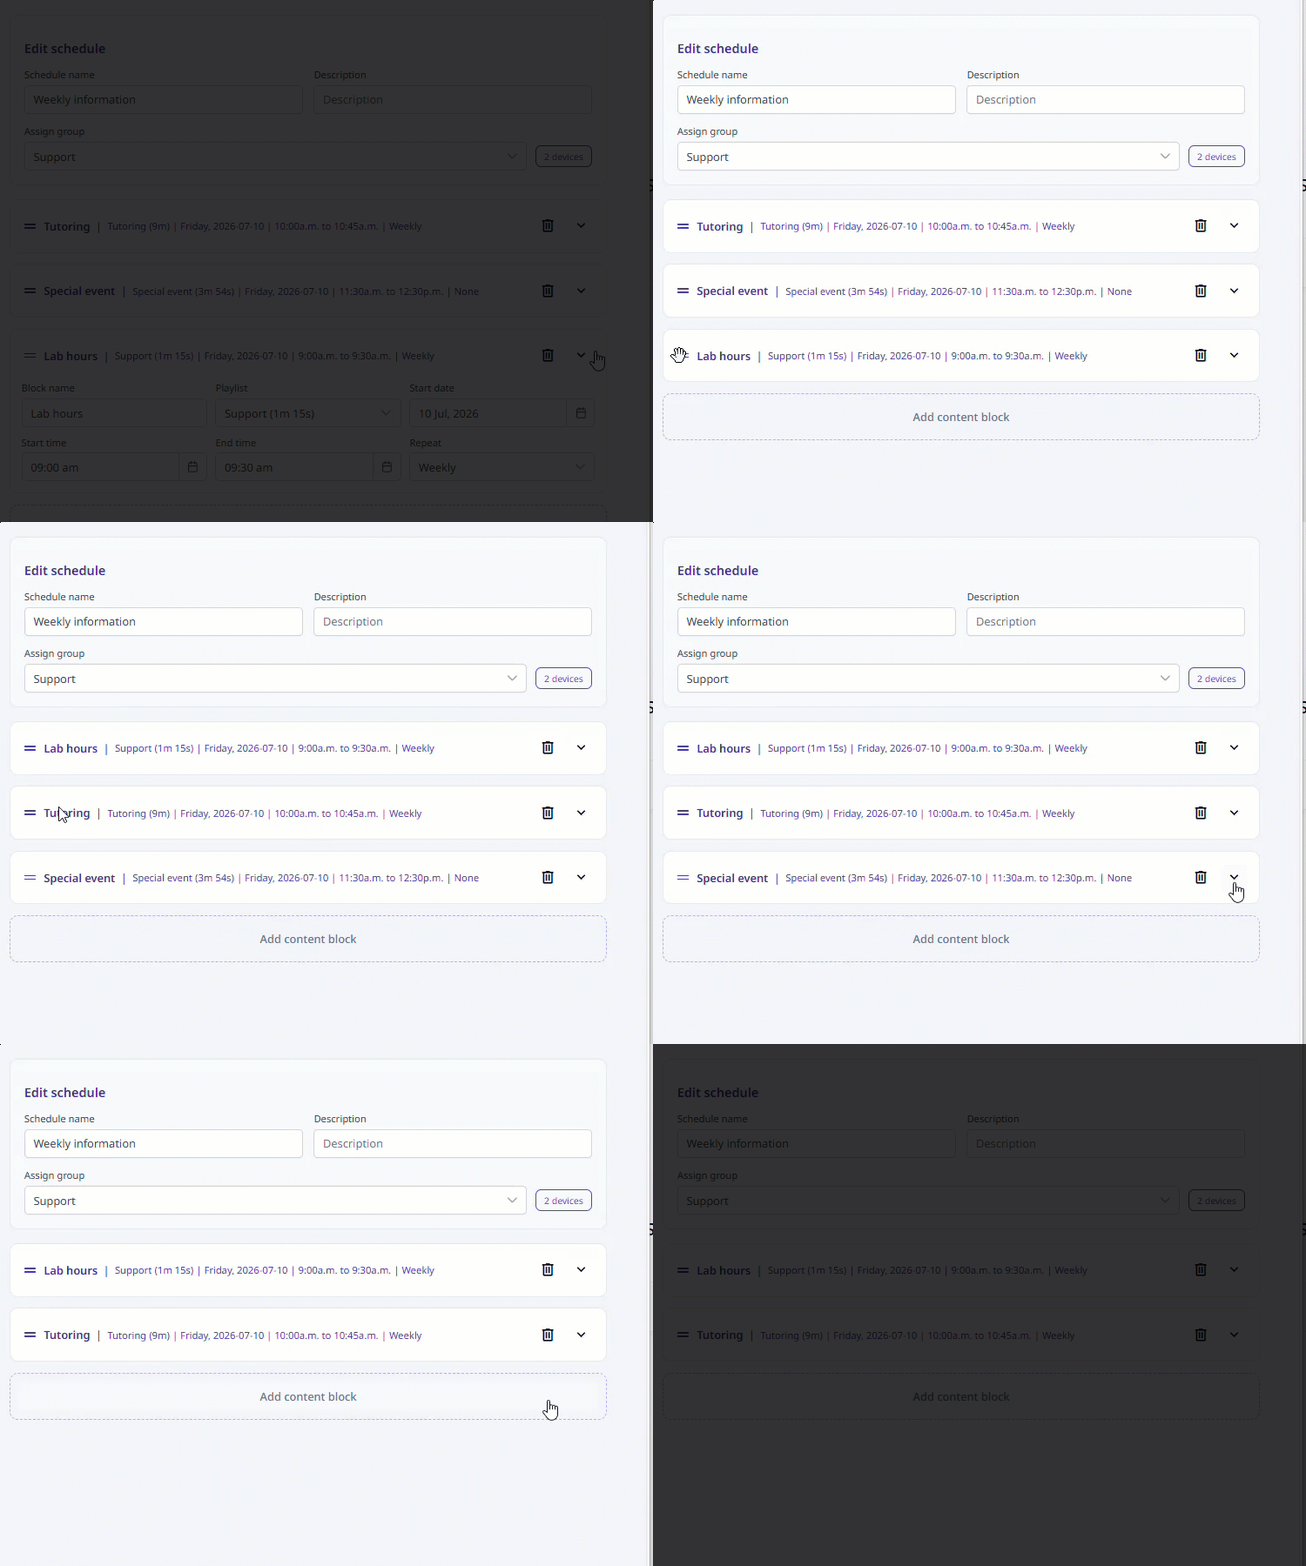
Set a scheduleA schedule assigns signage to a group of devices and can contain multiple content blocks. Each content block defines which playlist appears and when—its start time, end time, and which days it runs. Content blocks can overlap, and SMART Control plays each one during its assigned time.
For example, a schedule might include a Daily Schedule playlist that runs every day from 9 a.m. to 12 p.m., and a Special Reminder playlist that runs every Friday from 11 a.m. to 11:30 a.m. On Fridays, SMART Control plays the Daily Schedule playlist from 9–11 a.m., switches to the Special Reminder playlist at 11 a.m., then resumes the Daily Schedule playlist at 11:30 a.m.
To create a schedule
Click Schedule.
Click Add schedule.
Add a name and an optional description for the schedule.
From the Assign group drop-down, select a device group to apply the schedule to, or click Create group to create a new one.
Set up the first content block:
Enter a name for the block.
Select a playlist. The playlist duration appears in brackets.
Set a start date, start time, and end time.
Note
If the playlist is shorter than the block's time window, it loops until the block ends.
Choose how often to repeat the block—for example, no repeat, every weekday, or specific days only.
To add another content block, click Add content block and repeat the previous step.
To reorder blocks in the list, drag and drop them. This doesn't affect playback order—it only helps you organize the list in the web portal. To remove a block, delete it from the list.