Send messages or sound the siren on iQ 4 devices
You can send messages and sound the siren using SMART Remote Management. These features are useful when you need to communicate information with specific users or all users across your organization quickly.
You can send two types of messages using SMART Remote Management:
Text-only
Advanced
Text-only messages can be sent to all devices. You can send advanced messages to only SMART Board interactive displays and Android devices.
You can send messages or sound the siren on a single device, all devices that match a saved filter’s criteria, or a group. Alternatively, you can:
Use a trigger to perform the action at a scheduled time or when a specific event takes place.
Include the action in workflows.
SeeCreate workflows
Text-only messages consist of a title and body.
To send a text-only message to a device
Click Devices
 to open the Devices view.
Click the device’s row.
The device’s dashboard window appears.
Click Direct Message.
The Direct Message window appears.
Type the message title and body text in the Message title and Message body boxes.
Click Confirm.
Unlike text-only messages, advanced messages can include images, sounds, and video. You can create three types of advanced messages:
Advanced messages with text, images, and sounds
Advanced messages with YouTube videos that you can play in a loop
Advanced messages with embedded web pages or HTML
You can send advanced messages to a single device, multiple devices, all devices that match a saved filter’s criteria, or to a group. Alternatively, you can:
Use a trigger to send advanced messages at a scheduled time or when a specific event takes place.
Include the sending of advanced messages in workflows.
SeeCreate workflows
If your organization uses CrisisGo, users can send advanced messages that you create in SMART Remote Management to SMART Board interactive displays using physical panic buttons.
To create an advanced message with text, image, and sound
Click Deployment

 Messaging.
The Messaging window appears.
Click Add New.
Type a name and description in the Name and Description boxes.
Click Content
 .
.Choose one of the following message types and follow the associated steps:
Image and sound with text
Select Image/Sound in the Advanced message type drop-down list.
Provide text, image, and sound for the advanced message:
Text: Type text in the Text to display box and click
 to select a color for the text.
Image: Click Add image asset to select an image and click APPLY.
Sound: Click Add audio asset to select a sound and click Apply.
Note
If the image or sound you want to include isn’t already available, click Add New and follow the on-screen instructions to upload it
YouTube video
Select YouTube URL in the Advanced message type drop-down list.
Type the URL for the YouTube video in the YouTube URL box.
Embedded web page or HTML
Select Embed URL/HTML in the Advanced message type drop-down list.
Embed a web page or HTML:
Embed a web page: Select URL in the Type drop-down list, then type the web page’s URL in the URL box.
Embed HTML: Select HTML in the Type drop-down list, then type or copy and paste the HTML in the text box.
Click Confirm.
To send an advanced message to devices
Click Devices
to open the Devices view.Choose one of the following options:
Option
Steps
Send to a single device
Click the device’s row.
The device’s dashboard window appears.
Click Repository actions, and then click Messaging.
The Messaging window appears.
Select the advanced message from the list and click Apply.
Send to devices that match a saved filter
Click Filters
 to open the filters panel and then click Browse saved.
Click Actions
 in the saved filter’s row and select DeployMessaging.
The Messaging window appears.
Select the advanced message from the list and click Apply.
Send to devices in a group
If the groups panel isn’t visible, click
 Groups.
Click Actions
in the group’s row and select DeployMessaging.The Messaging window appears.
Select the advanced message from the list and click Apply.
To set up CrisisGo integration
Create two advanced messages in SMART Remote Management:
An alert of an emergency situation
A release of the alert
Sign into the CrisisGo Console.
In the top-right corner of the browser window, click the down arrow beside your user name and select Integrations.
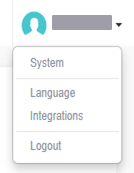
The Integration tab appears.
If the My Integrations list includes a row for SMART Technologies, click
 in that row and select Configuration.
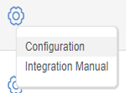
OR
If the My Integrations list doesn’t include a row for SMART Technologies:
Click All Integrations.
ClickInstall under SMART.
Click Yes when prompted.
In the left column, click API Endpoint.
In the right column, click Add Endpoint.
Use the controls on the page to create a new endpoint:
Control
Procedure
Endpoint Name
Type an appropriate name for the endpoint.
Action Type
Select Send Advanced Message (Viso MDM).
Username
Type your user name and account for SMART Remote Management, separated by @ (for example, jperez@smarttechnologies).
Password
Type your password for SMART Remote Management.
Advanced Message for Alert
Select the advanced message you created in step 1 for the alert.
Advanced Message for Alert Release
Select the advanced message you created in step 1 for the alert release.
Target Device(s)
Select the SMART Board interactive displays to which you want to sent the advanced messages.
Retry
Select the number of times you want CrisisGo to retry sending the advanced messages if the API endpoint fails.
Click Save and Back to Outbound Endpoints.
In the left column, click Rules.
In the right column, click Add Rule.
Create a rule to define who should receive the advanced messages and what would trigger CrisisGo to send them.
Important
Select the endpoint you created in steps 5 to 8 in the Select Destination API Endpoint drop-down list.
Example
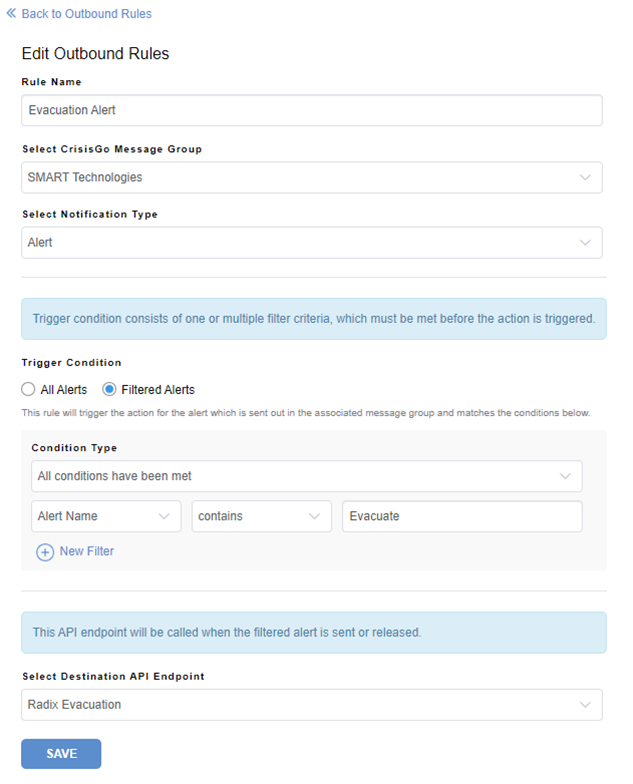
Click Save and Back to Outbound Rules.
Tip
For assistance with implementing and using CrisisGo, contact CrisisGo support:
Website
Phone
+1.314.669.9022 (select option 2)
Email
Support hours
Monday to Friday, 8:00 am to 5:00 pm CST (UTC–6)
Warning
The siren causes devices’ screens to flash at approximately 7 Hz. If any users are sensitive to rapidly flashing screens, consider sending messages instead.
To sound the siren on a device
Click Devices
to open the Devices view.Click the device’s row.
The device’s dashboard window appears.
Click Lock, and then click Play Siren.
A message appears, asking if you want to sound the siren.
Click Confirm.