Using additional tools and manipulatives
The SMART Board 6000S or 6000S Pro series interactive display’s Tool Explorer platform enables you to use a range of different pens, objects, and manipulatives that are automatically recognized the moment they contact the display’s screen. The entire screen can recognize a Tool Explorer-enabled object automatically, so there’s no need to select a tool type before you use a tool or manipulative.
Notes
The stamps and cubes that work with the 6000S series displays are not compatible with iQ system software 4.0 or later (for example, when viewing the input of an iQ enabled AM60 appliance installed in a 6000S display).
The tools work best when they’re separated by at least 4 or 5 inches (10–15 cm). If the pens, stamps, or cubes are too close to each other, you might experience an error or unexpected behavior. Performance may vary with different tools and different sizes of display.
Support for the different pens, objects, and manipulatives varies depending on the model of display, as described in the following descriptions of each tool.
Some Tool Explorer tools work only with the iQ system’s whiteboard and not with input from a connected computer.
Tip
For information about cleaning the Tool Explorer platform-enabled pens, objects, and manipulatives, see Cleaning Tool Explorer-enabled tools and manipulatives.
For education
The Tool Explorer platform lets teachers and students manipulate real -world objects that are automatically recognized by the display, combining the learning benefits of manipulatives with the flexibility and scalability of digital materials. Kinesthetic and tactile learners can get the hands-on activity and fine motor experiences they need to explore, learn and retain.
By creating tool sets for different subjects, learning needs, and abilities, teachers can also quickly provide multiple pathways through lessons.
This table shows the version of iQ system software or SMART software required for each Tool Explorer tool.
Tool | iQ system software version | SMART Notebook | SMART Product Drivers |
|---|---|---|---|
Tool Explorer multicolor 4-pen bundle | 3.6 or later | 20.0 or later | 12.16 or later |
Tool Explorer double-ended Highlighter | 3.6 or later | 20.0 or later | 12.16 or later |
Tool Explorer Magic Pen | 3.6 or later | N/A (provided by iQ 3.6 or later) | N/A (provided by iQ 3.6 or later) |
Tool Explorer Learn 4-Cube Bundle | 3.6 SP3 or later | Not supported | Not supported |
Tool Explorer Math 4-Cube Bundle | 3.6 SP3 or later | Not supported | Not supported |
Tool Explorer Play 4-Stamp Bundle | 3.6 SP3 or later | Not supported | Not supported |
Use the magic pen to write or draw digital ink that fades after a few seconds. You can write or draw over any input or content as the magic pen isn’t limited to a specific application.
You can also use the magic pen to open a spotlight or magnification window to focus attention to a specific area of the screen.
Note
For information about the iQ system software or SMART software version required for each Tool Explorer tool, see System requirements and SMART software compatibility.
To use the magic pen to write or draw ink that fades
Pick up the magic pen.
Use the “nib” end of the pen to write in magic ink.

To use the magic pen to spotlight or magnify screen content
Pick up the magic pen.
Use the gesture end of the pen to draw a circle or rectangle around the portion of the screen you want to spotlight or magnify.
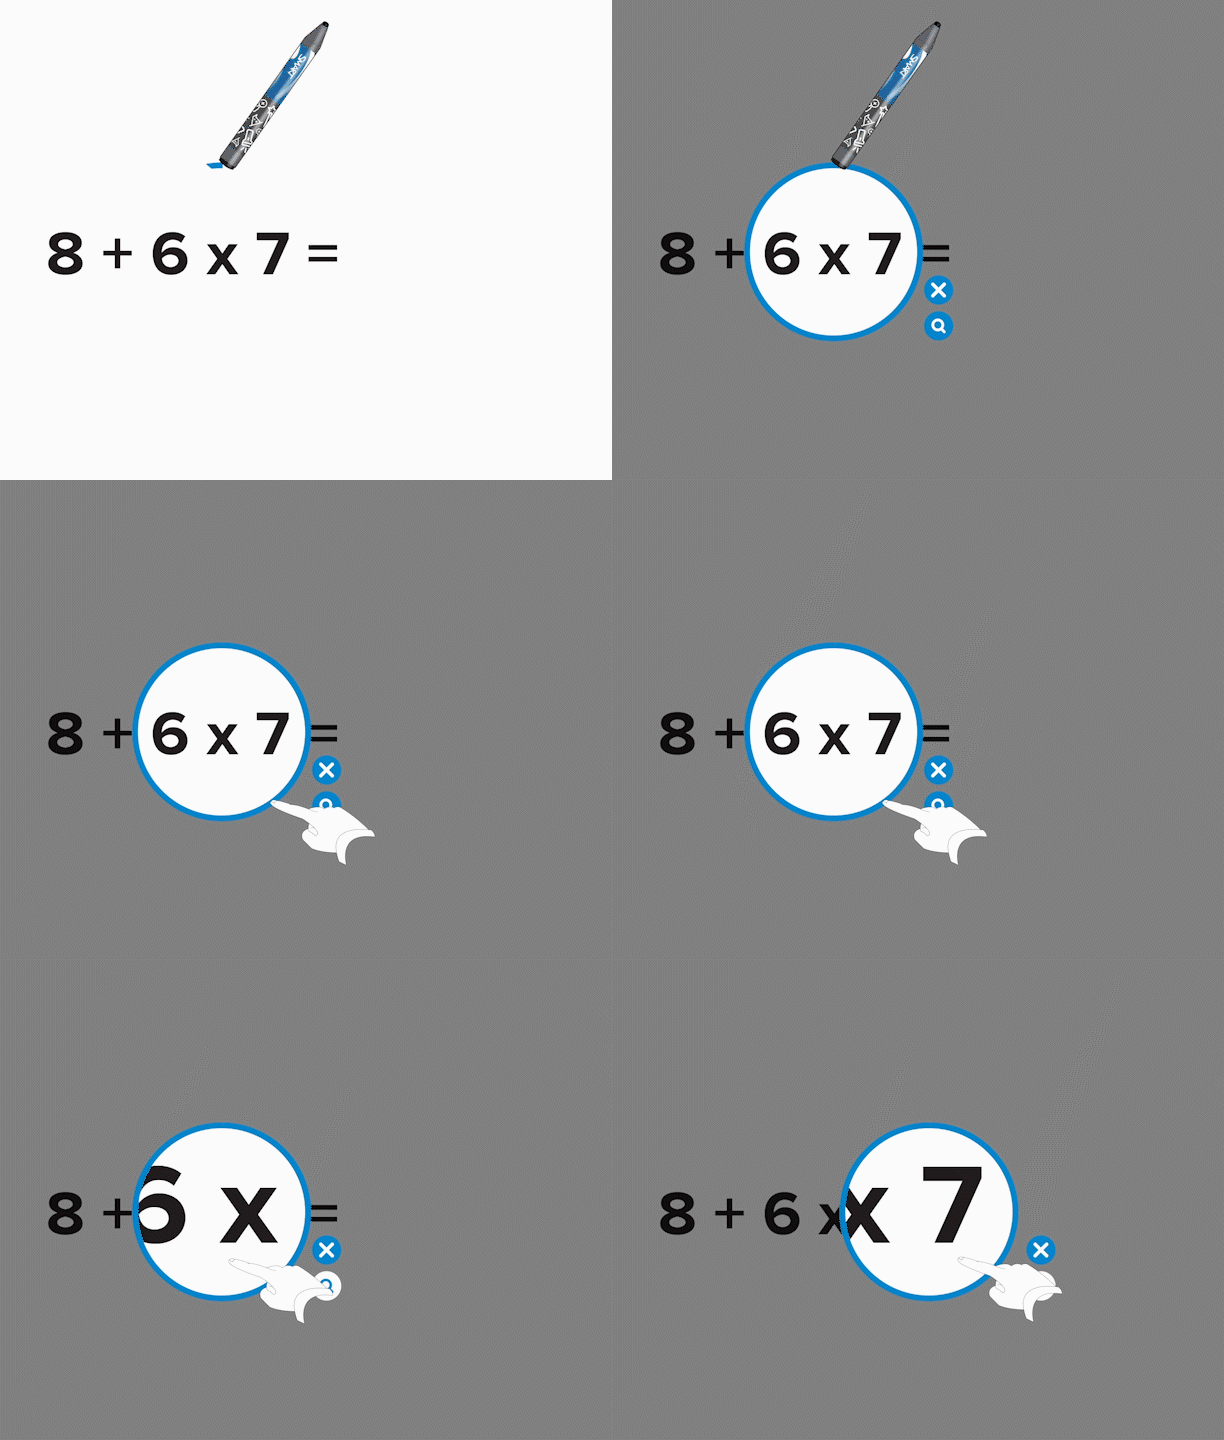
After the spotlight appears, you can:
Press and hold within the spotlight and drag to move it.
Press and hold the spotlight’s edge and drag toward or away from the center to make the spotlight larger or smaller.
Tap the magnifier icon
 to double the size of the spotlighted screen area.
When you’re done with the spotlight, tap Close
 .
.
Use the highlighter pen to emphasize text in supported applications, such as the iQ whiteboard, SMART Notebook Player, and SMART Notebook desktop.
Note
For information about the iQ system software or SMART software version required for each Tool Explorer tool, see System requirements and SMART software compatibility.
To use the highlighter pen
Pick up the highlighter pen.
Use the pen to highlight text or an object.
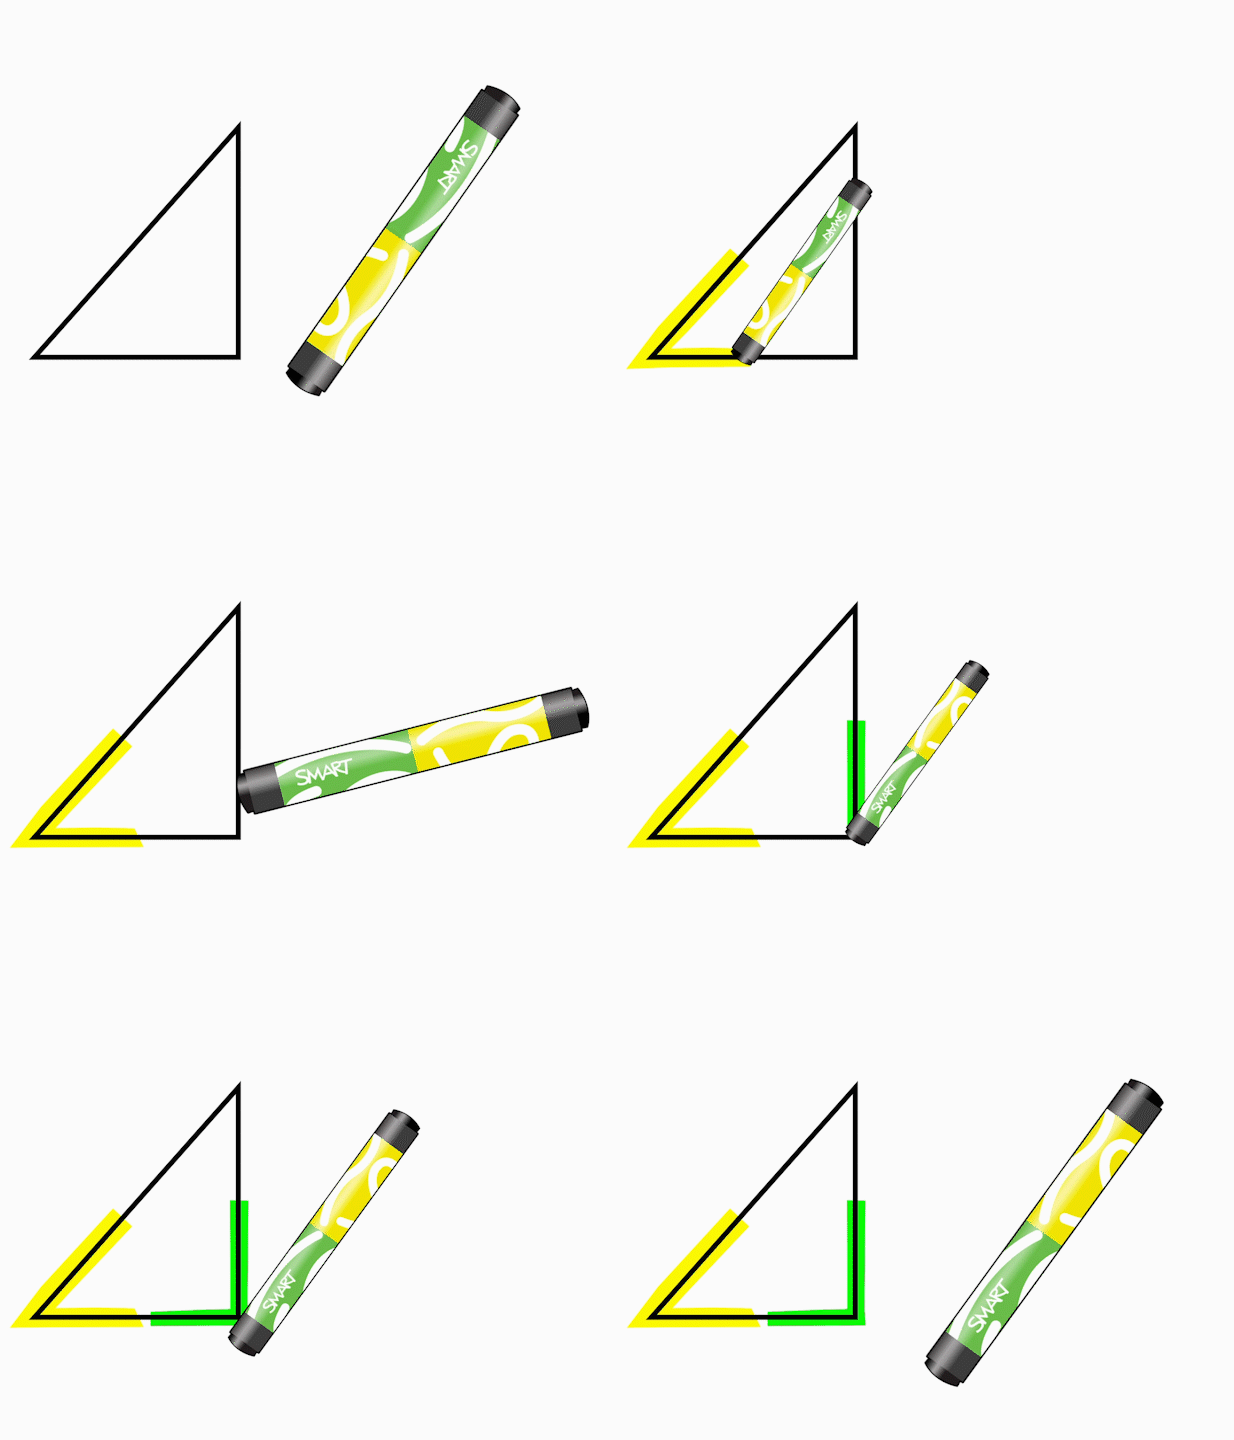
The pen is reversible: you can use one end to highlight in yellow and the other end to highlight in green.
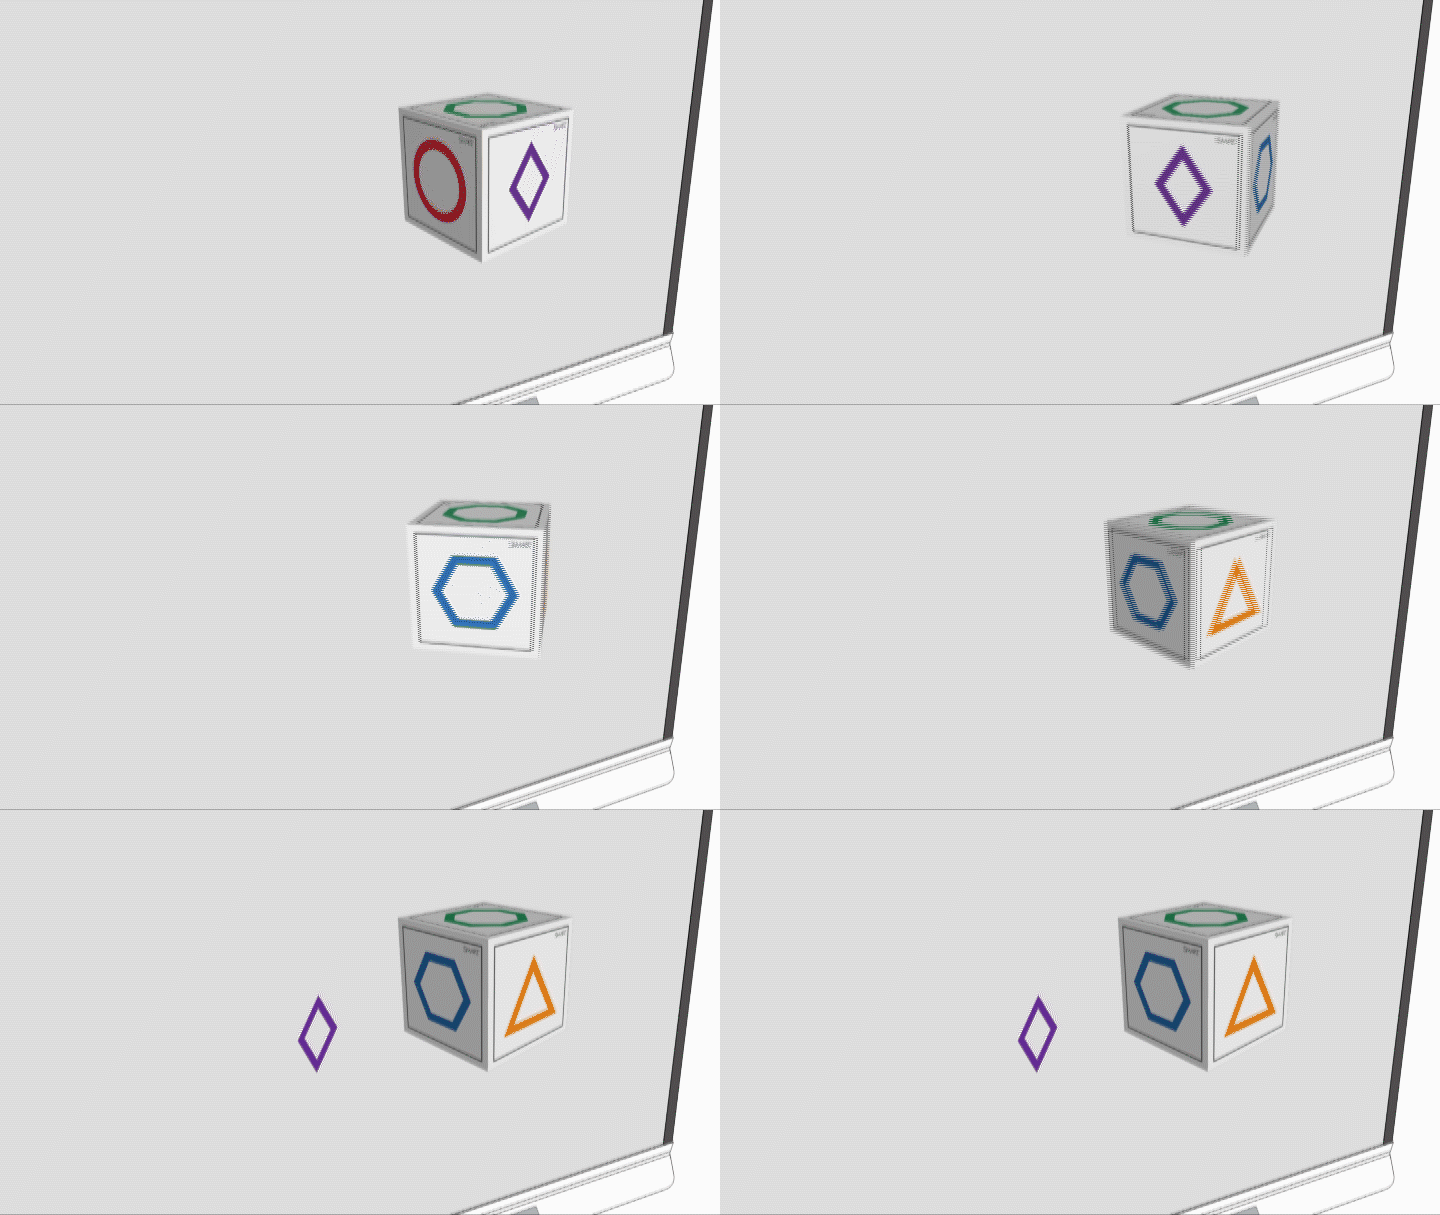
On an iQ enabled SMART Board 6000S, 6000 (C), or 6000S (V3) display, you can use the Tool Explorer-enabled cubes to add a variety of objects to a whiteboard or a lesson you've opened in the Whiteboard app.
The cubes feature a different shape, number, image, and more, on each of their six faces. When you tap a cube’s face on the display’s screen, the image is inserted as an object. You can then move, resize, rotate, and delete the object.
Note
For information about the iQ system software or SMART software version required for each Tool Explorer tool, see System requirements and SMART software compatibility.
To insert an object using a Tool Explore cube
Pick up a cube.
Tap the cube face that features the image you want on the display’s screen.
The image is inserted as an object.
Tip
The inserted object can be made smaller by tapping a portion or corner of a cube’s face on the screen.
To move, resize, and rotate an object
Tap the object you want to manipulate.
A selection rectangle appears around the object.

To manipulate the object, you can:
drag the object to a new position on the screen.
drag the object’s resize handle (bottom right circle) to make the object larger or smaller.
drag the object’s rotation handle (top circle) in the direction you want to rotate the object.
delete an object by pressing the object’s menu arrow, and then tapping Delete.
Tap the object.
A selection rectangle appears around the object.
Press the object’s menu arrow, and then select Delete.
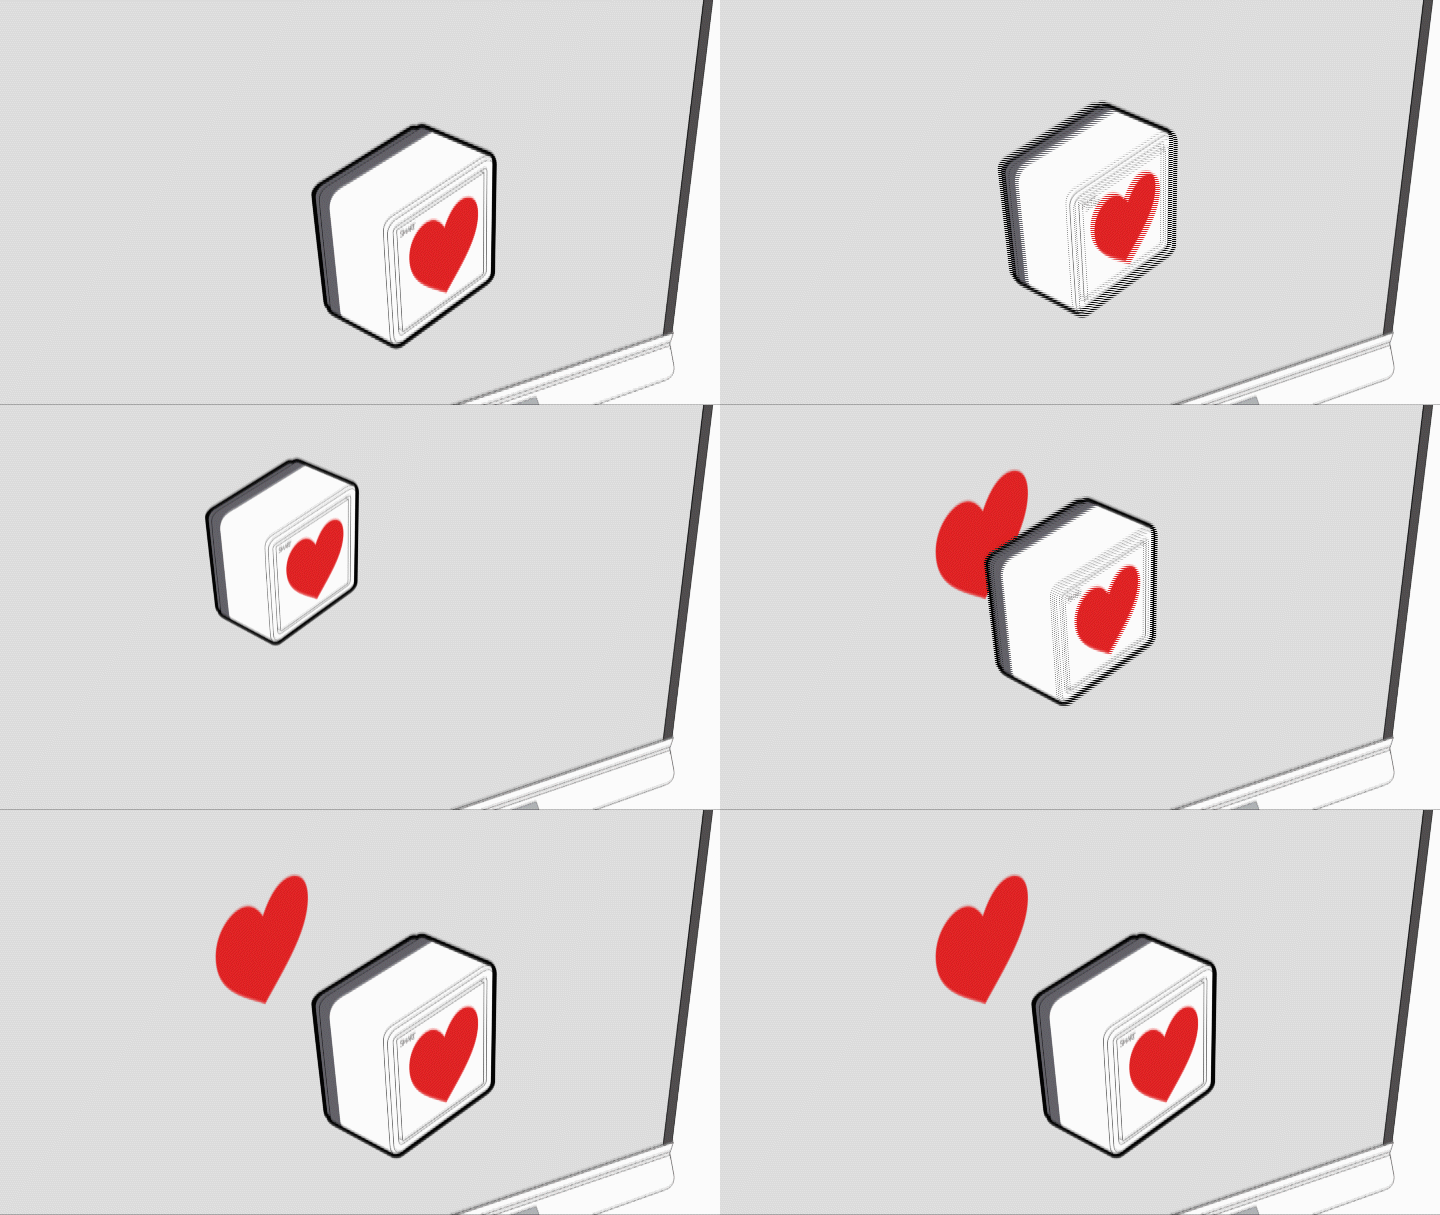
Tool Explorer stamps feature a single shape, number, image, and more, that is inserted as an object when you tap the stamp’s face on the display’s screen. You can move, resize, rotate, delete the object. Stamps are ideal for younger children and early learners.
Tip
You can store the stamps in place of the erasers at the bottom of the display’s frame. Two stamps fit on each magnetic holder.
Note
For information about the iQ system software or SMART software version required for each Tool Explorer tool, see System requirements and SMART software compatibility.
To insert an object using a Tool Explorer stamp
Pick up a stamp.
Tap the stamp’s face on the screen.
The image on the stamp is inserted as an object.
Tip
The inserted object can be made smaller by tapping a portion or corner of the stamp’s face on the screen.
To move, resize, rotate, or delete an object
You can use the SMART Tool Explorer Custom Image Editor to change the default image that's inserted when you tap a stamp or cube face on the display’s screen. Choose an image saved on the display or select an image from a USB drive connected to the display.
Notes
This feature is available in iQ system software version 3.15 or later.
Changes made to a stamp or cube face image are applicable only to the display on which the changes were made.
Supported image file formats are PNG, GIF, and JPEG. Recommended resolutions are: 300 × 300 to 600 × 600 for photo quality images and 500 × 500 to 1000 × 1000 for line art style images. The stamp or cube images won’t appear at these resolutions when initially inserted on the display’s screen; however, they can be enlarged after insertion.
Tip
Add a sticker to a stamp or cube face featuring an image that’s like the new image you applied using the SMART Tool Explorer Custom Image Editor. You can print the new image on a 1-1/2" × 1-1/2" square white sticker label and apply it to the stamp or cube face. Choose a label that’s designed to be easily removed as you may change images often.
To assign a new stamp or cube face image
From the Home screen, tap Apps
 .
.Tap SMART Tool Explorer.
The SMART Tool Explorer app opens.
Pick up a stamp or cube.
Tap the stamp or cube face that features the image you want to change on the middle of the display's screen.
The current image assigned to the stamp or cube face appears on the screen.
Tap Upload new image to open a dialog box providing options for choosing an image.
By default, the Recent dialog box appears.
Change the stamp or cube face image by:
Tapping an image in the list of recent images
Tapping the
 in the upper-left corner of the screen and browsing to an image in one of the Open from locations.
You can also connect a USB drive to the display's convenience panel and browse to an image saved on the USB drive. The USB drive name will appear in the list of Open from locations.
To reset to the default stamp or cube face image
From the Home screen, tap Apps
 .
.Tap SMART Tool Explorer.
The SMART Tool Explorer app opens.
Pick up a stamp or cube.
Tap the stamp or cube face that features the image you want to change on the middle of the display's screen.
The current image assigned to the stamp or cube face appears on the screen.
Tap Reset to default.
By default, the Recent dialog box appears.
The stamp or cube face image is now reset to the default image.