Using the SMART TeamWorks admin portal
The SMART TeamWorks admin portal is where you can add meeting rooms and user accounts to monitor usage and track licenses.
You can also use the portal to monitor, configure, and update SMART TeamWorks meeting rooms on a network. Although each meeting room display can be configured individually, the portal helps streamline the deployment and enables IT administrators to manage deployments from a central location.

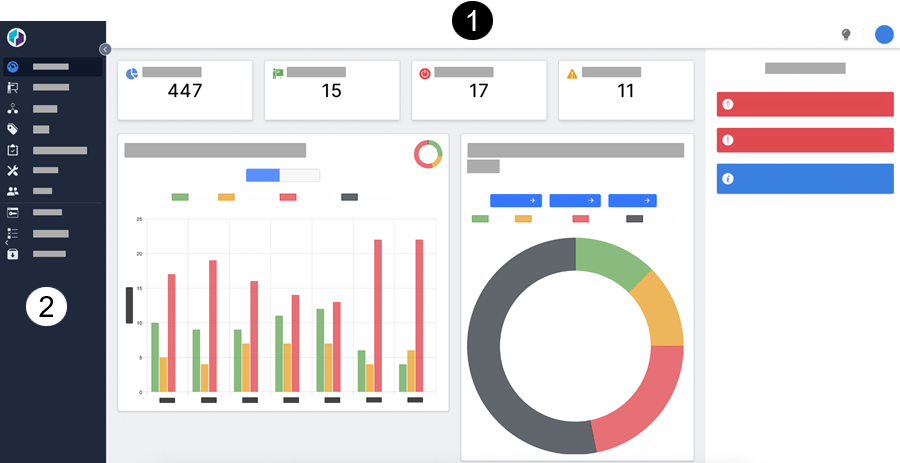
1 | The main dashboard view shows:
|
|---|---|
2 | The side menu is where you can see a list of rooms and users, view and manage licenses, configure digital signage, and perform other maintenance tasks. |
Go to twadmin.smarttech.com.
Click Sign Up.
Enter your details and click Sign up.
A confirmation email is sent to you to complete your sign up.
Before you can use the admin portal to monitor a meeting room, you need to add the license key used by the meeting room. After the key is added, you can view and manage a meeting room remotely from the admin portal.
To add a license
Click Licenses
 .
.Click + License.
Enter the SMART TeamWorks Room key for the meeting room you want to monitor.
Click Submit.
The license appears in the list with details such as type, expiration date, and the numbers of user accounts assigned to it.

Tip
If you don’t see the added license, refresh the browser.
To view and manage a meeting room
Click Room list
 .
.Search for the meeting room you want to view.
OR
Find the meeting room in the list.
Click Details.
Select the Info, Management, Equipment, or Analytics tab to view and manage details for the room.
Click Room list
 .
.Search for the meeting room you want to view.
OR
Find the meeting room in the list.
Click
 .
.Find the yellow banner. If a new version of TeamWorks Room is available, click Go to updates.

Click UPDATE NOW to begin.

You can activate an account for those in your organization who wish to take full advantage of the SMART TeamWorks app’s features. This table describes the features available with a workspace host account versus those available without one.
With a workspace host account | No workspace host account (free version) |
|---|---|
Store up to 2 GB of saved workspaces (whiteboards). | Store up to 100 MB of saved workspaces (whiteboards). |
Create personal workspaces and invite other contributors to collaborate. | Not available. |
To activate a user’s account for the app
Click Licenses
 .
.Click + License.
Enter a workspace host account license key.
Click Submit.
The license appears in the list with details such as type, expiration date, and the numbers of user accounts assigned to it.
Tip
If you don’t see the added license, refresh the browser.Click Users
 .
.Click + User.
Select a license to assign the user to in the drop-down.
Enter in the user’s details.
Click Submit.
The new user account appears in the list.
To delete a user account
Click Users
 .
.Find the user account you want to delete and click Details.
Click Delete.