Using SMART lab
Use SMART lab to enhance your lessons by creating and adding interactive activities. These activities help students memorize concepts and facts, identify objects, learn vocabulary definitions, and more.
Notes
Account Sign In is required to create and play some SMART lab activities, and SMART Notebook 16.2 software now allows you to sign in with your Google, Office 365 or Microsoft account. If you sign in with one of these accounts, you will not have to sign in each time you want to use SMART response 2, Shout It Out! or Monster Quiz.
When SMART software is updated, the sign-in feature automatically logs users out of their accounts. Users must sign in again to create and play SMART lab activities.
Students can be removed from an activity with the SMART lab Remove Students feature.
Note
Students may check their website access at https://hellosmart.com/connection/check.html.
Web browser recommendations |
|
Device operating system recommendations |
|
Network recommendations | SMART lab activities on hellosmart.com are designed to keep network requirements as low as possible while still supporting rich collaboration. The network recommendation for Shout It Out! alone is 0.3 Mbps per device. A school that regularly uses other Web 2.0 tools should have enough network capacity to run SMART lab activities on hellosmart.com. If SMART lab activities on hellosmart.com are used in conjunction with other online resources, such as streaming media, greater network capacity could be required, depending on the other resources being used. |
To ensure that all student-side SMART lab activities works correctly, add the following URLs to your network’s white list.
https://www.hellosmart.com
https://id.smarttech-prod.com
https://content.smarttech-prod.com
https://metric.smarttech-prod.com
https://google.com
https://google-analytics.com
https://www.gstatic.com (used by Google to load reCAPTCHA)
https://*.firebaseio.com
https://*.cloudfront.com
Flip Out flashcards teach one to one correspondence, memory and vocabulary. When you create a Flip Out flip card activity, you can use as many cards as you like and choose from different themes, such as Space, Jungle or Monsters.
Tips
Use the Sound button
 to turn activity sound on or off.
Use the Activity Restart
 button to restart the current activity. This button is located at the top right of the open SMART lab activity page.
Use the Activity Edit
 button to open the Add Activity dialog box. This button is located at the top right of the open SMART lab activity page.
To add a Flip Out flip card activity
Open SMART lab by pressing the toolbar icon
 in the Notebook toolbar.
The Select an Activity Creation Wizard opens.
Scroll to locate the Flip Out activity and press the activity icon.
Enter text or tap the image icon
 to add an image in both the Facing Up and Facing Down fields.
Create as many cards as you need. If you create more than 12 cards, the additional cards will be located in the middle of the Notebook desktop, along with the Discard pile. Card placement is random.
Tip
To use an image in your Flip card activity, click the image icon
 in the Add Content dialog box. Select the image from the appropriate Windows Explorer (Windows operating systems) or Finder (OS X operating systems) folder by clicking Open. The image appears in the Card back or Card face list and also on the flip cards.
Press Next.
The Select a Theme dialog box opens.
Select a theme, then press Finish.
SMART lab builds the activity, and it will be ready for use after a few moments.
To add a buzzer, timer or randomizer game component to the activity, press
 .
. The Game Component selector opens.
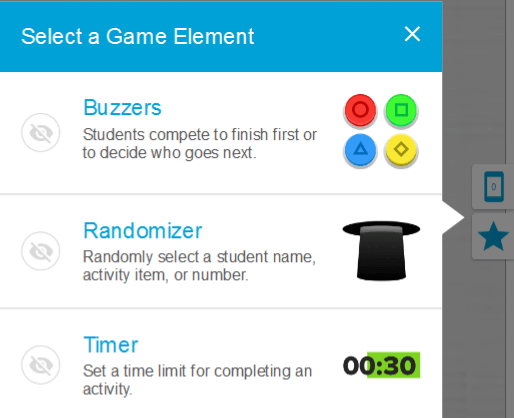
Select a game component if desired. The game component will appear in the activity. See Adding a Game Component to an Activity for more information.
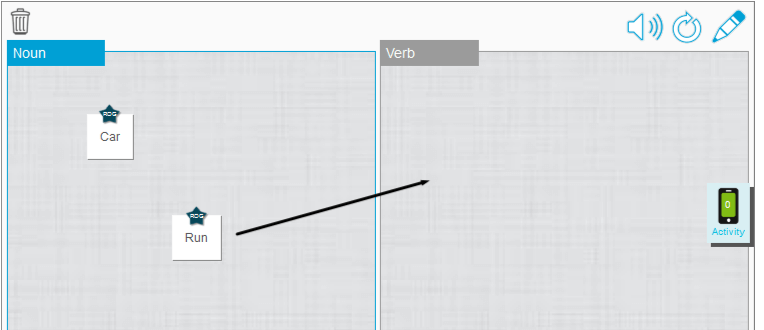
Have students flip cards over to reveal what’s on the other side. For example, the back of a card may be named “run,” while the face of the card is named “verb.” After the card has been flipped and the content discussed, you can drag the card to the discard pile.
Super Sort teaches classification and grouping. In a Super Sort activity, students sort items into two categories. An item disappears if a student sorts it correctly, and the item is sent back to be resorted if it’s sorted incorrectly. Add optional game components to make the activity even more engaging.
To add a Super Sort sorting activity
To open SMART lab, press the toolbar icon
 in the Notebook toolbar.
 The Select an Activity Creation Wizard opens.
Scroll to locate the Super Sort activity and press the activity icon.
The Super Sort Add Content dialog box opens.
In Required Category Name fields, type the name you want to use for each category.
In Enter item text, type category content or press the Manage Content icon
 to add category content from a previously saved list.
Press Next.
Select a Super Sort theme. The selected activity is highlighted with a blue box.
Press Next
The Select a Theme dialog box opens.
Select a theme, then press Finish.
SMART lab builds the activity, and it will be ready for use after a few moments.
To add a buzzer, timer or randomizer game component to the activity, press
 .
. The Game Component selector opens.

Select a game component if desired. The game component will appear in the activity. See Adding a Game Component to an Activity for more information.
Have students work individually or in teams to sort the content into the correct categories.
Match ‘Em Up! is a matching activity that emphasizes memory and one to one correspondence between items. Add game components to make the activity even more engaging.
To add a Match ‘Em Up! activity
Open SMART lab by pressing the SMART lab toolbar icon
 in the Notebook toolbar.
The Select an Activity Creation Wizard opens.
Scroll to locate the Match ‘Em Up activity and press the icon.
The Match ‘Em Up Add Content dialog box opens.
In Optional Category Name fields, type the name you want to use for each category pair.
Enter text or tap the image icon
 to add an image to each category. You may enter up to 10 pairs.
In the Check Answers section, select Instantly to indicate immediately whether the answers are correct.
OR
Select When Prompted to check answers at a pace you choose. As answers are entered into the activity, a Check Matches button appears in the activity. Press the button when you want to check an answer.
If the answer is correct, a
 appears beside it. If the answer is incorrect, a
  appears beside it.
Press Next.
The Match ‘Em Up! Select a Theme dialog box opens.
Select a theme, then press Finish.
SMART lab builds the activity, and it will be ready for use after a few moments.
To add a buzzer, timer or randomizer game component to the activity, press
 .
. The Game Component selector opens.

Select a game component if desired. The game component will appear in the activity. See Adding a Game Component to an Activity for more information.
Have students work individually or in teams to match up the content to the correct categories.
Tip
To use an image in your activity, click the image file folder icon
 in either content list. Browse to and select the image, then press Open. The image appears in the content list. Although you can create as many items as you like, only the first 10 are used in your activity. Create at least two matches to continue.
Fill In the Blanks is a fun activity where students drag words or numbers into blanks. Write a sentence with up to ten blank spaces, then let students drag the words around the board to fill in the missing information that belongs in those blanks.
To add a Fill In the Blanks activity
Open SMART lab by pressing the SMART lab toolbar icon
 in the Notebook toolbar.
The Select an Activity Creation Wizard opens.
Scroll to locate the Fill In the Blanks activity and press the activity icon.
The Fill in the Blanks Add Content window opens.
In the Edit text area, enter the desired text. You can use up to 300 characters for your content. The character counter indicates how many characters you have left. You will define the blanks in the next step.
In the Check Answers section, select Instantly to indicate immediately whether the answers are correct.
OR
Select When Prompted to check answers at a pace you choose. As answers are entered into the activity, a Check Matches button appears in the activity. Press the button when you want to check an answer.
OR
Select Don’t check. Answers will not be checked.
Press Define Blanks.
The Define Blanks dialog box opens with your text.
Define the blanks by clicking a word. Use the sizing handles to make a blank bigger or smaller.

To remove a blank, click it again.
Press Next.
The Fill in the Blanks Select a Theme dialog box opens.
Select a theme and press Finish.
SMART lab builds the activity, and it will be ready for use after a few moments. The sentence and word blanks appear.
To add a buzzer, timer or randomizer game component to the activity, press
 .
. The Game Component selector opens.

Select a game component if desired. The game component will appear in the activity. See Adding a Game Component to an Activity for more information.
Have students work individually or in teams to drag the correct words or numbers into the appropriate blanks.
Press the Check answers button that appears when the activity is complete.
If an answer is correct, a
 appears beside it. If an answer is incorrect, a
  appears beside it.
The Label Reveal activity is a great way for students to develop deeper understanding of systems and their components. Label Reveal emphasizes memory and deduction.
To add a label reveal activity
Open SMART lab by pressing the toolbar icon
 in the Notebook toolbar.
The Select an Activity Creation Wizard opens.
Scroll to locate the Fill In the Blanks activity and press the activity icon.
The Label Reveal Add Content dialog box opens.
Drag an image from your desktop into the square box in the activity dialog box
OR
Press the
 icon to browse to and select an image from a directory on your computer.
The image appears in the Label Reveal Add Content dialog box.
Click within the image to add labels.
The Label window and Label edit tool
 open.
open.Position the label to the part of the image you wish to label.
Press Change Style to change the type and color of the label arrows.
Enter a brief description on the label. Press the down arrow below the label to enter an extended description note of up to 150 characters.
Press Done to close the Note window.
Add as many labels as required, then press Finish.
SMART lab builds the activity, and it will be ready for use after a few moments. Each label will appear as a question mark icon
 until it is clicked. The label name will then be revealed.
To add a buzzer, timer or randomizer game component to the activity, press
 .
. The Game Component selector opens.

Select a game component if desired. The game component will appear in the activity. See Adding a Game Component to an Activity for more information.
Ask students to identify and reveal component labels as they are discussed.
In the Rank Order activity, students arrange items in ranked order and learn about comparison, deduction, sequencing and arrangement. Try arranging whole numbers from smallest to largest, steps in a scientific procedure or other items in order of preference.
To add a Rank Order activity
Open SMART lab by pressing the SMART lab toolbar icon
 in the Notebook toolbar.
The Select an Activity Creation Wizard opens.
Scroll to locate the Rank Order activity and press the activity icon.
The Rank Order Add Content dialog box opens.
Enter content text or tap the image icon
 to add an image. You can add up to ten items.
Press
 to reverse the order of the text items.
In the Check Answers section, select Instantly to indicate immediately whether the answers are correct.
OR
Select When Prompted to check answers at a pace you choose. As answers are entered into the activity, a Check Matches button appears in the activity. Press the button when you want to check an answer.
OR
Select Don’t check. Answers will not be checked.
- In the Ranking Labels section, enter the terms you would like to use to indicate the order, such as First and Last
Press Next.
The Rank Order Select a Theme dialog box opens.
Select a theme and press Finish.
SMART lab builds the activity, and it will be ready for use after a few moments.
To add a buzzer, timer or randomizer game component to the activity, press
 .
. The Game Component selector opens.

Select a game component if desired. The game component will appear in the activity. See Adding a Game Component to an Activity for more information.
Although you can create as many items as you like, only the first 10 appear in the activity.
Tip
To use an image in your activity, return to the Rank Order Add Content dialog box and click the file folder icon in the content list. Browse to and select the image, then press Open. The image appears in the content list. Create at least two items to continue.
Have students drag and drop the items in the correct order from top to bottom. When the items are sorted correctly, they gently move to indicate completion.
Tips
A green check mark
 or a red X
  will appear beside each ordering answer to indicate correct or incorrect. The order may be changed until all answers are correct.
If you selected Check answers right away, answers are checked as they are given. Correct answers are accepted, and incorrect answers are rejected.
If you selected Check answers after students have finished, the answers are checked after students answer all the questions, giving you time for discussion.
Speedup is a racing quiz with multiple choice and true or false questions. Students will love to compete to see who answers questions the fastest using the Speedup activity. Speedup encourages competition and quick thinking.
To add a Speedup activity
Open SMART lab by pressing the toolbar icon
 in the Notebook toolbar.
The Select an Activity Creation Wizard opens.
Scroll to locate the Speedup activity and press the Speedup activity icon.
The Add Content dialog box opens.
Select between Multiple Choice and True or False as the type of quiz you would like to build.
Multiple Choice format
For Multiple Choice format, enter a question. You may use up to 150 characters for your question.
Enter at least two answers to the question you entered in step 4, and press the button beside the correct answer. A
 indicates the answer.
Press Add Question to continue adding questions and answers.
After you have finished adding questions and answers, press Next.
The Review Content dialog box opens. You may edit your questions and answers and set a time limit to answer each question.
Click the questions or answers to edit them.
If you would like to assign a time limit for the question to be answered, toggle the Time limit button and set the number of seconds allowed for answering each question.
Press Finish.
SMART lab builds the activity, and it will be ready for use after a few moments.
True or False format
For True or False format, enter a question. You may use up to 150 characters for your question.
Press the button beside True or False to indicate the correct answer to the question. A
 indicates the answer.
Press Add Question to continue adding questions and answers.
After you have finished adding questions and answers, press Next.
The Review Content dialog box opens. You may edit your questions and answers and set a time limit to answer each question.
Click the questions or answers to edit them.
If you would like to assign a time limit for the question to be answered, toggle the Time limit button and set the number of seconds allowed for answering each question.
Press Finish.
SMART lab builds the activity, and it will be ready for use after a few moments.
Note
Game components cannot be added to the Speedup activity.
To play a Speedup activity
When the activity opens, press Start
Select the number of racers from one to four. A maximum of four racers can race, but additional students can participate.
Select a racer avatar
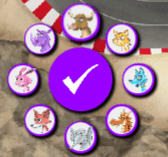 and press the check mark to lock in your choice. You have 15 seconds to select a racer avatar. If no avatars are chosen, avatars will automatically be selected and the race will begin.
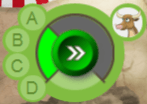
When the race starts, rapidly press the Racer control arrow for a Turbo boost to increase speed
 .
.At various points around the race track, the questions will be asked. Racers select the letter that corresponds to the correct answer on their racer controls.
When the race is complete, the winner’s racer avatar is displayed in the results window, and time results will be shown in seconds for each racer avatar. Press Review answers to see all answers. Press Show Players to see each racer’s avatar.
Students use the Shout It Out! to quickly create and contribute text and images to SMART lab content-creation activities using their own device web browsers, and teachers can easily curate the content. Use it as a brainstorming activity for generating ideas.
To ensure the best possible user experience with Shout It Out!, see Device and network requirements for more information.
Important
If you are using a trial version of SMART Notebook software, you might receive a reCaptcha notification. Validate the trial version to use Shout It Out!. For more information, see Shout It Out! user validation for more information.
To add a Shout It Out! activity
Open SMART lab by pressing the SMART lab toolbar icon
 in the Notebook toolbar.
 The Select an Activity Creation Wizard opens.
Scroll to locate the Shout It Out! activity and press the activity icon.
The Shout It Out! Add Content page opens. Select the contribution format you would like to use. You can choose from either Randomized or Categories placements.
If you selected Categories placements, at least two categories are required for the activity. Give names to the categories that will contain student contributed content.
In the Contributions section, select either Text or Images as the type of contribution students will make; then enter the maximum number of contributions allowed per device.
In the Student Names section, select whether you would like to Show or Hide student names.
Click Finish.
SMART lab builds the activity, and it will be ready for use after a few moments. To start the activity and allow your students to make contributions, see Adding Student Text Contributions and Adding Student Image Contributions.
To add a buzzer, timer or randomizer game component to the activity, press
 .
. The Game Component selector opens.

Select a game component if desired. The game component will appear in the activity. See Adding a Game Component to an Activity for more information.
To start a Shout It Out! Activity
After you have created a Shout It Out! activity, confirm that the Display Contributor Names and Contributions per Device settings are correct.
Press Start Activity.
The SMART lab Student Contribution Activity dialog box appears. It includes the URL that students will enter into their browsers, and the generated activity ID number students will enter on the SMART Notebook lesson activity builder website. The activity icon
 turns green to indicate that an activity is currently in progress.
Direct students to
hellosmart.comand have them enter the activity ID number and their names. Students are connected to the activity.Student contributions will appear in the Notebook SMART lab page.
Note
To delete a contribution, drag it to the Recycle bin at the top left of the SMART lab activity page. After a contribution is deleted, it cannot be retrieved.
If you are using a trial version of SMART Notebook collaborative learning software, you might receive a reCaptcha notification when you open Shout It Out! in SMART lab for the first time.
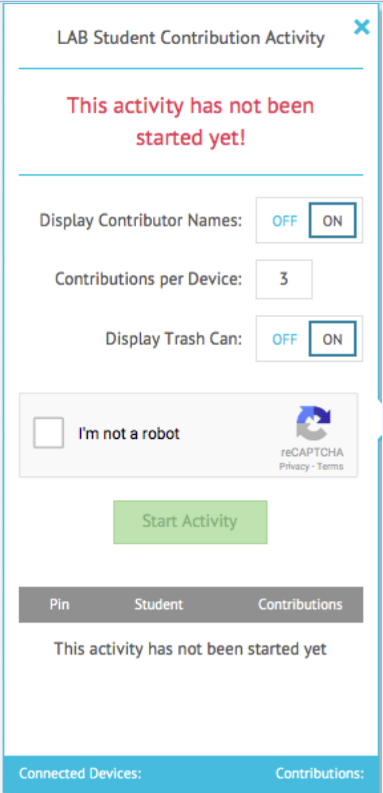
If you receive this notification, you must first validate the trial version before Shout It Out! features will work. After you have registered as a trial user, you will no longer receive reCaptcha notifications.
To validate as a trial user
If you receive a reCaptcha notification In the SMART lab Student Contribution Activity dialog box, select the I’m not a robot check box.
An image questionnaire appears.
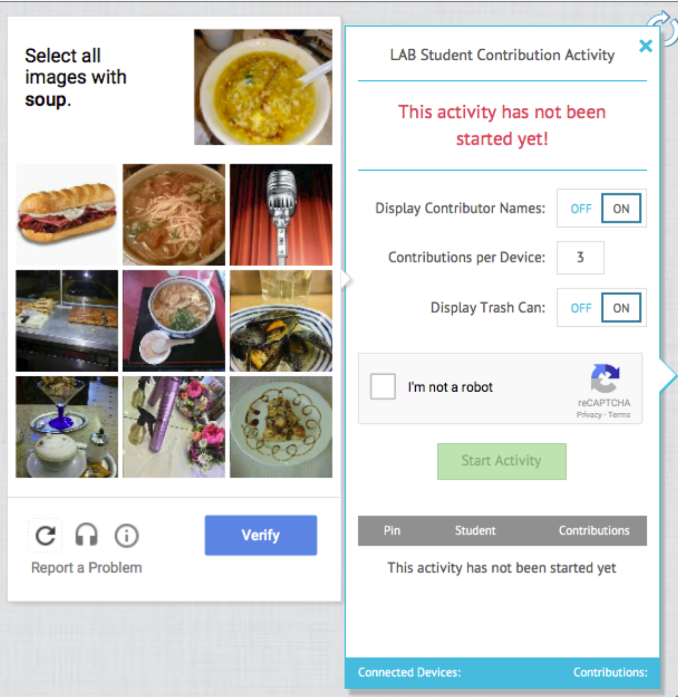
Complete the questionnaire and press Verify.
If you answer the questionnaire correctly, a green check mark will appear in the I’m not a robot check box.
Press Start Activity to begin adding the Shout It Out! activity.
Note
When using SMART lab activities on hellosmart.com, students may check their website access at https://hellosmart.com/connection/check.html.
Web browser recommendations |
|
Device operating system recommendations |
|
Network recommendations | SMART lab activities on hellosmart.com are designed to keep network requirements as low as possible while still supporting rich collaboration. The network recommendation for Shout It Out! alone is 0.3 Mbps per device. A school that regularly uses other Web 2.0 tools should have enough network capacity to run SMART lab activities on hellosmart.com. If SMART lab activities on hellosmart.com are used in conjunction with other online resources, such as streaming media, greater network capacity could be required, depending on the other resources being used. |
To ensure that Shout It Out! works correctly, add the following URLs to your network’s white list.
https://www.hellosmart.com
https://id.smarttech.com
https://content.smarttech-prod.com
https://metric.smarttech-prod.com
https://google.com
https://google-analytics.com
https://www.gstatic.com (used by Google to load reCAPTCHA)
https://*.firebaseio.com
https://*.cloudfront.com
Students will enjoy adding their contributions to your SMART lab activities. Students can add text or images, depending on activity requirements. Have other students position comments into categories or use the contributions to begin discussions.
After a student has signed in to the activity using the SMART lab Student Contribution Activity dialog on their computer or mobile device browser, the Activity response window opens.
Students enter their contribution in the text window. A student may enter up to 150 characters into the window including spaces, and can contribute the number of times specified by the teacher.
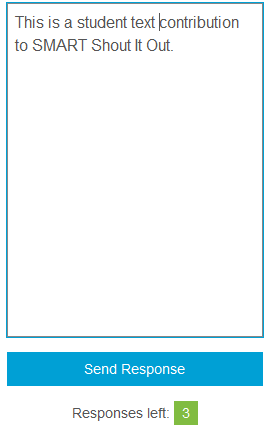
If you previously selected Categorized placements, the text window includes a category menu.
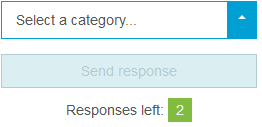
After making their contributions, students select the category to which they wish to contribute from the Select a category drop-down menu.
Students press Send Response to send their contributions to the Notebook SMART lab activity page.
The student contribution appears on the Notebook SMART lab activity page. See Adding Student Text Contributions and Adding Student Image Contributions for more information.
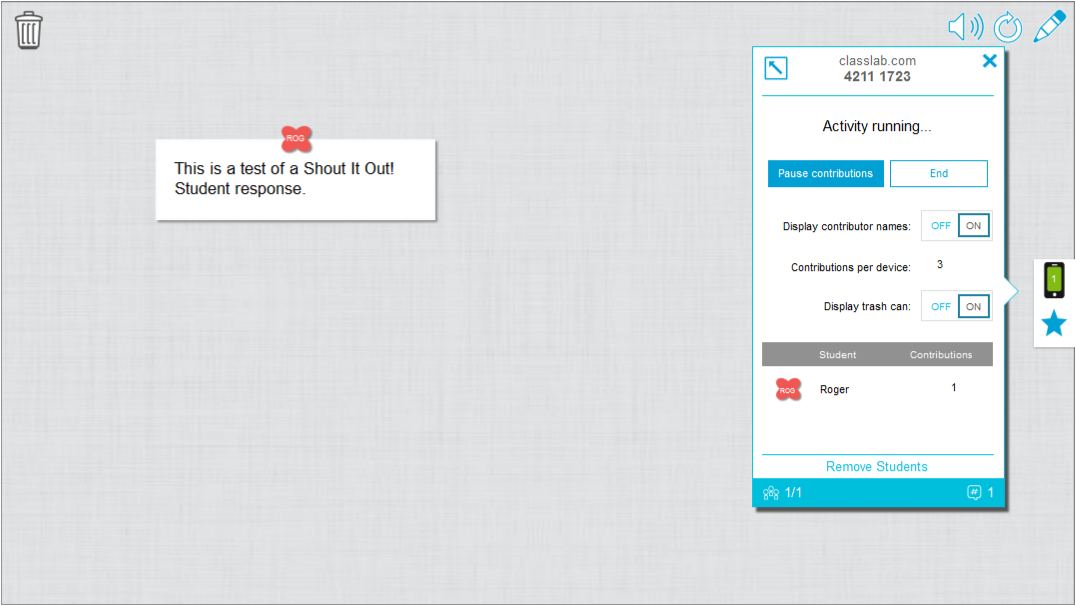
In Categorized view, click the
 to minimize the activity ID window to view contributions that appear in the window on the right of the activity page. Click
 to reopen the window.
Tip
You can move a student contribution from one category to another by pressing the student contribution and dragging it to the other category.
After a student has signed in to the activity using the SMART lab Student Contribution Activity dialog box, the Activity response window opens.
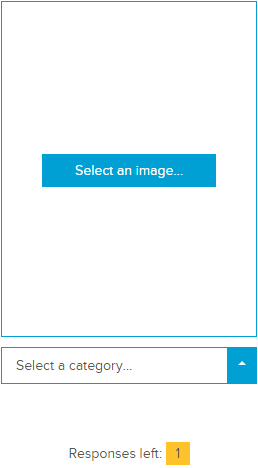
The student presses Select an image.
The device file explorer opens.
The student selects the image and presses Open.
As with the text contribution, the image contribution appears on the Notebook SMART lab page.
To enlarge the image contribution, the teacher can press the image on the Notebook page, and the image will enlarge.
To return the image to its normal size, press outside the enlarged image, or press the X in the top right corner of the enlarged image.
Important
A student may contribute 50 images per activity. If the student exceeds this amount, a warning appears, and additional image contributions by that student do not appear for the current activity.
Note
To delete a contribution, drag it to the Recycle bin at the top left of the SMART lab activity page. After a contribution is deleted, it cannot be retrieved.
To leave the activity, students can press the application exit symbol on their device browsers
 .
.
You can remove students from a Shout It Out! activity and end the activity.
At the bottom of the activity panel, press Remove Students.
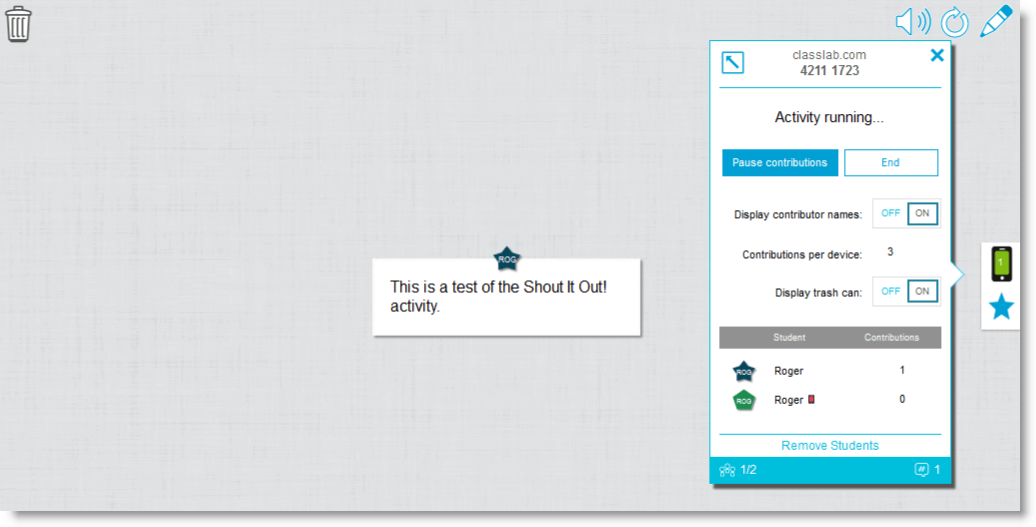
The Remove Students confirmation dialog will appear.
Press Remove Students. The activity will end and all students will be removed from the activity and the Remove Student button will be disabled.

You can make your SMART lab activity more interesting and engaging for your students by adding game components. Three game components are available.
To add a game component to an activity
To add a buzzer, timer or randomizer game component to the activity, press
 .
. The Game Component selector opens.

Select a game component. The game component will appear in the activity, along with a Settings button.
- Press the settings button to change available features of the game component.

Use the timer to track how long it takes students to complete an activity. In the Timer dialog box you can choose from 15 second, 30 second, or one minute count down from or count up to times, or you can choose a custom time in minutes and seconds.

Use the Randomizer to randomly select the students’ or the activity’s content. You can randomize flip card backs, numbers, or student lists. In the Randomizer dialog box, you can randomize Flip card backs or numbers from 1 to 30. You can also randomize selected student names by adding them to the Student List box or by adding student names from a student list you have already saved. Each item can only be chosen once.

Students can compete to see who gets to go next. You can select and use up to four buzzers from the Buzzer dialog box using the game component Settings.