Monitoring devices
The Devices view displays information about the devices enrolled in SMART Remote Management to which you have access. The Devices view is the main view in SMART Remote Management for monitoring and managing devices.
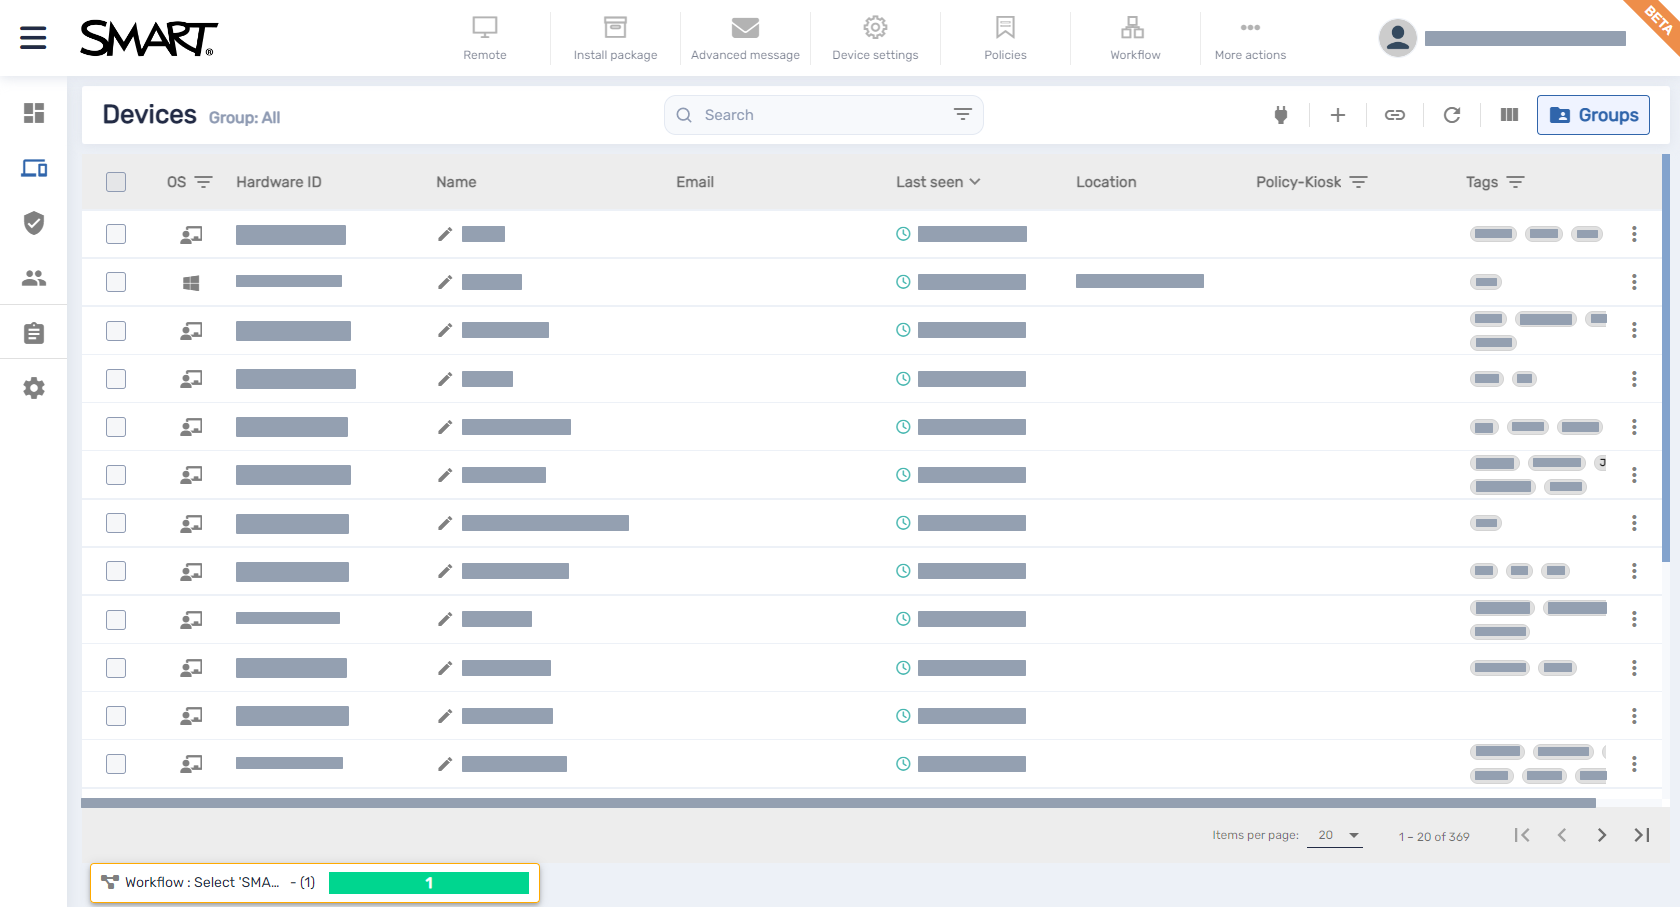
To open the Devices view from anywhere in SMART Remote Management, click Devices in the menu. In the Devices view, you can:
Show and hide columns
Filter devices
Identify which devices are online
View device details
Locate devices
Export device details to CSV files
Important
If a warning icon appears next to a device’s ID, you need to reset the device’s authentication token. Click the icon to learn more and reset the device’s authentication token.
You can choose the columns that appear in the Devices view by clicking Columns. Enable columns you want to show, and disable columns you want to hide:
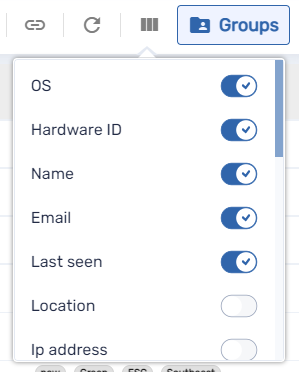
These are the columns you’d typically want to display for SMART Board interactive displays with iQ:
| Column | Description | Notes |
|---|---|---|
| OS | An icon representing the device’s type (operating system) | For SMART Board interactive displays with iQ, the icon is |
| Hardware ID | A unique identifier assigned by the device’s manufacturer | For SMART Board interactive displays with iQ, the unique identifier is the same as the display’s serial number. |
| Name | A name you give the device to identify it in SMART Remote Management | SeeRenaming devices |
| Last seen | The date and time the device was last active | N/A |
| Policy-Kiosk | The policies applied to the device | |
| Tags | The tags applied to the device | SeeUsing tags |
| SMART Build Number | The build number of iQ software running on the SMART Board interactive display | For devices other than SMART Board interactive displays with iQ, this column is blank. |
Tips
You can sort devices by clicking the Last Seen column header.

You can change the order of columns by dragging a column’s header to its new position.

You can filter the list of devices based on values in some columns.
SeeFinding devices
To find a specific device or devices quickly, filter the devices in the Devices view in one of the following ways:
Use the Search bar at the top of the Devices view

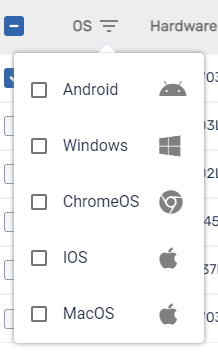
Use column filtering.
Notes
Column filtering is available for the OS, Policy-Kiosk, and Tags columns.
For the OS column, selecting Android displays all SMART Board interactive display and Android devices, not just Android devices.
Use filters
SeeUsing filters
Use groups
SeeUsing groups
You can use filters to filter devices in the Devices view and run commands on all devices that meet filter criteria. You can create and save a filter for future use, or you can create a one-time quick filter.
Tip
Filters are useful for applying policies to a group of devices. Because policies are created for specific operating systems, create a filter for devices that have the same operating system.
To create and save a filter
Click Filters
in the Search bar.
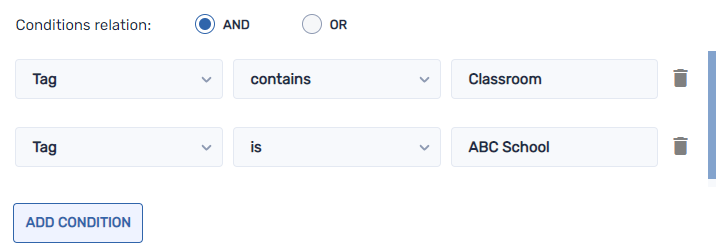
Create the conditions for the filter.
Note
Click Add Condition to add multiple conditions as needed.
Example
Click Save Filter.
The Save filter window appears.
Type a name in the Filter name box.
OptionalSelect the following options for the filter:
Option
Description
Set as private
Make this filter available only to you.
Select color
Assign a color to the filter’s icon.
Select icon
Assign an icon to the filter.
Click Save.
Tip
You can edit the filter by selecting it in the list, modifying its conditions, and clicking Edit Filter.
To filter devices using filters
Click Filters
in the Search bar.
Select the saved filter you want to use.
OR
Create the conditions for a one-time quick filter and click Quick Search.
Note
Click Add Condition to add multiple conditions as needed.
Example

Click outside the filter drop-down menu.
The devices that meet the filter’s criteria appear in the Devices view.
To run a command on all devices that meet a saved filter’s criteria
Click Filters
in the Search bar.
Click Actions
next to a saved filter and select the command you want to run on the devices that meet the filter’s criteria.
Tip
You can pin a frequently used command to the top of the menu by hovering over it and clicking Pin to favorites
 .
.
You might need to change a device’s name if its current name doesn’t accurately describe its status or purpose. You can rename devices from the Devices view.
To rename a device
Click Edit device name
beside the device’s name.
Type a new name for the device and click save changes
.
Tips
To revert to the existing name, click cancel
.
You can also rename a device from the device dashboard by clicking Manage and then Rename.
You can quickly identify which devices are online by clicking Who is online? in the Devices view. The OS icon for online devices turns blue (
).
When you click a device’s row in the Devices view, a device dashboard similar to this appears:
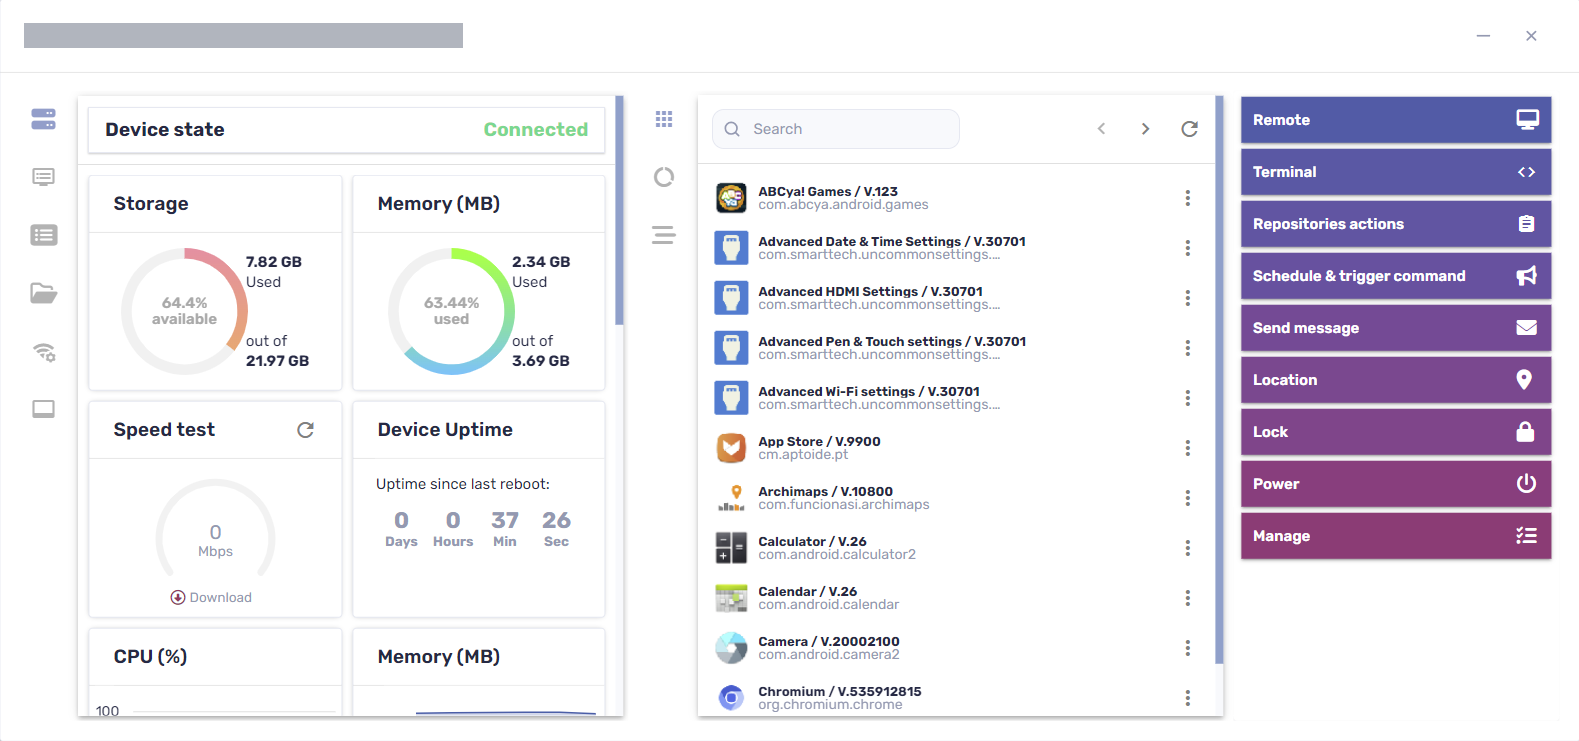
From this dashboard, you can view general information about the device, a list of apps installed on the device, and device usage. The device dashboard also offers management tools, such as starting a remote session, applying settings and policies, and more.
The general details section on the dashboard’s left side shows the device’s current state—Connected, Connected (non interactive), or Disconnected—and device information, such as memory, storage, resolution, battery life, and more.
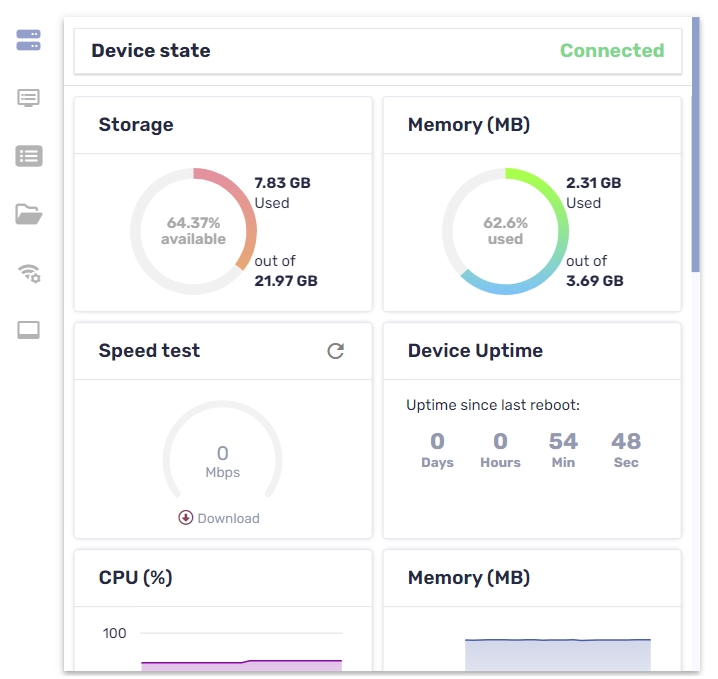
Note
Devices with a state of Connected (non-interactive) are connected and functioning properly but are not being actively used. This typically occurs when the lock screen or screen saver are appearing on the device’s display.
Tip
The device state refreshes automatically every 3 seconds. You can refresh it manually by clicking Refresh.
Click the other tabs to see additional information for the device:
Icon | Tab | Description | ||||||||
|---|---|---|---|---|---|---|---|---|---|---|
Info | More details about the device, such as Wi-Fi, IP address, Bluetooth availability, model number, operating system version, MAC address, permissions, CPU, serial number, and time zone | |||||||||
Properties | Properties for the device | |||||||||
File system | Contents of the device’s file system | |||||||||
Storage stats | Storage statistics for the device | |||||||||
Network | Network information, such as Wi-Fi state, Wi-Fi SSID, Wi-Fi allowed protocols, IP address, subnet mask, network related events (traceroute), and more | |||||||||
Smartboard | Basic information about the SMART Board interactive display with iQ, such as information about the touch controller and scaler firmware version, display build number, and display name Note If a user changes the name of a SMART Board interactive display with iQ from the display’s settings, it can take up to 24 hours before the new name appears in SMART Remote Management. | |||||||||
Bios | Information about the device’s BIOS | |||||||||
Processor | Information about the device’s CPU | |||||||||
Manufacture model | Information about the device’s model | |||||||||
Hot fixes | Information about Windows hot fixes applied to the device | |||||||||
OS | Information about the device’s operating system | |||||||||
Disks | Information about the device’s hard drive | |||||||||
Logged on users | Information about users currently logged on to the device | |||||||||
Browsing | the device’s browsing history |
Tip
In the Properties, File system, Storage stats, and Browsing tabs, you can do the following:
Search for specific information using the Search box.
Export information to a CSV file by clicking Export to CSV
.
Display the information in the tab in an expanded view by clicking Expand
.
You can see a device’s current location from the Devices view. This is particularly useful for finding mobile devices.
Notes
Before SMART Remote Management can locate a device, you must set up the network.
If location services are not available, SMART Remote Management shows an approximate location for the device based on its IP address.
To locate a device
Click the row of the device you want to locate.
The device’s dashboard window appears.
Click Location to open the Location window.
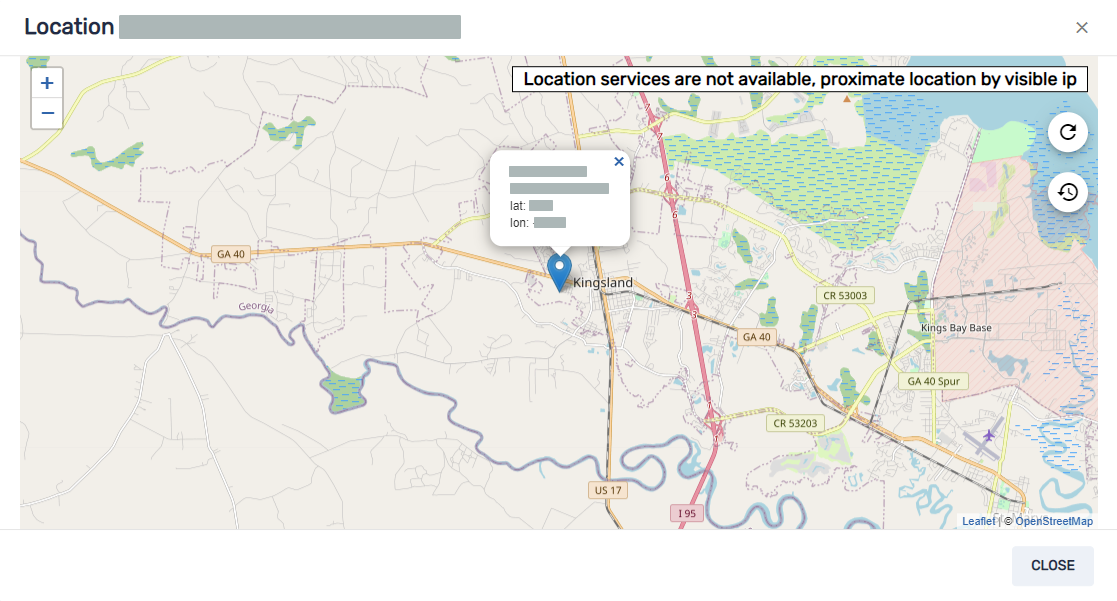
From the Devices view, you can create a CSV file that contains information from all available device columns in SMART Remote Management or from only those columns shown in the Devices view.
To export a CSV file
Select the check boxes of the devices you want to include in the CSV file.
Click More actions
and select Export to CSV.
Select All columns to export all device columns to the CSV file.
OR
Select Columns shown in devices table to export only those columns shown in the Devices view.
Click Confirm.
Your browser downloads a CSV file from SMART Remote Management.
Open the CSV file in a spreadsheet application.

