Managing settings
You can use SMART Remote Management to manage settings for SMART Board interactive displays and Android devices remotely. You can also lock access to settings from SMART Board interactive displays with iQ so that users do not inadvertently change them.
 Managing settings
Managing settingsTo manage a device’s settings remotely using SMART Remote Management, you need to first create settings in SMART Remote Management. You can then apply the settings to an individual device, multiple devices, all devices that match a saved filter’s criteria, or a group. Alternatively, you can:
- Use a trigger to apply settings at a scheduled time or when a specific event takes place. 
- Include the application of settings in workflows. 
Note
Not all SMART Board interactive display with iQ settings can be changed from SMART Remote Management. If there is a setting you want to be able to change from SMART Remote Management, submit a feature request to add this setting to a future version.
To create settings
- Click Repositories - and select Device settings. - The Device settings window appears. - Tip - If your organization created its domain account after May 2023, the Device settings window includes sample settings that you can use as starting point for creating your own settings. These sample settings have turquoise icons. 
- Click Add New. 
- Type a name and description in the Name and Description boxes. 
- Enter the appropriate information in the remaining tabs: - Icon - Tab - Description - Wifi - Enable Set device wifi to enter the device’s Wi-Fi settings. - Notes - SMART doesn’t recommend connecting SMART Board interactive displays with iQ to hidden networks using SMART Remote Management settings. If you do, you might need to apply settings twice to connect the display to the network successfully, particularly if the display is connected to the internet through Ethernet (rather than Wi-Fi). 
- To make devices forget an existing Wi-Fi network, enable Forget wifi and type the existing network’s SSID in the Service Set Identifier (SSID) box. 
 - Security - Enable security settings you want to apply to the device, such as maximum allowed log in attempts, password settings, and so on. - General - Control various settings for the device, such as allowing users to be added locally, volume adjustments, and so on. - Tip - Search for specific settings using the Search box at the top of the tab. - APN - Turn on Access Point Name (APN) settings and enter APN details. - Wallpaper - Set a wallpaper for the device. - Certificates - Install certificates on the device. To do this - Turn on Install CA Certificate. 
- Select one of the following from the User certificate drop-down list: - User trusted credentials 
- User wifi CA certificate 
- VPN and apps certificate 
- User private key wifi certificate 
 
- If you selected User wifi CA certificate or VPN and apps certificate in step b, type the alias for the certificate in the Certificate alias box. 
- Copy the body text of the certificate and paste it into the CA cetificate body box. 
 - Smartboard settings - Control general display settings, such as the apps visible in the display’s apps library, whiteboard settings, and so on. - Lock screen - Set a password and message for the device’s lock screen. - Note - For several settings, you can use a three-way toggle to enable the setting, disable the setting, or leave it set to its default state: - Toggle state - Action - Example  - SMART Remote Management doesn’t modify the setting on the device.  - 
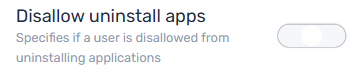
SMART Remote Management doesn’t modify the setting on the device. Whether users can uninstall apps depends on whether the setting is enabled or disabled by default on the device.  - SMART Remote Management enables the setting on the device.  - 
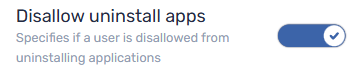
SMART Remote Management enables the setting on the device and users cannot uninstall apps as a result.  - SMART Remote Management disables the setting on the device.  - SMART Remote Management disables the setting on the device and users can uninstall apps as a result. 
- Click Confirm. 
To apply settings to a single device
- Click Devices - to open the Devices view. 
- OptionalFilter the devices shown in the Devices view. - SeeFinding devices 
- Click the device’s row. - The device’s dashboard window appears. 
- Click Repositories actions, and then click Device settings. - The Device settings window appears. 
- Select the settings from the list and click Apply. 
To apply settings to multiple devices
- Click Devices - to open the Devices view. 
- OptionalFilter the devices shown in the Devices view. - SeeFinding devices 
- Select the devices’ check boxes. 
- Click Device settings - . - The Device settings window appears. 
- Select the settings from the list and click Apply. 
To apply settings to all devices that match a saved filter’s criteria
- Click Devices - to open the Devices view. 
- Click Filters - in the Search bar. 
- Click Actions - in the saved filter’s row and select Device settings. - The Device settings window appears. 
- Select the settings from the list and click Apply. 
To apply settings to a group
- Click Devices - to open the Devices view. 
- Click Groups to open the Groups panel. 
- Click Actions - in the group’s row and select Device settings. - The Device settings window appears. 
- Select the settings from the list and click Apply. 
 Locking settings for SMART Board interactive displays with iQ
Locking settings for SMART Board interactive displays with iQTo lock access to settings on SMART Board interactive displays with iQ, connect a USB drive to one display and create a lockdown certificate. After you obtain the lockdown certificate, create a lockdown policy and apply it to a display, multiple displays, all displays that match a saved filter’s criteria, or a group.
Tip
You can use a lockdown certificate from a single display to lock settings on multiple displays. You don’t need to create a lockdown certificate on each display for which you want to lock settings.
To create a lockdown policy
- Connect a USB drive to a SMART Board interactive display with iQ and create a lockdown certificate. 
- Connect the USB drive to your computer. 
- Click Repositories - and select Policies. - The Policies window appears. - Tip - If your organization created its domain account after May 2023, the Policies window includes sample policies that you can use as starting point for creating your own policies. These sample policies have turquoise icons. 
- Click Add New and select Smartboard. - The New custom policy window appears. 
- Type a name and description in the Policy name and Policy description boxes. 
- Click Settings lockdown - . 
- Click the Set key slider to enable it. 
- Click Add key  . .- The Open window appears. 
- Browse to and select the .key file on the USB drive, and click Open. 
- Click Confirm. 
To lock settings on a single display
- Click Devices - to open the Devices view. 
- OptionalFilter the devices shown in the Devices view. - SeeFinding devices 
- Click the display’s row. - The display’s dashboard window appears. 
- Click Repositories actions, and then click Policies. - The Policies window appears. 
- Select the lockdown policy from the list and click Apply. 
To lock settings on multiple displays
- Click Devices - to open the Devices view. 
- OptionalFilter the devices shown in the Devices view. - SeeFinding devices 
- Select the displays’ check boxes. 
- Click Policies - . - The Policies window appears. 
- Select the lockdown policy from the list and click Apply. 
To lock settings on all displays that match a saved filter’s criteria
- Click Devices - to open the Devices view. 
- Click Filters - in the Search bar. 
- Click Actions - in the saved filter’s row and select Policies. - The Policies window appears. - Note - Select a filter that selects only SMART Board interactive displays with iQ. 
- Select the lockdown policy from the list and click Apply. 
To lock settings on a group
- Click Devices - to open the Devices view. 
- Click Groups to open the Groups panel. 
- Click Actions - in the group’s row and select Policies. - The Policies window appears. - Note - Select a group that contains only SMART Board interactive displays with iQ. 
- Select the lockdown policy from the list and click Apply.