Troubleshooting
This page explains how to resolve a variety of common problems with the display and related SMART products.
Note
The troubleshooting information on this page is organized into three types of checklists:
What to keep in mind
Information you should be aware of when troubleshooting an issue
What to check
Items you should verify when troubleshooting an issue
What to try
Actions you should perform to either resolve an issue or identify an issue’s underlying cause
What seems to be the problem?
The display isn’t turning on.
The power light isn’t lit.

What to check
The switch beside the AC power inlet is in the ON (I) position.
The power cable is securely fastened to the power outlet and the display.
Note
If the power cable is connected to a power bar, make sure the power bar is securely fastened to the power outlet and turned on.
What to try
Test the power outlet with a different device to make sure it’s working.
Did this information help you solve the problem? Let us know.
The power light is red, and the screen is blank.
What to try
Press the Power button on the front of the display or on the remote control.
Restart the display.
Did this information help you solve the problem? Let us know.
The power light is blue, but the screen is blank.
What to check
Any connected computers are on and not in an energy saving mode.
What to try
Press the Power button on the front of the display or on the remote control.
Determine if the problem is with the currently selected input rather than with the display by:
Opening the Home screen
Switching to another input
Disconnecting any cables from the display’s HDMI Output connector (if used) to determine whether equipment connected to the HDMI output port is causing the problem.
Restart the display.
Did this information help you solve the problem? Let us know.
The display is turning off when it shouldn’t.
What to check
Check the timer switch settings in the Startup and shutdown section of the display’s settings to see whether any shutdown tasks have been scheduled, and adjust them as needed.
What to try
If the display is connected to a room control system via the RS-232 connection, disconnect it to determine if the problem is being caused by the room control system.
The screen is blank or there’s a problem with the image on the screen.
The screen is blank when the status light is blue.
What to check
Any connected computers are on and not in an energy saving mode.
What to try
Determine if the problem is with the currently selected input rather than with the display by:
Opening the Home screen
Switching to another input
Disconnecting any cables from the display’s HDMI Output connector (if used) to determine whether equipment connected to the HDMI output port is causing the problem.
Restart the display and any connected computers.
If a computer’s input is currently selected, replace the video cable that connects the computer to the display to determine if the problem is with the cable.
Notes
Make sure the replacement cable meets the required specifications.
Avoid using connection extenders or signal converters where possible and during troubleshooting.
If a computer’s input is currently selected, replace the video cable that connects the computer to the display to determine if the problem is with the cable.
Note
The recommended resolutions are 3840 × 2160 @ 60Hz or 1920 × 1080 @ 60Hz.
Did this information help you solve the problem? Let us know.
A computer is connected to the display, but only a connection message appears on the screen.
What to check
The computer is not in an energy saving mode.
The computer is connected to the currently selected input.
The computer’s active video signal resolution and refresh rate match the display’s native or supported resolutions and refresh rates.
If the computer is a laptop, its video output is enabled.
Tip
On Windows computers, press WIN+P to determine if the computer’s video output is enabled, and set the video output to duplicate or extend the desktop.
What to try
Replace the video cable that connects the computer to the display to determine if the problem is with the cable.
Notes
Make sure the replacement cable meets the required specifications.
Avoid using connection extenders or signal converters where possible and during troubleshooting.
Did this information help you solve the problem? Let us know.
The image on the screen is distorted.
What to try
Determine if the problem is with the currently selected input rather than with the display by:
Opening the Home screen
Switching to another input
Disconnecting any cables from the display’s HDMI Output connector (if used) to determine whether equipment connected to the HDMI output port is causing the problem.
Restart the display and any connected computers.
If a computer’s input is currently selected, replace the video cable that connects the computer to the display to determine if the problem is with the cable.
Notes
Make sure the replacement cable meets the required specifications.
Avoid using connection extenders or signal converters where possible and during troubleshooting.
Did this information help you solve the problem? Let us know.
There are lines, snow, or other visual noise on the screen.
What to try
Determine if the problem is with the currently selected input rather than with the display by:
Opening the Home screen
Switching to another input
Disconnecting any cables from the display’s HDMI Output connector (if used) to determine whether equipment connected to the HDMI output port is causing the problem.
Restart the display and any connected computers.
If a computer’s input is currently selected, replace the video cable that connects the computer to the display to determine if the problem is with the cable.
Notes
Make sure the replacement cable meets the required specifications.
Avoid using connection extenders or signal converters where possible and during troubleshooting.
Did this information help you solve the problem? Let us know.
The image is flickering or flashing.
What to try
Determine if the problem is with the currently selected input rather than with the display by:
Opening the Home screen
Switching to another input
Disconnecting any cables from the display’s HDMI Output connector (if used) to determine whether equipment connected to the HDMI output port is causing the problem.
Restart the display and any connected computers.
If a computer’s input is currently selected, replace the video cable that connects the computer to the display to determine if the problem is with the cable.
Notes
Make sure the replacement cable meets the required specifications.
Avoid using connection extenders or signal converters where possible and during troubleshooting.
Did this information help you solve the problem? Let us know.
The image is dim.
What to try
Determine if the problem is with the currently selected input rather than with the display by:
Opening the Home screen
Switching to another input
Disconnecting any cables from the display’s HDMI Output connector (if used) to determine whether equipment connected to the HDMI output port is causing the problem.
Restart the display and any connected computers.
If a computer’s input is currently selected, replace the video cable that connects the computer to the display to determine if the problem is with the cable.
Notes
Make sure the replacement cable meets the required specifications.
Avoid using connection extenders or signal converters where possible and during troubleshooting.
Did this information help you solve the problem? Let us know.
There is no image when using the USB Type-C receptacle with a computer.
What to check
The computer supports Display Port Alternate Mode video via USB Type-C.
Tip
Look for the Display Port logo
 or the Thunderbolt 3 or 4 logo
 beside the USB Type-C receptacle on the computer. If it’s not there, the computer might not support Display Port Alternate Mode video via USB Type-C.
The cable used with the USB Type-C receptacle supports Super Speed (5Gbps) USB.
Tip
Look for the Super Speed USB logo
 or Thunderbolt logo on the cable. If the cable doesn’t have the Super Speed USB or Thunderbolt logo, it might not have the internal wiring necessary to carry Display Port Alternate Mode video data.
Did this information help you solve the problem? Let us know.
There are bright spots on the screen.
What to try
Determine if the problem is with the currently selected input rather than with the display by:
Opening the Home screen
Switching to another input
Disconnecting any cables from the display’s HDMI Output connector (if used) to determine whether equipment connected to the HDMI output port is causing the problem.
Take a photograph of the screen and send it to SMART support.
Note
If SMART support determines that the problem is with the screen and the display is under warranty, you may be eligible for a replacement.
Did this information help you solve the problem? Let us know.
Colors don’t appear correctly.
What to keep in mind
If two or more displays are mounted side-by-side, it’s normal to see minor differences in colors across the displays. This problem is not unique to SMART products.
What to try
If a computer’s input is currently selected and the computer is connected to the display with a VGA cable, replace the VGA cable to determine if the problem is with the cable.
Notes
Make sure the replacement cable meets the required specifications.
Avoid using connection extenders or signal converters where possible and during troubleshooting.
Press the Home button to determine whether the color issue occurs on the Home screen only. If the Home screen appears normal but a specific video input does not, test the connection cables and video source equipment by temporarily replacing them.
If the screen is completely lacking one color or the color problems occur on the Home screen, take a photograph of the screen and send it to SMART support.
Note
If SMART support determines that the problem is with the screen and the display is under warranty, you may be eligible for a replacement.
If you’re using the VGA analog video input, use a different cable or connect a different source to see if the issue is with the cable or input.
Did this information help you solve the problem? Let us know.
The image is cut off or shifted to the left or right.
What to check
The connected computers’ video output is set to a resolution supported by the display.
What to try
Adjust any connected computers’ video settings, particularly zoom, crop, and underscan.
See the computer’s operating system documentation.
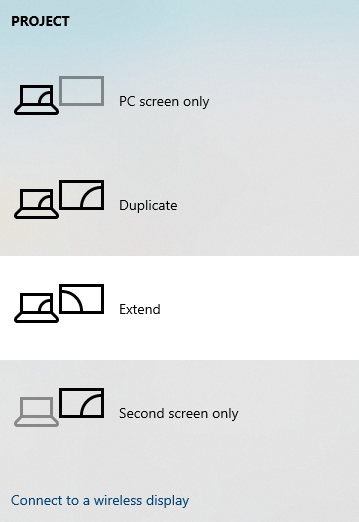
If a computer’s input is currently selected and the computer’s desktop is extended across multiple screens, select a different screen mode. If the mode is currently set to duplicate, change it to extended. If the mode is currently set to extended, change it to duplicate.
Tip
On Windows computers, press WIN+P to determine if the computer’s video output is enabled, and set the video output to duplicate or extend the desktop.
Did this information help you solve the problem? Let us know.
The image doesn’t fill the entire screen.
What to check
The connected computer’s video connector is configured to output a supported video signal.
What to try
Adjust any connected computers’ video settings, particularly overscan.
See the computer’s operating system documentation.
What to try
If a computer’s input is currently selected and the computer’s desktop is extended across multiple screens, select a different screen mode. If the mode is currently set to duplicate, change it to extended. If the mode is currently set to extended, change it to duplicate.
Did this information help you solve the problem? Let us know.
A persistent image appears on the display.
What to try
Follow the recommendations in the knowledge base article, Image persistence or burn in on LCD displays.
Did this information help you solve the problem? Let us know.
There’s no sound or there’s a problem with the sound.
There’s no sound.
What to check
If you’re using an external audio system, make sure it is turned on.
The cables connecting the display to the computer are securely fastened.
Note
The display’s stereo 3.5 mm In connector works with the VGA input only.
If you’re using the display’s S/PDIF Out connector, adjust the volume on the external audio system and make sure the audio system isn’t muted.
If a computer or other device is connected to the display using an HDMI cable, the computer or other device is configured to send HDMI video and audio, not digital DVI video.
Note
HDMI cables can carry digital DVI video signals, which don’t include audio.
What to try
If a computer’s input is currently selected, adjust the computer’s volume (80% recommended) and then adjust the display’s volume. If the display is connected to an external audio system, adjust the audio system’s volume. Adjust the display’s audio settings.
SeeSound
If you’re using the integrated speakers, set the volume for the computer and any running applications to 80%, and then adjust the display’s volume.
OR
If you’re using an external audio system, set the volume for the computer, any running applications, and the display to 80%, and then adjust the external audio system’s volume.
Did this information help you solve the problem? Let us know.
There is sound, but the volume is low.
What to check
If you’re using an external audio system, make sure it is turned on.
The cables connecting the display to the computer are securely fastened.
Note
The display’s stereo 3.5 mm In connector works with the VGA input only.
If you’re using the display’s S/PDIF Out connector, adjust the volume on the external audio system and make sure the audio system isn’t muted.
What to try
If a computer’s input is currently selected, adjust the computer’s volume (80% recommended) and then adjust the display’s volume. If the display is connected to an external audio system, adjust the audio system’s volume. Adjust the display’s audio settings.
SeeSound
If you’re using the integrated speakers, set the volume for the computer and any running applications to 80%, and then adjust the display’s volume.
OR
If you’re using an external audio system, set the volume for the computer, any running applications, and the display to 80%, and then adjust the external audio system’s volume.
Did this information help you solve the problem? Let us know.
The sound is distorted or muffled.
What to check
If you’re using an external audio system, make sure it is turned on.
The cables connecting the display to the computer are securely fastened.
Note
The display’s stereo 3.5 mm In connector works with the VGA input only.
If you’re using the stereo 3.5 mm In or Out connectors, ensure that analog audio cables are not routed behind mains voltage power lines, electric motors, or other sources of electromagnetic interference.
If you’re using the display’s S/PDIF Out connector, adjust the volume on the external audio system and make sure the audio system isn’t muted.
What to try
If a computer’s input is currently selected, adjust the computer’s volume (80% recommended) and then adjust the display’s volume. If the display is connected to an external audio system, adjust the audio system’s volume. Adjust the display’s audio settings.
SeeSound
If you’re using the integrated speakers, set the volume for the computer and any running applications to 80%, and then adjust the display’s volume.
OR
If you’re using an external audio system, set the volume for the computer, any running applications, and the display to 80%, and then adjust the external audio system’s volume.
If you’re using the stereo 3.5 mm In or Out connectors, replace the existing analog audio cables with better quality cables.
Did this information help you solve the problem? Let us know.
There is a whine or buzzing sound coming from the back of the display.
What to keep in mind
These sounds are normal. All displays emit some electrical noise. Such sounds might be more noticeable with some displays than with others. However, if you hear noise from the front of the display, further investigation is required.
What to check
If you’re using the stereo 3.5 mm In or Out connectors, ensure that analog audio cables are not routed behind mains voltage power lines, electric motors, or other sources of electromagnetic interference.
What to try
Connect all devices to the same power outlet or power bar.
If you’re using the stereo 3.5 mm In or Out connectors, replace the existing analog audio cables with better quality cables.
Did this information help you solve the problem? Let us know.
Touch isn’t working as expected.
The display doesn’t respond to touch.
What to check
Remove infrared sources, such as incandescent or arc lights, desk lamps, and infrared audio devices, or move the display to another location in the room.
Ensure that there are no physical obstructions (such as holiday decorations) on the display’s frame.
Restart the display.
Make sure SMART Product Drivers 12.26 or later is installed and running on the connected computer.
The USB cable between the display and the computer doesn’t exceed the maximum cable length and supports the minimum USB data speed.
Any connected computers have detected the display’s USB connection.
What to try
Clean the screen and touch sensors.
On Windows computers, open Device Manager and make sure there is no red X or yellow explanation mark (!) over the display’s icon.
On Mac computers, open System Report and make sure there are no error messages in the USB’s row.
For Mac computers, follow the recommendations in the knowledge base article, Resolving issues with SMART Learning Suite and Lumio on macOS operating systems.
Did this information help you solve the problem? Let us know.
The display responds to touch intermittently.
What to check
SMART Product Drivers and Ink is installed and running on any connected computers.
There is only one USB cable connecting the computer and the display.
The USB cable between the display and the computer doesn’t exceed the maximum cable length and supports the minimum USB data speed.
What to try
Clean the screen and touch sensors.
If the pointer appears in the wrong place on input from a connected computer, orient the display.
Restart the display.
Remove any USB extenders, hubs, port replicators, or docking stations to improve the USB data connection while troubleshooting.
Shield from infrared sources, such as incandescent or arc lights, desk lamps, infrared audio devices, and sunlight, or move the display to another location in the room.
Update the firmware.
Update SMART Product Drivers.
Did this information help you solve the problem? Let us know.
When you touch the screen, the pointer doesn’t appear in the correct place.
What to keep in mind
Touch is oriented to the dimensions of the display’s screen. If a connected computer’s image has a different aspect ratio than the display’s screen (and letterbox or pillarbox bars appear around the computer’s image as a result), the touch location will not be accurate and you will need to orient the display.
What to check
SMART Product Drivers and Ink is installed and running on any connected computers.
There is only one USB cable connecting the computer and the display.
The USB cable between the display and the computer doesn’t exceed the maximum cable length and supports the minimum USB data speed.
What to try
Clean the screen and touch sensors.
If the pointer appears in the wrong place on input from a connected computer, orient the display.
Restart the display.
Remove any USB extenders, hubs, port replicators, or docking stations to improve the USB data connection while troubleshooting.
Shield from infrared sources, such as incandescent or arc lights, desk lamps, infrared audio devices, and sunlight, or move the display to another location in the room.
Update the firmware.
Update SMART Product Drivers.
Did this information help you solve the problem? Let us know.
The pens aren’t working as expected.
The display doesn’t respond to touch or writing with a pen.
What to check
Remove infrared sources, such as incandescent or arc lights, desk lamps, and infrared audio devices, or move the display to another location in the room.
Ensure that there are no physical obstructions (such as holiday decorations) on the display’s frame.
Restart the display.
Make sure SMART Product Drivers 12.26 or later is installed and running on the connected computer.
The USB cable between the display and the computer doesn’t exceed the maximum cable length and supports the minimum USB data speed.
Any connected computers have detected the display’s USB connection.
What to try
Clean the screen and touch sensors.
On Windows computers, open Device Manager and make sure there is no red X or yellow explanation mark (!) over the display’s icon.
On Mac computers, open System Report and make sure there are no error messages in the USB’s row.
For Mac computers, follow the recommendations in the knowledge base article, Resolving issues with SMART Learning Suite and Lumio on macOS operating systems.
Did this information help you solve the problem? Let us know.
The display responds to touch but not to writing with a pen.
What to check
You’re using the correct type of pen for the display.
The pen nib is not worn.
Tip
Replacement pens are available from the Store for SMART Parts.
SMART Product Drivers and Ink is installed and running on any connected computers.
You’re holding the pen perpendicular to the display.
Note
If you hold the pen more than 45° from perpendicular to the display, the display may interpret the pen as a finger.

Did this information help you solve the problem? Let us know.
When you write on the screen, the ink appears in the wrong place.
What to keep in mind
Touch is oriented to the dimensions of the display’s screen. If a connected computer’s image has a different aspect ratio than the display’s screen (and letterbox or pillarbox bars appear around the computer’s image as a result), the touch location will not be accurate and you will need to orient the display.
What to check
SMART Product Drivers and Ink is installed and running on any connected computers.
What to try
Clean the screen.
If the ink appears in the wrong place on input from a connected computer, orient the display.
Restart the display.
Shield from infrared sources, such as incandescent or arc lights, desk lamps, infrared audio devices, and sunlight, or move the display to another location in the room.
Did this information help you solve the problem? Let us know.
When you write on the screen, the pen works like your finger.
What to keep in mind
The display uses a size-based object recognition system. Touching the screen with an object larger than a pen tip might be recognized as a finger.
What to check
You’re holding the pen perpendicular to the display.
Note
If you hold the pen more than 45° from perpendicular to the display, the display may interpret the pen as a finger.
The pen nib is not worn.
Tip
Replacement pens are available from the Store for SMART Parts.
Did this information help you solve the problem? Let us know.
Writing is intermittent.
What to check
SMART Product Drivers and Ink is installed and running on any connected computers.
You’re holding the pen perpendicular to the display.
Note
If you hold the pen more than 45° from perpendicular to the display, the display may interpret the pen as a finger.
What to try
Clean the screen.
Restart the display.
Shield from infrared sources, such as incandescent or arc lights, desk lamps, infrared audio devices, and sunlight, or move the display to another location in the room.
Did this information help you solve the problem? Let us know.
Ink disappears as you write.
What to keep in mind
If you are writing or drawing with the Magic Pen tool in SMART Notebook software, the ink disappears after a few seconds. This is expected behavior. What to check
SMART Product Drivers and Ink is installed and running on any connected computers.
You’re holding the pen perpendicular to the display.
Note
If you hold the pen more than 45° from perpendicular to the display, the display may interpret the pen as a finger.
What to try
Clean the screen.
Restart the display.
Shield from infrared sources, such as incandescent or arc lights, desk lamps, infrared audio devices, and sunlight, or move the display to another location in the room.
Did this information help you solve the problem? Let us know.
You can’t write or draw in Microsoft Office.
What to check
Microsoft Office 2013 or later is installed on any connected computers.
SMART Product Drivers and Ink is installed and running on any connected computers.
Did this information help you solve the problem? Let us know.
SMART software on the display isn’t working as expected.
You’re unable to manage the display using RS-232.
What to check
All the cable connections are secure.
The room control system is using the correct communication protocol and commands.
What to try
Use only a standard RS-232 cable. Do not use a null modem cable.
Note
Null modem cables typically have ends of the same type.
Restart the display and the remote management system.
Configure the serial interface settings in your RS‑232 terminal application.
Did this information help you solve the problem? Let us know.
If you’re encountering a problem with related products, refer to those products’ troubleshooting pages: