Installing
You or your organization’s installers can install the SMART Chromebox OPS module in a supported SMART Board interactive display’s accessory slot following the module’s installation instructions.
SeeSMART Chromebox OPS illustrated installation instructions (docs.smarttech.com/kb/172051)
Caution
Do not install or remove the Chromebox while the display is turned on. Ensure the power switch on the back of the display beside the AC power inlet is in the OFF (O) position.
Once installed, you can view the Chromebox’s input on the display. Refer to your display’s support documentation on how to view a connected computer’s input.
 Turning on the module for the first time
Important
Install the module before you turn on the display.
Turn on the display and wait for the home screen to appear.
View the available inputs and select the Chromebox.
Follow the on-screen instructions to complete the setup.
Configuring the moduleAfter the initial on-screen set up, adjust the power settings for the Chromebox so that the display behaves as expected when waking from sleep:
Open Settings and tap System Preferences
 PowerWhen idleKeep display on.
The following additional configuration settings are optional, but recommended for the best experience:
Configure volume settings: When using the Chromebox, you'll see volume controls on-screen (from the ChromeOS) and the physical volume buttons on the SMART Board display itself. To simplify things, SMART recommends setting the Chromebox’s volume to maximum and then using the display’s volume buttons to adjust sound. This avoids having to manage two separate volume levels.
Change the position of the app shelf: Adjust the alignment of the app shelf so that it doesn’t overlap with the toolbar on the SMART Board display with iQ.
If the app shelf isn’t visible, swipe up on the screen.
Press and hold and area of the shelf to view the options menu and select Always show shelf.
Press and hold the shelf again and select Shelf position
Right or Left.
Connecting USB drives, peripherals, and other devicesYou can use USB drives, peripherals, and other devices with the Chromebox by connecting those devices to the module’s USB 2.0 Type-A, USB 3.2 Gen 1 Type-A, and USB Type-C receptacles.
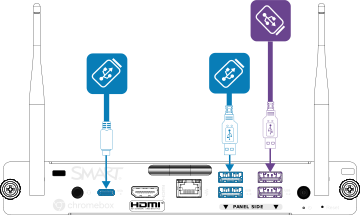
Alternatively, you can connect USB devices to the USB receptacles on the display. For information about the type and location of USB receptacles on the display, see the display’s documentation.
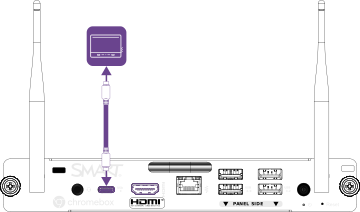
Connecting external displaysYou can connect an external display to the HDMI out or USB Type-C connector on the Chromebox (rather than the connectors on the display). This allows you to duplicate the Chromebox’s desktop to the external display.
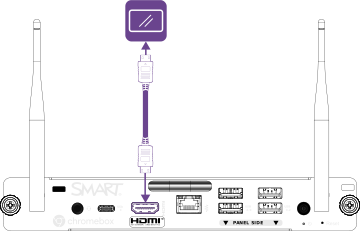
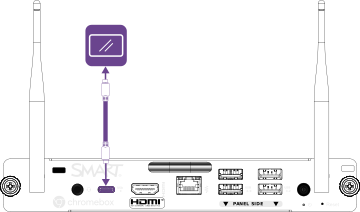
Note
Because of limitations in ChromeOS, using the HDMI out or USB-C connectors to extend the Chrome desktop to an external display may cause touch to behave unexpectedly. SMART recommends using the Mirror Built-in Display option for connected displays in Chrome’s settings instead.
Connecting the Chromebox OPS module to a second SMART Board interactive displayYou can connect a Chromebo installed in one SMART Board interactive display to a second interactive display by connecting an HDMI cable from the Chromebox’s HDMI out connector to one of the second display’s HDMI in connectors. Also connect a USB cable from one of the Chromebox’s USB Type-A receptacles to the appropriate USB Type-B receptacle on the second display.
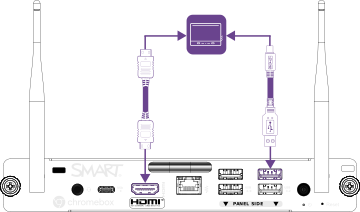
Alternatively, if the second interactive display has a USB Type-C input, you can connect a USB cable from the Chromebox’s USB Type-C receptacle to one of the second display’s USB Type-C receptacles.
Note
Because of limitations in ChromeOS, using the HDMI out or USB-C connectors to extend the Chrome desktop to an external display may cause touch to behave unexpectedly. SMART recommends using the Mirror Built-in Display option for connected displays in Chrome’s settings instead.