Inserting and working with shapes
When you add shapes to your workspace, you can move, resize, or rotate them, and interact with them in a variety of other ways.
To insert a shape
In the workspace, tap
 , and then tap
 .
.Browse to the shape you want to insert and tap
 .
.Note
By default, you can insert up to 10 objects in a workspace page. To change this default, open Settings and change the Maximum elements per page under Workspace Settings.
To manipulate a shape in the workspace
If the shape’s object toolbar isn’t visible, select the shape to make it appear.
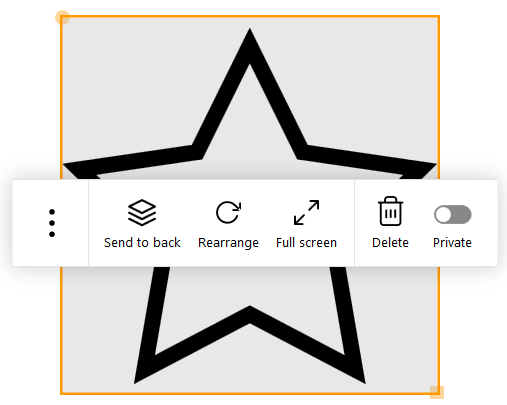
Use the following options to work with the shape:
Send to back Makes the shape appear under the other objects on the workspace page.
Rearrange Returns the shape to its original orientation.
Note
To manipulate the shape, use the yellow circle on the shape’s border to rotate, and use the yellow square to resize.
Full screen Expands the shape to occupy the entire screen. To exit fullscreen, tap  at the bottom of the screen and then tap Exit Full screen.
Delete Deletes the shape from the workspace page. Private Makes the file private: it is not shown to participants who are connected to the meeting.
When participants create their own meeting recap, the file is not included.
When the meeting recap is created by the room computer, the file is included.
Open (tap
 )
)Open the file in its default Windows program.
Clone (tap
)Clones the shape as a new shape on the workspace page
Keywords |
|