Installing the web portal for SMART TeamWorks 4 Server
The web portal for SMART TeamWorks 4 Server is a management tool administrators can use to manage user accounts, meeting data, and meeting room accounts. Users can manage their own accounts through the portal as well, provided your organization supports the creation of personal user accounts. Personal accounts allow users to host their own whiteboard sessions through their SMART TeamWorks 4 Contributor apps.
Much like the process for installing the SMART TeamWorks 4 meeting server, installing the web portal for SMART TeamWorks 4 Server involves two main procedures:
Create a new site for the web portal using the Internet Information Service (IIS) Manager.
Configure the web portal's web.config file.
Note
To install the web portal, you will use the RMS Web Portal for IIS files you previously downloaded. See Downloading the installation files.
To install the web portal
Open File Explorer and browse to the IIS server’s file location. By default, the location is C:\inetpub\wwwroot\.
Create a new folder called WebPortal.
Copy the files from the RMS Web Portal for IIS folder to the WebPortal folder you created in the previous step.
Right-click the WebPortal folder and select Properties.
On the Security tab, select IIS_IUSRS under Group or user names, and click Edit.
Modify the permissions to give IIS_IUSRS Modify and Write permissions.
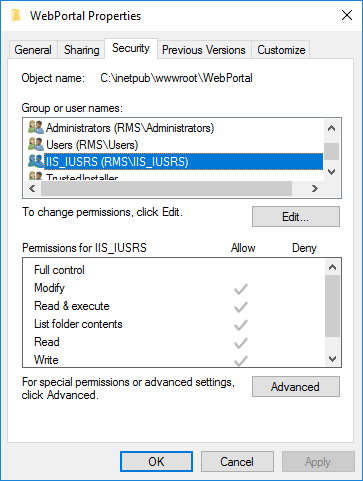
Important
Confirm that these permission settings are propagated to sub-folders and files.
Click OK to close the WebPortal Properties dialog box.
Open Internet Information Service (IIS) Manager, right-click the Sites folder, and select Add website.
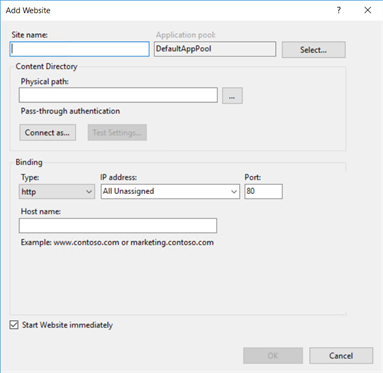
Make the following changes:
Field
Setting
Site name
Enter WebPortal.
Physical path
Enter the path to the WebPortal folder you created:
C:\inetpub\wwwroot\WebPortal
In the Binding section, assign a dedicated IP address for the site, then use the following security settings:
Setting
Option 1 (recommended)
Option 2
Type
https
http
Port
443
80
Note
The recommended settings in Option 1 provide better security, but they are only available if at least one SSL certificate in installed on the Web Server IIS. If you do not have an SSL certificate, use the less secure Option 2 settings.
Enter a Host name in the format of webportal.companyname.com. For example, webportal.smartteamworks.com. This is your web portal’s URL.
Note
This name should be resolvable within the local network or from the internet, based on your choice and configuration.
Click OK to add the site and return to the main Internet Information Service (IIS) Manager window.
Confirm that the application pool for the WebPortal site has the following settings:
Field
Setting
Name
Enter WebPortal.
.NET CLR version
.NET CLR Version 4.0.xxxxx
Managed pipeline mode
Integrated
After you finish adding the MeetingServer site, configure the web.config file.
To configure the Web.config file for the SMART TeamWorks 4 web portal
Open File Explorer and browse to the WebPortal folder you created: (C:\inetpub\wwwroot\WebPortal).
Open the Web.config file in a text editor and find the
<system.web>section. Configure the following settings:globalization uiCulture="en-US" culture="en-US"Where both instances of
"en-US"are replaced with your organization’s culture.machineKeyvalidationKey="2D32F2D5D2D569938C8E99B4D4DC263A80F7842CBE2D2F1638323D68081BE795542A2472A5D15054A22267EC59941BDDE50386818C9103B02121BB8E60B5E312"decryptionKey="A47E22BC79E0808F9B6959F6A4DCFAAFD48627473C8DADA46856DA2767E5FF05" validation="SHA1" decryption="AES"Where
machineKeyvalidationKey= the same unique machine key you entered when configuring the Web.config file for the SMART TeamWorks 4 meeting server. See Use an online service to generate a unique machine key for your installation, such as AllKeysGenerator (allkeysgenerator.com/Random/ASP-Net-MachineKey-Generator.aspx)..
Find the
<connectionStrings>section and configure the following settings:add name="IdentityDbContext" connectionString="Server=YOUR_SQL_SERVER;Database=YOUR_RMS_DATABASE;User Id=YOUR_DB_USERNAME;Password=YOUR_DB_USERPWD;MultipleActiveResultSets=True;"Where...
YOUR_SQL_SERVERis the host name or IP address of your SQL Server.YOUR_RMS_DATABASEis the name of your SMART TeamWorks 4 database. For example, TWDatabase. See To create a new user with SQL authentication.YOUR_DB_USERNAMEis the user name for the user you created to access the SMART TeamWorks 4 database. See To create a new user with SQL authentication.YOUR_DB_USERPWDis the password of the user you created to access the SMART TeamWorks 4 database. See To create a new user with SQL authentication.
add name="RMSEntities" "metadata=res://*/Entities.RMSModel.csdl|res://*/Entities.RMSModel.ssdl|res://*/Entities.RMSModel.msl;provider=System.Data.SqlClient;provider connection string="data source=YOUR_SQL_SERVER;initial catalog=YOUR_RMS_DATABASE;user id=YOUR_DB_USERNAME;password=YOUR_DB_USERPWD;multipleactiveresultsets=True;application name=EntityFramework""Where...
YOUR_SQL_SERVERis the host name or IP address of your SQL Server.YOUR_RMS_DATABASEis the name of your SMART TeamWorks 4 database. For example, TWDatabase. See RMS Database installation.YOUR_DB_USERNAMEis the user name for the user you created to access the SMART TeamWorks 4 database. See To create a new user with SQL authentication.YOUR_DB_USERPWDis the password of the user you created to access the SMART TeamWorks 4 database. See To create a new user with SQL authentication.
Save the file.
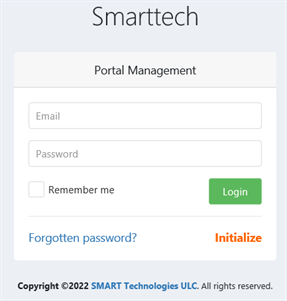
From the Internet Information Service (IIS) Manager, restart the WebPortal site.
Test the new web portal by opening a browser and entering the web portal's IP address or URL (for example, webportal.smartteamworks.com). You should see a page something like this one:
Keywords |
|