Getting started
Create .notebook files that include graphics, text, tables, lines, shapes, animations and more. Present your file and keep your class’s attention as you move and interact with these objects. When your class provides comments and suggestions, write their input on the page using digital ink. You can open .notebook files in SMART Notebook software on a Windows, Mac or Linux computer. You can also export your file in a variety of formats, including HTML and PDF.
Important
Access to the premium features of Notebook 17.1 requires an activated product key.
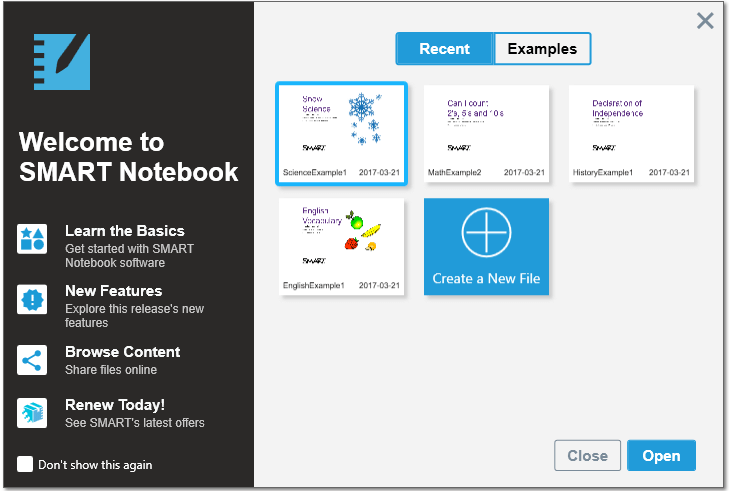
When you start SMART Notebook software the first time, the Welcome screen opens. Select New Features on the Welcome screen to learn more about the software and its new features.
Select the Don’t show this again check box if you don’t want the Welcome screen to appear each time you open SMART Notebook software. You can access the Welcome screen anytime from SMART Notebook software Menu > Help.
In Notebook, select File > New to create a new, blank file. See Creating and working with files and pages for more information.
SMART Notebook 17.1 software now allows you to sign in with your Google or Microsoft account. (Sign in is required to create and play most SMART lab activities.) After you sign in with one of these accounts, you and your students won’t have to sign in each time you want to use SMART response 2 or other activities that require sign in.
With one-time sign in, you can:
Have your students connect to your SMART lab and response 2 activities with one persistent code (students won’t have to reconnect every time).
Share lessons with your peers using an online link
Share your lessons on SMART Boards with iQ technology
Access limited features of Notebook after the trial period has ended
Note
If you skip the sign in, you might not be able to use the activity that’s prompting you to sign in.
You will be prompted to sign in:
When using the SMART lab Creation Wizard for the first time
When using the SMART response 2, Shout It Out! and Monster Quiz activities
When using the Hand out activity
When you start the software subsequent times, a new blank file opens automatically. To open the tutorial, select Help > Tutorial.
Learn more about Account sign-in.
After the trial period, Notebook opens in limited mode unless you have activated it. Limited mode allows a user to access limited features of SMART Notebook software outside a trial or purchased subscription.
When in limited mode, a watermark appears on the screen if you are not using a SMART Board. Learn more at SMART Notebook Features.
The Welcome screen gives you timely information, links to new Notebook features and content, file sharing, the latest subscription information, and upgrade offers. You can also access your recent Notebook files.
The SMART Notebook software interface consists of the these components:
Menu
Toolbar
Tabs (Page Sorter, Gallery, Attachments, Properties, and Add-ons)
Page area
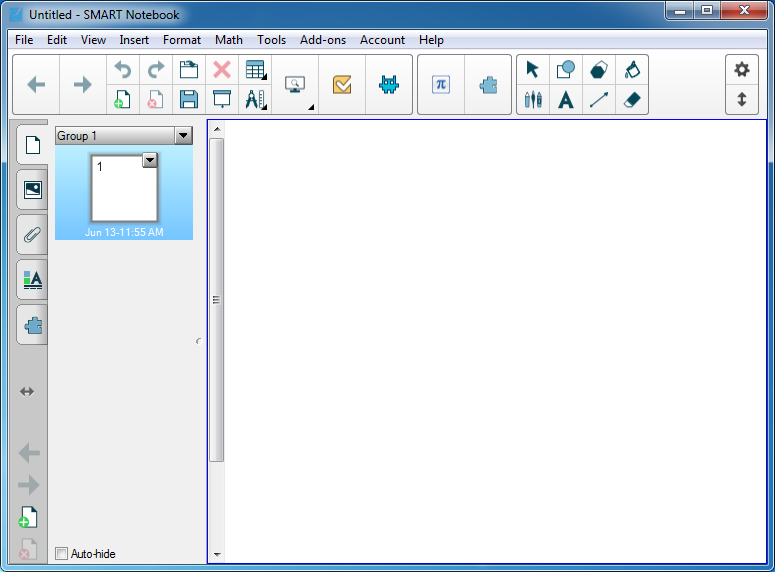
The menu contains the commands for managing files and objects.

From the toolbar, you can select and use a variety of commands. The toolbar buttons are organized in panels.
Panel | Description |
|---|---|
Actions | The Actions panel includes buttons for browsing and making changes to .notebook files:  |
Add-ons | If you install SMART Notebook add-ons, an add-on panel appears to the right of the Actions panel:  |
Tools | The Tools panel includes buttons for creating and working with basic objects on pages: 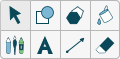 |
Contextual | When you select a button in the Tools panel, additional buttons appear. For example, if you select Pens
Press the Pen Types button to select a pen type and then press one of the line type buttons to write or draw digital ink in that line type. You can customize a selected line type using the options in the Properties tab and then save your customizations for future use (see Changing object properties). Use the three property selectors beside the line type buttons to set the color, thickness, style and transparency of digital ink. If you click other buttons in the Tools panel, similar sets of additional buttons appear. |
 , the following additional buttons appear:
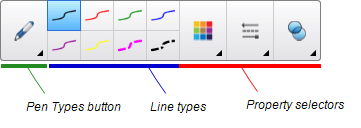
Note
The commands in the toolbar are also accessible from the menu.
You can add, remove and change the position of buttons on the toolbar by pressing Customize the toolbar  (see Customizing the toolbar).
By default, the toolbar appears at the top of the SMART Notebook software window. You can move it to the bottom by pressing Move toolbar to top/bottom of window  . This is useful in situations where you or your students can’t reach the toolbar when it’s at the top of the window.
The Page Sorter displays all the pages in the open file as thumbnails and automatically updates these thumbnails as you change the contents of the pages.
Using the Page Sorter, you can:
To open the Page Sorter, press Page Sorter .
.
You can move the Page Sorter from one side of the SMART Notebook software window to the other by pressing Move Sidebar .
.
You can resize the Page Sorter by dragging its border left or right. You can also hide the Page Sorter when you aren’t using it by selecting the Auto-hide option. To display the Page Sorter when it’s hidden, press Page Sorter.
Note
For Windows operating systems: if you reduce the Page Sorter to its minimum size, the auto-hide option turns on automatically.
The Gallery tab contains clip art, backgrounds, multimedia content, files and pages that you can use in your lessons. The Gallery tab also provides access to other online resources. For more information, see Inserting content from the Gallery.
You can also add your own and other teachers’ content to the Gallery tab.
To open the Gallery tab, press Gallery  .
.
You can move the Gallery tab from one side of the SMART Notebook software window to the other by pressing Move Sidebar.
You can resize the Gallery tab by dragging its border left or right. You can also hide the Gallery tab when you aren’t using it by selecting the Auto-hide option. To display the Gallery tab when it’s hidden, press Gallery .
Note
For Windows operating systems: if you reduce the Gallery tab to its minimum size, the auto-hide option turns on automatically.
The Attachments tab displays the files and web pages attached to the current file.
To open the Attachments tab, press Attachments .
.
You can move the Attachments tab from one side of the SMART Notebook software window to the other by pressing Move Sidebar.
You can resize the Attachments tab by dragging its border left or right. You can also hide the Attachments tab when you aren’t using it by selecting the Auto-hide check box. (To display the Attachments tab when it’s hidden, press Attachments .)
Note
For Windows operating systems: if you reduce the Attachments tab to its minimum size, the auto-hide feature turns on automatically.
The Properties tab enables you to format objects on a page, including digital ink, shapes, lines, text and tables. Depending on the object you select, you can change:
The color, thickness and style of lines
The transparency and fill effects of objects
The font type, size and style of text
The animation of objects
The Properties tab displays only the options available for the object you select. For more information about displaying and setting object properties in the Properties tab, see Changing object properties.
To open the Properties tab, press Properties .
.
You can move the Properties tab from one side of the SMART Notebook software window to the other by pressing Move Sidebar.
You can resize the Properties tab by dragging its border left or right. You can also hide the Properties tab when you aren’t using it by selecting the Auto-hide option. To display the Properties tab when it’s hidden, press Properties.
Note
For Windows operating systems: if you reduce the Properties tab to its minimum size, the auto-hide option turns on automatically.
The Add-ons tab enables you to work with SMART Notebook software add-ons.
To open the Add-ons tab, press Add-ons  .
.
You can move the Add-ons tab from one side of the SMART Notebook software window to the other by pressing Move Sidebar.
You can resize the Add-ons tab by dragging its border left or right. You can also hide the Add-ons tab when you aren’t using it by selecting the Auto-hide option. To display the Add-ons tab when it’s hidden, press Add-ons .
Note
For Windows operating systems: if you reduce the Add-ons tab to its minimum size, the auto-hide option turns on automatically.
The page area displays the contents of a selected page in a file. This is the area of the page where you create and work with objects.
Keywords |
|
Related documents |