Using SMART response 2
Available within SMART Notebook software, response 2 is a highly intuitive and simplified assessments tool, making it easier, quicker and more natural to create actionable question sets. Focusing on formative assessments, the new tool supports the need for educators to effectively assess students in order to guide learning. Students access the assessments tool by navigating to classlab.com on their mobile devices.
To start the response 2 assessment tool
To begin using the response 2 assessments tool, open it from Notebook by pressing the response 2 icon . The response 2 setup dialog box opens. You can then begin to create and save question sets. Each question requires at least two answers. Keep questions under 150 characters for optimal performance.
To create a SMART response 2 question set
Open response 2 from Notebook by pressing the response 2 icon
. The response 2 Add Content dialog box opens.
From the Add Content dialog box, select the type of quiz you want to create. You can create multiple choice, true or false, multiple answer, poll/opinion or short answer questions.
The quiz question set you choose determines the answer format. For example, a multiple choice quiz will give four potential answers from A through D, while a true or false quiz will give only True and False answers for you to complete.
Select the correct answer for each question.
To add another question to your quiz, press Add Question.
Press Save
 to save the quiz. You can use it later for other lessons.
When completed, press Next.
OR
Press Previous to go back to the previous page and edit your questions or add more questions.
Press Finish.
After a few moments the activity will load and will be ready to use.
To create a SMART response 2 question set from a previously saved file
From the Notebook menu, press Add Page. A new Notebook page opens.
Open response 2 from Notebook by pressing the response 2 icon
. The response 2 Add Content dialog box opens.You can also select response 2 from the SMART lab Creation Wizard.
Tap Load
 to load a previously saved file.
The Load Content selection dialog box opens.
Select the file to load, then press Load.
The question set loads and appears in the Review Content dialog box. While in the Review Content dialog box, you can also delete questions from your quiz.
To delete a question, press
 .
. Select Finish.
After a few moments the activity will load and will be ready to use.
To add questions to a question set
In the response 2 Add Content dialog box, press Add Question. The Questions dialog box opens.
Add questions as required.
Press Save
to save your question set. You can then use it later.Press Next.
The question set loads and appears in the Review Content dialog box.
OR
Press Previous to go back to the previous page and edit you questions.
Press Finish.
After a few moments the activity will load and will be ready to use.
To add images to a SMART response 2 question set
Press the Add Image icon
 .
.An Open dialog box appears.
Select the image to add to the list and press Open.
The image appears in the Add Content dialog box. You can also drag an image into the dotted blue box.
After all answers have been entered, press Add Question to add another question to the set.
Press Done. The Add Content dialog box opens. Edit, remove or add questions as needed.
Press Finish. After a few moments the question set will be built and will be ready to use. Students will see the activity and activity identification number on the SMART Board.
Press Start for Students. Students can now use their mobile devices to access the response 2 activity.
For more information about SMART response 2 and Response version, see the SMART response 2 FAQs.
To convert previous versions of SMART Response files
Previous versions of SMART Response files will be converted so that they open in SMART response 2. A dialog box appears when you attempt to open a file from a previous version of SMART Response:
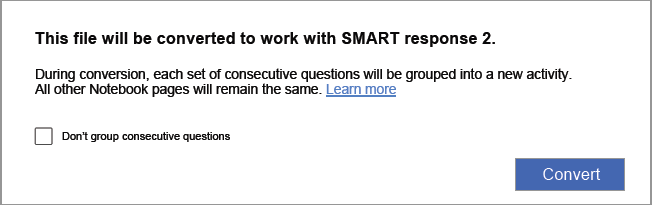
Press Convert to convert the old SMART Response questions. Each set of consecutive questions will be grouped into a new SMART response 2 activity.
If you don???t want to group consecutive questions, select the Don???t group consecutive questions check box.
If you select the Don???t group consecutive questions check box, each SMART Response page in the file will get a new single-question response 2 activity inserted on a new page in front of it. You will see two pages for every SMART Response page in the original SMART Response file.
Press Convert to confirm the file conversion.
The converted Notebook file opens.
A banner appears indicating that the file has been converted. Select Learn More on the banner for additional information.
Important
The conversion process does not capture certain pieces of information from SMART Response:
Pictures, annotations and cross references are not preserved
Untranslated Yes/No and True/False labels will show as text questions A) True and B) False. If the file has been translated, the options will still be Yes/No and True/False.
Superscript and subscript will be formatted but no other text formatting will be converted
Number character references will not be maintained
Math question types will not be supported
Empty question titles will show the following default text: Incomplete question. Edit activity to complete
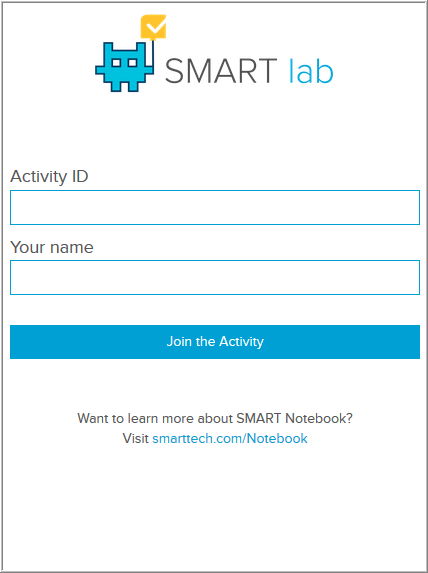
Once the activity is running, it can be accessed on a mobile device if the device meets the necessary browser and connectivity requirements. See Using Shout it Out!.
The student uses the browser on the mobile device to browse to classlab.com.
When in the classlab.com website, the student enters the activity identification number.
The Activity instructions dialog box opens.
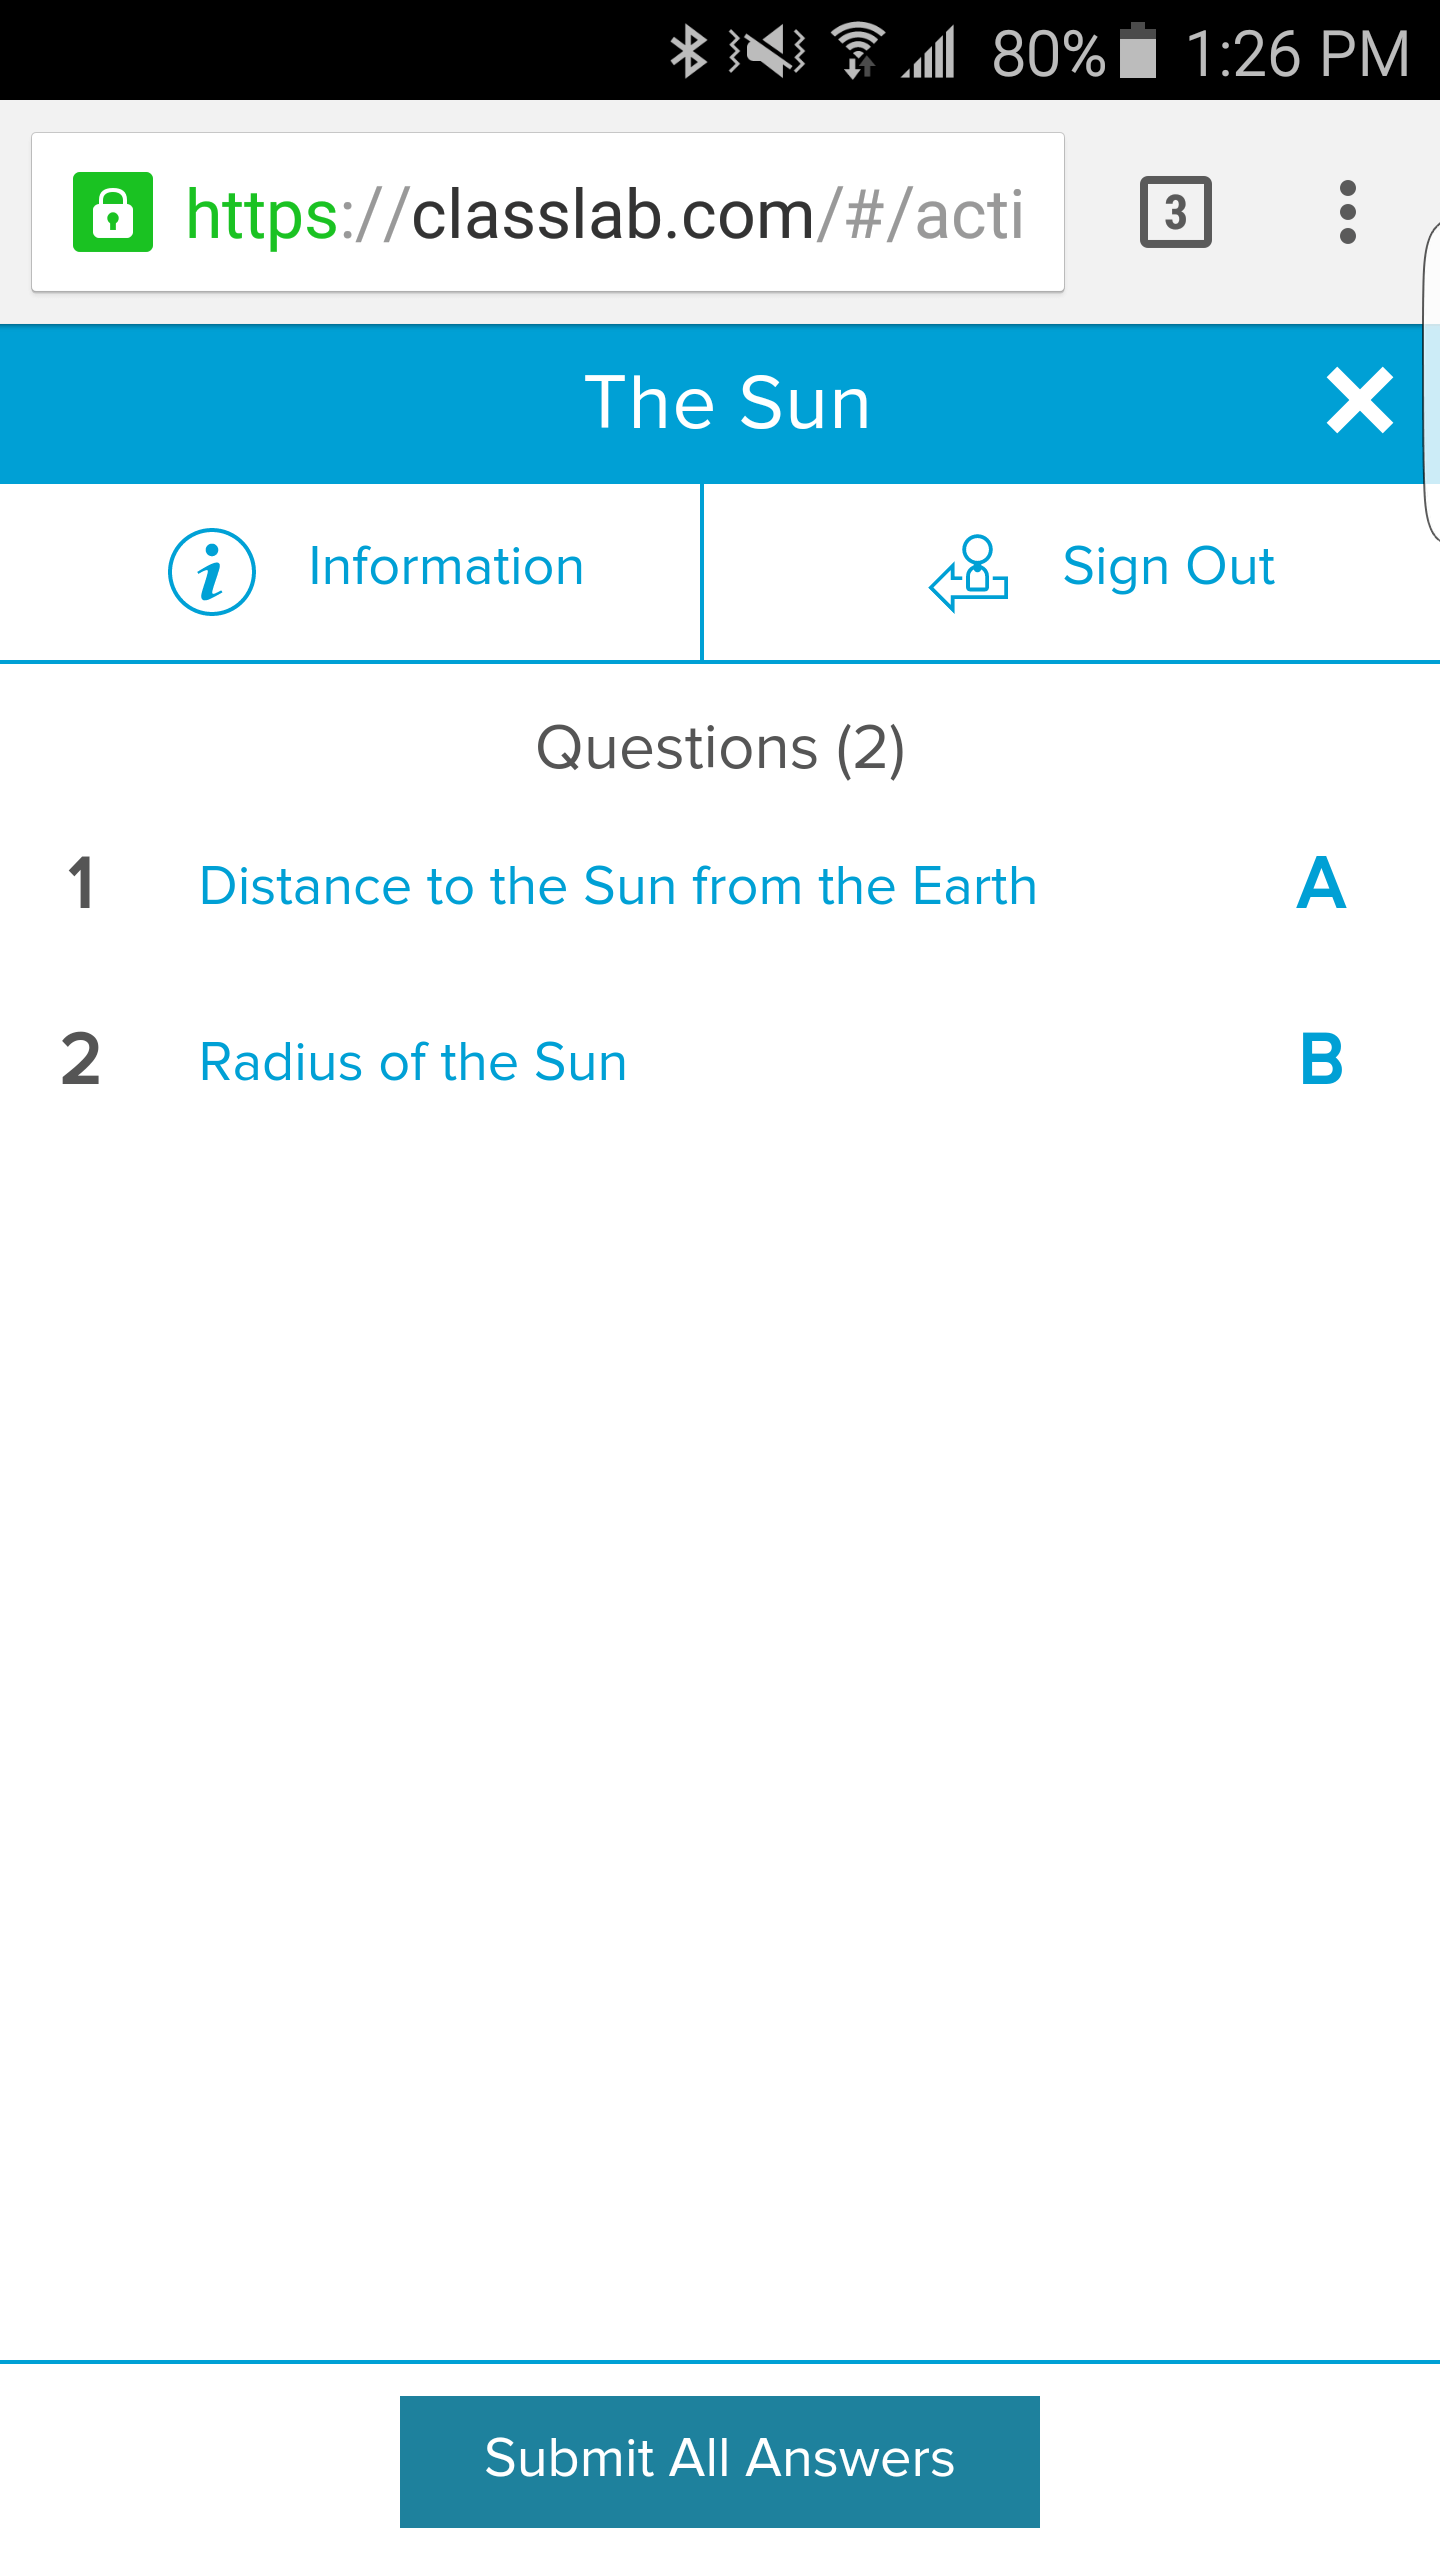
Press OK. The first quiz question opens.
Select the answer to the quiz question and then press the arrow key to advance to the next question.
when all questions have been answered press the arrow key once more to advance to the submit questions page. On this page you can get information about the quiz or sign out of the quiz
Press Submit All Answers.
A confirmation pages opens.
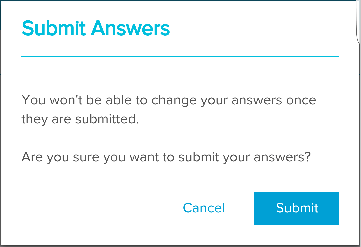
Press Submit. The teacher will review results with class.
To review results on the device
When the teacher presses review, the student gets instant feedback on the device for each question. Tapping a question on the final review pages takes the user to that question to see what selections are available
The percentage correct is indicated at the bottom of the device screen.
When the review is complete, press Sign Out. A prompt asking the user to confirm leaving the activity opens.
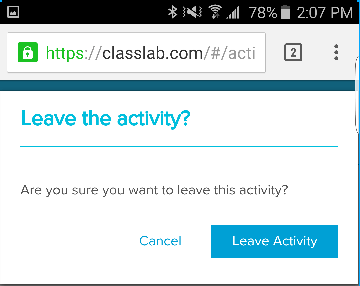
Press Leave Activity. The activity closes and the student is returned to the initial classlab.com website.
Keywords |
|
Related documents |