Adding dice, spinners, timers, and other interactive widgets
SMART Notebook’s Gallery tab provides interactive widgets that you can use to add interactive elements to your lesson. There are five widgets available in SMART Notebook:
Clock
Dice
Pull tab
Spinner
Timer
Widgets are located in SMART Notebook’s Gallery tab.
To add a widget
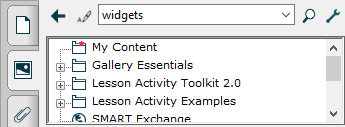
Open the Gallery tab.
In the search bar, type widgets and click Search
 .
.
Click and drag the widget you want to add to the Notebook page.
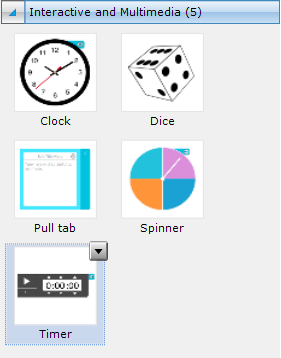
Customize the widget to suit your needs. Expand the sections below to learn more about the options for customizing each widget.
Change the clock’s appearance by selecting a color, and choosing a clock style: analog, digital, or both.
Students can move the clock’s hands to practice telling time and to work on elapsed time problems.
To customize the clock widget
Select the clock widget on the Notebook page and select the settings icon.
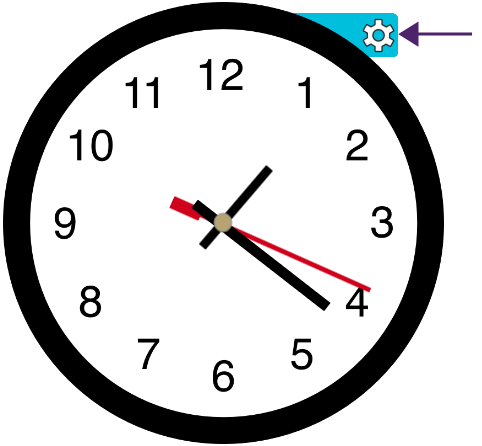
The widget’s editor opens:
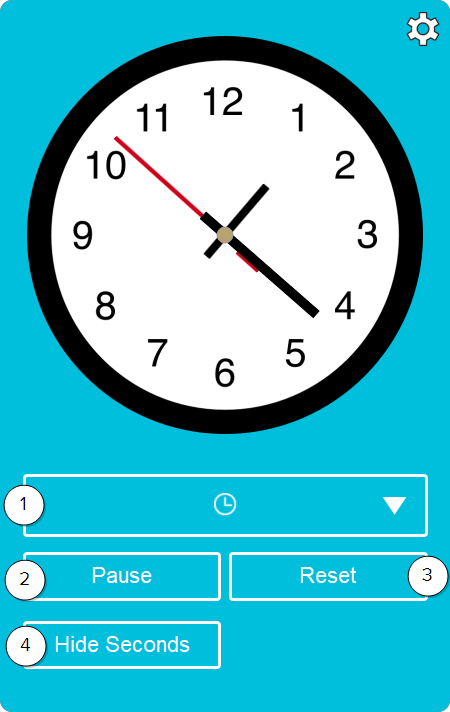
No.
Description
1
Select the type of clock you want to use:
Analog
Digital
Both
2
Click to pause the clock.
3
Click to reset the clock’s time.
4
Select to hide the seconds on the clock.
Click the settings icon again to close the editor and save the changes.
You can add words, use letters, change the numbers, or use images for each die face. You can also use more than one die.
Have questions on each face of the die, roll the die to see what question the students will respond to. Or use multiple die with numbers to make a math game. Students can add or subtract the number shown on one die with the numbers shown on the other die. You can also use letters instead of numbers and have students roll the die to build words.
To customize the dice widget
Select the dice widget on the Notebook page and select the settings icon.
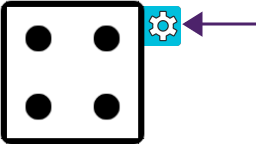
The widget’s editor opens:
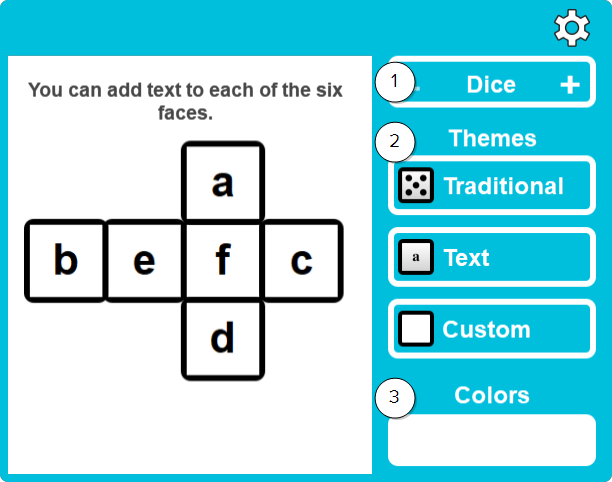
No.
Description
1
Choose how many dice you want.
2
Choose the type of dice you want:
Traditional: The traditional six-sided dice
Text: Use the default letters, or click the die’s faces to edit the text.
Custom: Add images. To add images, insert the image on the Notebook page, then drag it on the die’s face to insert it.
3
Choose a color for the die.
Click the settings icon again to close the editor and save the changes.
Use the interactive tab to hide directions, answers or challenge questions. Choose which side the tab appears on, add images, text, and change the color of the pull tab.
To customize the pull tab widget
Select the clock widget on the Notebook page and select the settings icon.
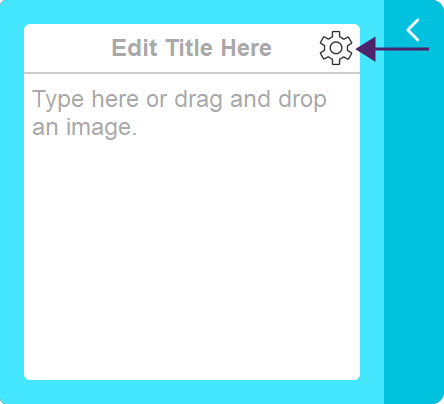
The widget’s editor opens:
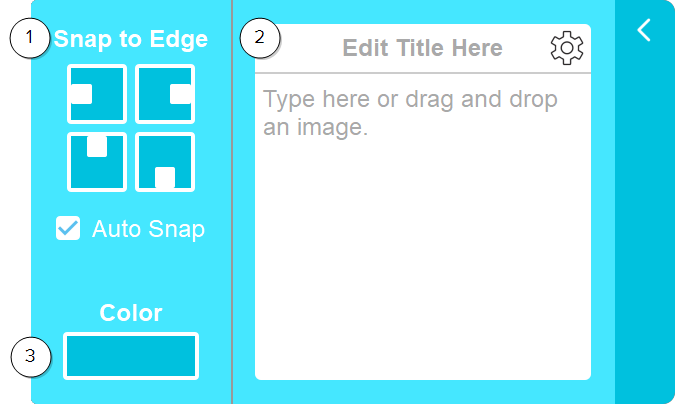
No.
Description
1
Select the edge you want the pull tab to be on.
2
Edit the content of the pull tab. You can add text or images.
3
Choose a color for the pull tab.
- Click the settings icon again to close the editor and save the changes.
Customize the spinner by adding words, new sections, or changing the colors.
To customize the spinner widget
Select the spinner widget on the Notebook page and select the settings icon.
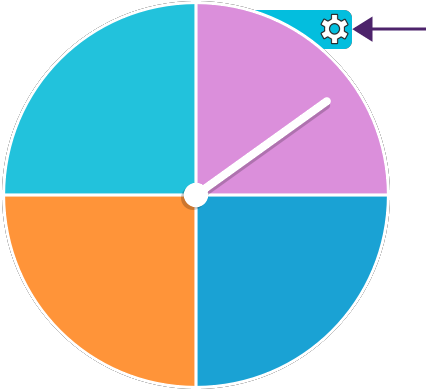
The widget’s editor opens:
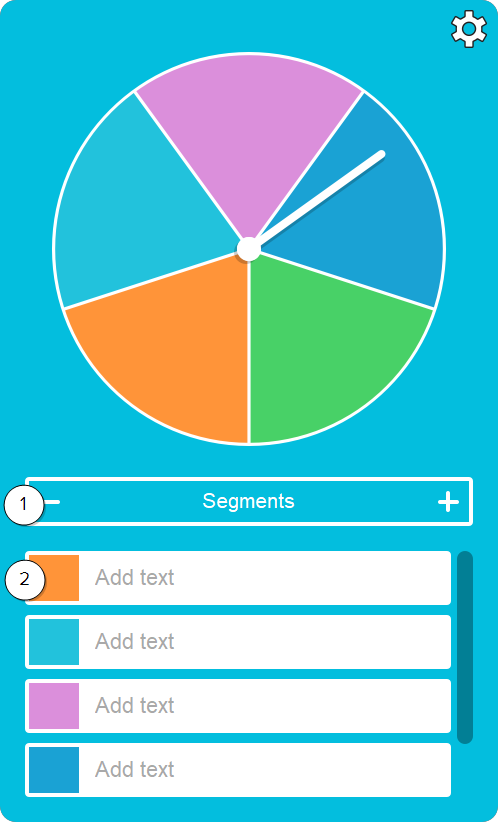
No.
Description
1
Choose the number of segments you want the spinner to have. 2
Edit each segment by choosing a color and adding text. Click the settings icon again to close the editor and save the changes.
Use the timer to help students know when to rotate among stations, or have them race the clock to complete an activity.
To customize the timer widget
Select the timer widget on the Notebook page and select the settings icon.

The widget’s editor opens:
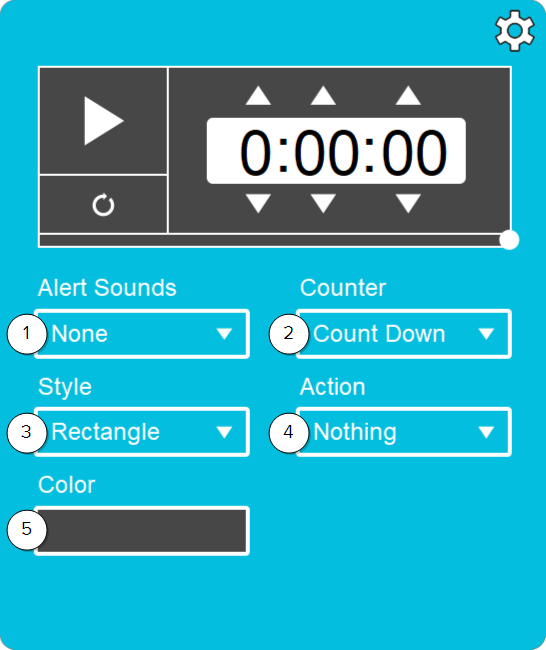
No.
Description
1
Choose the alert sound. 2
Choose whether the timer counts up or down. 3
Choose a rectangle or circle style for the timer. 4
Choose an action to perform when the timer ends. 5
Choose a color for the timer.
Click the settings icon again to close the editor and save the changes.