Using your SMART Document Camera
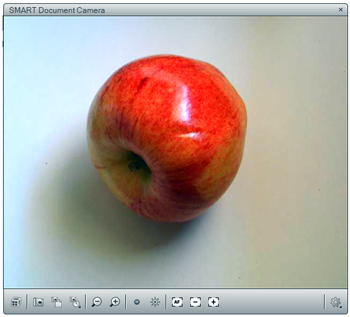
Using your SMART Document Camera, you can display 3D objects and capture an image to a SMART Notebook page.
To open a SMART Document Camera window
Important
Your document camera should be in Camera mode. SMART Notebook software also works with the camera in the Computer Pass-Through mode. See your document camera’s user’s guide for more information.
Connect your SMART Document Camera to your computer and turn on the document camera.
Tap SMART Document Camera
 .
.A SMART Document Camera window appears.
Place the object or objects you want to display under the camera.

Tap any of the following on the menu bar to adjust the image.
Menu option
Description

Zoom out.

Zoom in.

Decrease brightness.

Increase brightness.

Focus automatically.

Focus out manually.

Focus in manually.

Change the appearance of the image: rotate it 180º, define the image color, black and white or film negative. You can also start and stop Microscope mode and start Mixed Reality Tools for SMART Document Camera automatically.

Start Mixed Reality.

Insert a screen capture on the current page and then close the window.

Capture an image and insert a screen capture on a new page and keep the current window open.
To take a series of screen captures
Open a SMART Document Camera window.
Tap Capture with Time-Lapse
 on the SMART Document Camera window menu bar, and then select a period of time. (For example, if you want to take a screen capture every 15 seconds, select 15 Seconds.)
When you’re done, press
 to stop recording.
Note
The display
 appears in the bottom left corner of your SMART Notebook page. It displays the time that has lapsed since the last screen capture and the number of screen captures taken.
To use a microscope
Connect your document camera to a microscope. See your document camera’s user’s guide for more information.
Open a SMART Document Camera window.
Tap Additional Settings
 on the SMART Document Camera window menu bar, and then select Start Microscope Mode.
Note
The Additional Settings
 button doesn’t appear if you’re using a SMART Document Camera 230 with SMART Notebook software.
Tap Additional Settings
 , and then select Stop Microscope Mode when you’re done.
3D models are available from the 3D Objects folder in Lesson Activity Examples and the SMART Exchange website (exchange.smarttech.com) as well as the Trimble 3D Warehouse. You can also insert your own 3D models if they are in one of the following formats:
COLLADA (.dae)
3D Object (.obj)
FBX (.fbx)
Note
Textures and other information for some 3D models are stored in separate files and folders. When you insert these 3D models, ensure the 3D model file is located in the correct folder structure with the supporting files and folders.
To insert a 3D model
Select Insert > 3D Object.
The Insert 3D File dialog box appears.
Browse to and select the 3D model you want to insert.
Tap Open.
The 3D model appears on the page.
Trimble 3D Warehouse is an online repository of 3D models. The Gallery tab in SMART Notebook software includes a link to Trimble 3D Warehouse. Using this link, you can search for 3D models and download them to your computer. You can then insert the 3D models into your .notebook files.
To download 3D models from Trimble 3D Warehouse
Tap the Gallery
 tab.
tab.Tap Trimble 3D Warehouse.
Tap Click here to browse Trimble 3D Warehouse.
Trimble 3D Warehouse appears in a new window.
Search or browse for a 3D model that you want to download.
Select the model.
Tap Download, and then select the Collada (.zip) file.
Notes
When you first download a 3D model, Trimble 3D Warehouse could prompt you for a nickname.
If you’re using OS X operating system software and you cancel the download, the 3D model still saves to the
Downloadsfolder.
Save the .zip file to your computer.
- Extract the contents of the .zip file to a folder on your computer.
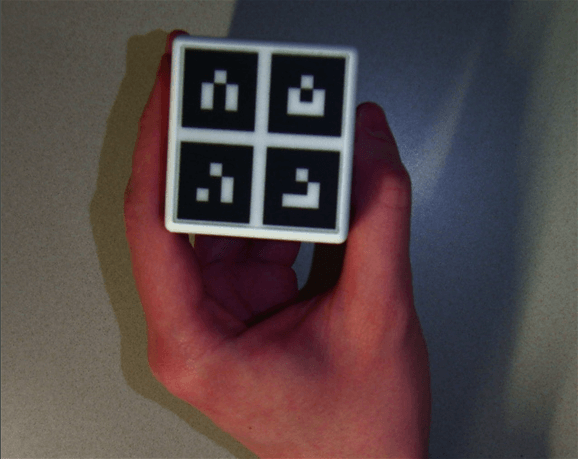
You manipulate 3D models using your SMART Document Camera and the mixed reality cube.
Note
3D models created with SketchUp 2015 are not compatible with SMART Notebook 20 software. Model files from that version cannot be inserted into SMART Notebook software. As an alternative, use SketchUp 2014 or earlier versions of the 3D model files.
To manipulate a 3D model using the mixed reality cube
Connect your SMART Document Camera to your computer and turn on the document camera.
Open the .notebook file, and then display the page containing the 3D model.
Place the mixed reality cube under the SMART Document Camera, showing one side of the cube to the camera.

SMART Notebook software enters Mixed Reality mode and assigns the 3D model to the cube. If there is more than one 3D model on the page, move the cube until the animation on the page indicates that the cube is connected to the 3D model you want to manipulate.
Note
SMART Notebook software enters Mixed Reality mode in this situation only if a 3D model is on the page. Alternatively, you can enter Mixed Reality mode by tapping SMART Document Camera
 in the toolbar, and then tapping Start Mixed Reality
 in the SMART Document Camera window.
Do any of the following:
To move the 3D model on the screen, move the cube.
To rotate the 3D model on the screen, rotate the cube in your hand.
To unassign the 3D model from the cube, cover the cube’s markings with your hand.
Note
If you experience any of the following symptoms, the cause may be issues with tracking:
The 3D model doesn’t connect to the cube.
The 3D model shakes when it’s connected to the cube.
The 3D model sporadically disconnects from the cube.
SMART Notebook software enters Mixed Reality mode when the cube is under the camera even if you aren’t moving the cube.
Tips
As you move and rotate the cube in your hand, ensure you don’t cover the symbols on the cube’s surface.
To hide the image from the SMART Document Camera and show only the 3D model, move the transparency slider to the left.
If you’ve purchased a second cube from SMART and there is more than one 3D model on the page, manipulate another 3D model by completing steps 3 and 4 with the other cube.
Note
The two cubes must have different patterns if you want to use them both at the same time.
When you’re done, move the cube (or cubes) away from the camera.
SMART Notebook software exits Mixed Reality mode after a few seconds.
To increase the contrast between the mixed reality cube and background, you can use the mixed reality mat available from the SMART Support website. The mat includes marks that indicate the area in which you can move the cube while in Mixed Reality mode.
To print the mixed reality mat, you need the following items:
A computer with Internet access and Adobe Reader or Acrobat software
A printer
Tape
To open and print the mixed reality mat
Open the appropriate mixed reality mat file in Adobe Reader or Acrobat.
Region
Page size
Link
U.S. and Canada
Letter (8 1/2" × 11")
Elsewhere
A4
Select File > Print.
The Print dialog box appears.
Select None in the Page Scaling drop-down list, clear the Auto-Rotate and Center check box, and then press OK.
Arrange the pages:
Page 1 is top left.
Page 2 is top right.
Page 3 is bottom left.
Page 4 is bottom right.
Set page 1 as the bottom page in your stack.
Overlap, orient and align the pages according to the guidelines, and then tape the pages together.
Note
Due to different page sizes and printing options, your pages may not align perfectly onto the guidelines. If that is the case, align the pages to the central crosshairs.
Tips
Use a light table or a tablet device set to a white background as an aid when aligning the pages.
To make the mat last longer, consider printing it on heavy cardstock.
To use the mixed reality mat
Place the mixed reality mat on your work surface.
Place the document camera over the darkened area on the mat.
Rotate the arm of the document camera upward until it’s at its highest spot.
Turn on the document camera.
Notes
The document camera image should show the target area in the center. You can adjust the mat slightly if necessary.
The lines on the mat indicate where you can position the mixed reality cube while in Mixed Reality mode (see Manipulating 3D models using Mixed Reality Tools for SMART Document Camera).
Keywords |
|

