Writing, drawing, and erasing digital ink
Digital ink is freehand text or objects you create using an interactive display’s pen or the Pens tool in SMART Notebook software. Digital ink enables you to quickly write or draw within your SMART Notebook software files, either as you create the files or when you present them to students.
After you create digital ink, you can erase it.
The easiest way to write or draw digital ink is to use an interactive display’s pen.
You can also create freehand objects using the Pens tool. The Pens tool enables you to write or draw with a variety of pen types:
Pen type | Purpose and example | Notes |
|---|---|---|
| Write or draw digital ink in a variety of colors and line styles.  | The Standard pen can be used for most writing applications. |
| Works much like the Standard pen type, but creates lines of varying thickness.  | The Calligraphic pen type is useful for teaching students handwriting. |
| Write or draw crayon-like digital ink.  | The Crayon pen type works best with artistic work, such as painting and coloring pictures, rather than writing. |
| Highlight text and other objects.  | Use the Highlighter pen to add emphasis to text. |
| Write notes that automatically convert to editable text.  | You can edit your text as you work without touching a keyboard. |
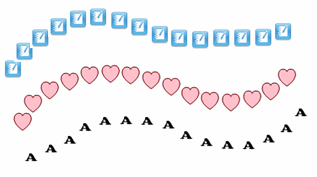
| Add colorful elements to your presentations.  | You can create custom Creative pen styles (see Creating custom Creative pen styles). |
| Write or draw paint-like digital ink.  | The Paint Brush pen type works best with artistic work, such as painting and coloring pictures, rather than writing. |
| Write or draw digital ink that fades after a few seconds. | You can also use the Magic Pen to open a magnification window or a spotlight window (see Using the Magic Pen). |
| Draw a variety of shapes with digital ink. | You can draw circles, ovals, squares, rectangles, triangles, and arcs (see Adding shapes with the Shape Recognition Pen tool). |
 Standard
 Calligraphic
 Crayon
 Highlighter
 Text
Text Creative
 Paint Brush
 Magic
Magic Shape Recognition
Select Pens
 .
.The Pen tools buttons appear.
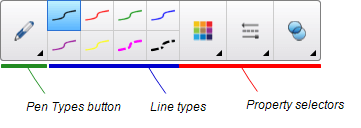
Tap Pen Types, and then select a pen type.
Select a line type and, if you want, customize the line type using the property selectors.
If you want to save the pen’s new properties as default settings for that tool, see Changing pen default settings.
Write or draw on the page.
Tips
Don’t rest your elbow or the palm of your hand on your interactive product’s surface while you write or draw.
If you write or draw multiple lines, SMART Notebook software automatically combines the lines into a single object. For example, if you write the letters of a word, the software combines the individual letters, enabling you to interact with the whole word. If you want to write words on the same line but don’t want them combined, leave a large gap between the words, use different pens, or briefly put the pen in the pen tray before you write another word.
After you write or draw, the ink becomes an object which you can select, then rotate, resize, and more.
The SMART Board interactive display’s pens come with default settings for ink color, thickness, and style. However, you can change a pen's default appearance within SMART Notebook by using the Properties tab.
Note
On a SMART Board 6000 or 7000 series interactive display, returning a pen to the tray resets the pen's properties to match the pen's physical color. To change these original settings, use the SMART Settings dialog box.
Use the SMART Settings dialog box to change the default pen settings for all applications.
To change pen tool defaults for SMART Notebook
Tap Pens
 , and then select the pen tool for which you want to change the defaults.
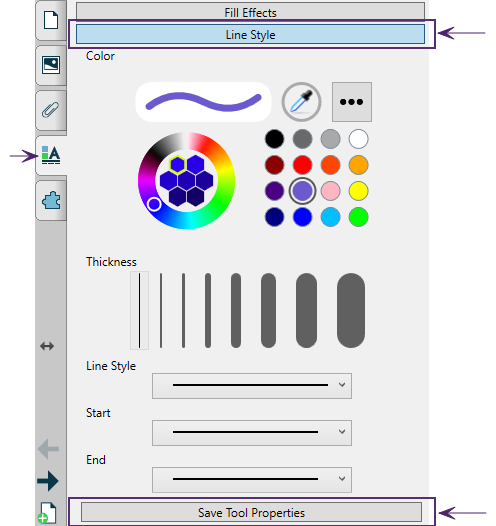
Open the Properties tab and tap Line Style.
Select the settings you want to use as the tool's default settings.
Tap Save Tool Properties.
To change pen defaults for all applications (Windows)
In Windows operating systems, tap the SMART Board icon
 in the Windows notification area on the right side of the Taskbar, and then select SMART Settings.
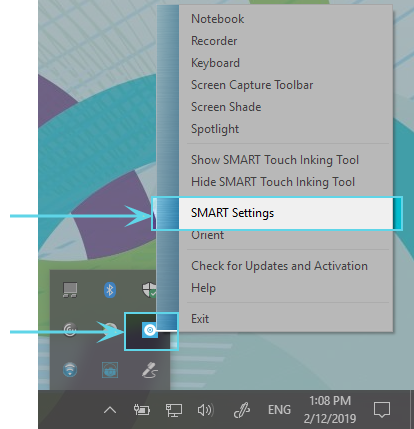
OR
In OS X operating system software, tap the SMART Board icon
in the Mac menu bar, and then select SMART Settings.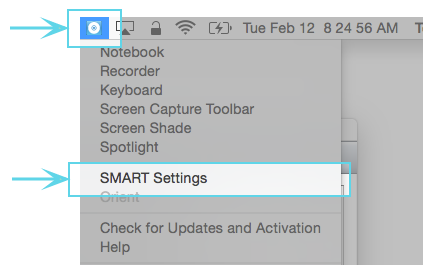
Note
If your computer isn’t currently connected to a SMART interactive product, the SMART Board icon includes an X in its lower-right corner
 .
.Select SMART Hardware Settings. If more than one SMART hardware product is connected to the computer, select SMART Board.
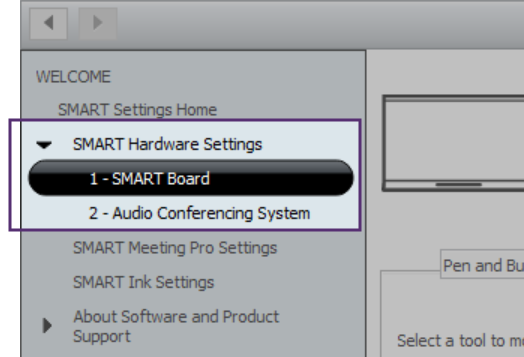
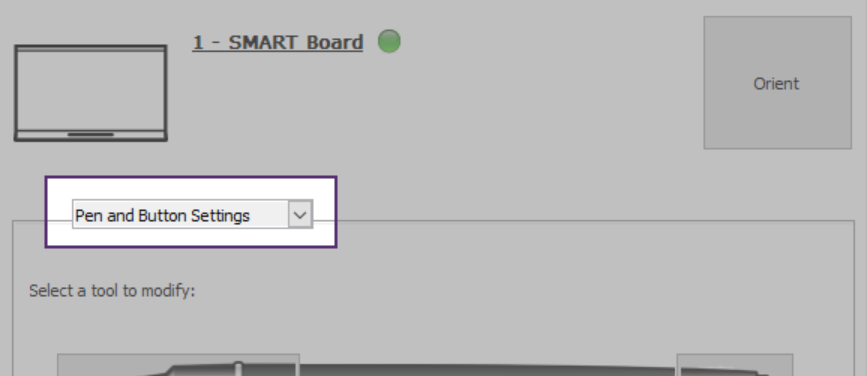
The settings for the SMART Board are displayed.
Select Pen and Button Settings from the drop-down menu to show the available pens for your SMART Board.
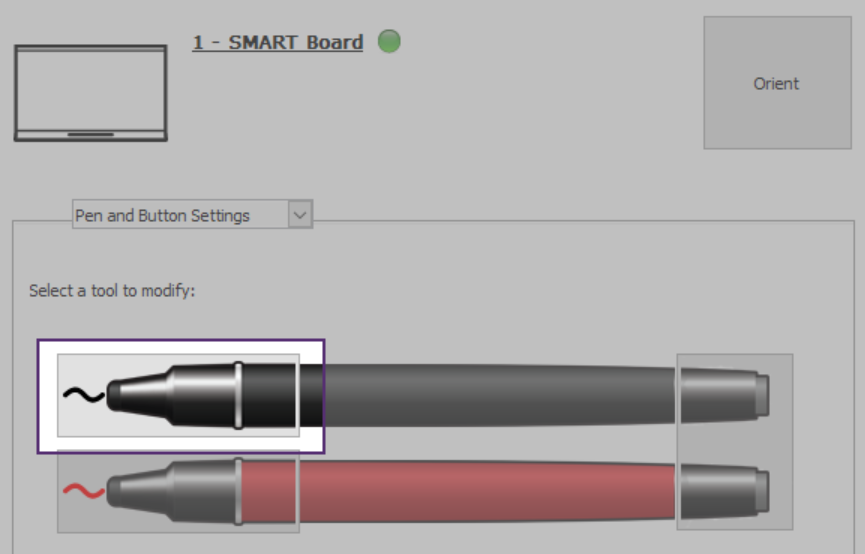
Select the pen whose defaults you want to change by tapping the pen's writing end. The pen colors shown in this window match the physical pens’ color to help you easily identify which pen you’re modifying.
In the Properties window that opens, tap Line Style and then select the new default properties you want to use.
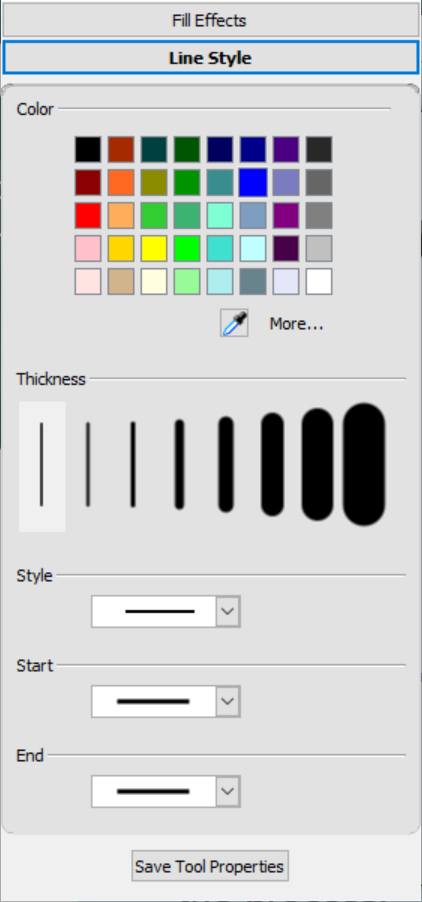
Tap Save Tool Properties. The new default settings are applied to the pen.
Tip
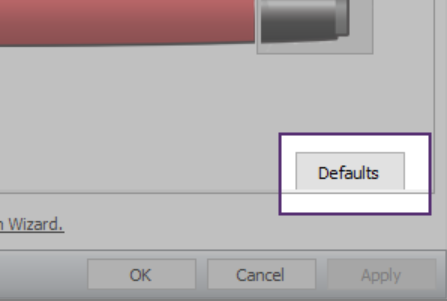
To return the pen to its factory default settings, tap Defaults in the bottom-right corner of the window, then tap Apply.
Tap OK to close the SMART Settings window.
SMART Notebook software includes eight Creative pen styles (see Writing, drawing and erasing digital ink). You can also create your own styles using pictures or objects on the current page.
To create a custom Creative pen using a picture
Select Pens
.The Pen tools buttons appear.
Tap Pen Types, and then select Creative Pen.
Select a line type.
If the Properties tab isn’t visible, tap Properties
 .
.Tap Line Style.
Select Use a custom stamp image.
Tap Browse.
The Insert Image File dialog box appears.
Browse to and select the picture you want to use for the Creative pen style.
Tap Open.
Write or draw digital ink on the page.
Tip
To resume using the default line type, select Use the default pattern.
To save your custom Creative pen style for future use, tap Save Tool Properties. You can later reset the Creative pen style (see Customizing the toolbar).
To create a custom Creative pen using an object
Select Pens
.The Pen tools buttons appear.
Tap Pen Types, and then select Creative Pen.
If the Properties tab isn’t visible, tap Properties
.Tap Line Style.
Select Use a custom stamp image.
Tap Select object, and then select an object on the page.
Write or draw digital ink on the page.
Tip
To resume using the default line type, select Use the default pattern.
To save your custom Creative pen style for future use, tap Save Tool Properties. You can later reset the Creative pen style (see Customizing the toolbar).
You can erase digital ink from your interactive display by using the eraser or the erasing gesture. If you’re erasing digital ink from a .notebook file page, you can also erase objects using the Eraser tool.
Note
Erasing works with digital ink. To remove other types of objects, such as shapes, lines, text, and pictures, delete them rather than erase.
To erase digital ink
Tap Eraser
 , and then select an eraser type.
Erase the digital ink.
Keywords |
|
Related documents |