Creating a Fill In the Blanks activity
Fill In the Blanks is a fun activity where students drag words or numbers into blanks. Write a sentence with up to ten blank spaces, then let students drag the words around the board to fill in the missing information that belongs in those blanks.
Here’s an example of a Fill in the Blanks activity based on Lewis Carroll’s nonsense poem, ‘‘Jabberwocky.’’

This example was created by typing the poem’s first two stanzas and then selecting words to appear as blanks.
Follow the instructions below to create your own version of this activity.
To create a Fill In the Blanks activity
Tap Activities
 in the SMART Notebook toolbar.
The Select an Activity dialog box opens.
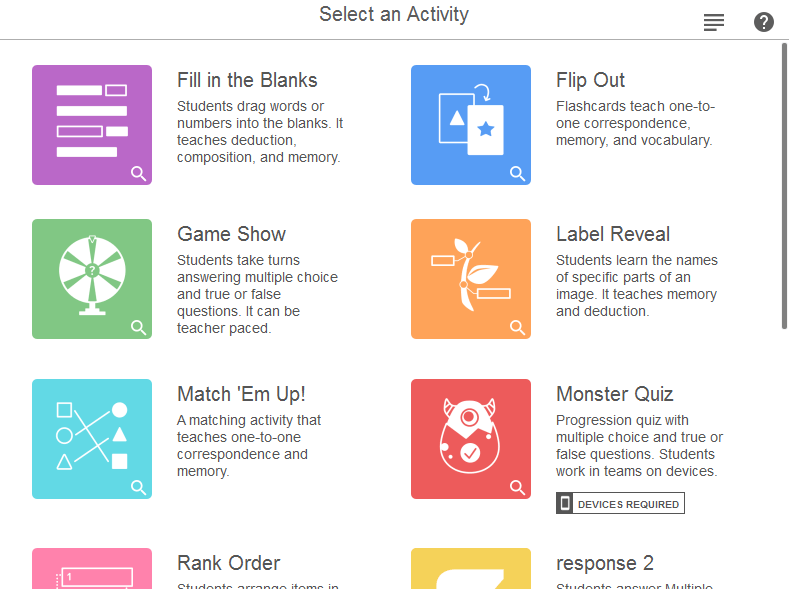
Select Fill In the Blanks.
The activity’s Add Content dialog box opens.
In the Edit text area, type or paste the text to use in the activity.
Tip
You can add up to 300 characters. The character counter shows you how many characters are left.
In the Check Answers section to the right of the text box, select one of these options:
When Prompted – a Check Matches button appears in the activity so players can decide when to check their work.
Instantly – players see whether the answers are correct right away.
Don’t check – players cannot see answers.
Below the text box, click Define Blanks and then click a word. The word becomes a blank that students will fill in.
Tips
Use the sizing handles to change your selection. Like this:
 .
.To remove a blank, click it again.
Continue to select words to appear as blanks.
When you’re done, click Next.
The Select a Theme dialog box opens.
Select a theme for your activity and click Finish.
The activity loads and then appears on a new lesson page.
Tip
If you’re delivering the activity at the classroom display, you can add a buzzer, timer, or randomizer game element to facilitate group play. Tap  to open the game element selector, and select the game element you want to add.
To play a Fill in the Blanks activity
Navigate to the lesson page that contains the activity.
Tip
To enable your students to play the activity or to make contributions from their own devices, see Connecting student devices.
Have students work individually, in teams using their devices, or as a class at the board, to drag the words or numbers into the correct blanks.
Tip
The activity controls appear in the top right corner of the page:
Use
 to turn activity sound on or off.
Use
 to restart the activity.
 Use
 to modify the activity.
To review a Fill in the Blanks activity
Tap the Check answers button that appears when the activity is complete.
If an answer is correct, a
 appears beside it. If an answer is incorrect, a
  appears beside it.
Keywords |
|
Related documents |