#WeareSMART
Quick reference posters
Get started using your display! Print the poster for the SMART Board display in your classroom and post it next to the board for quick reference. Make sure to continue scrolling down on this page to learn how to use the various features in your class.
Not sure which display you have? Learn how you can tell

Tips for using this guide

Use this guide anytime, anywhere, on any device.
Follow the Steps on a page to learn how to use a tool, then choose an Instructional idea to try.
Try one new tool and idea a week. Learn, try, and reflect!
Instructional ideas are divided into three stages:Engage your class, Enhance your lesson, and Extend learning. Choose the stage that’s right for you.
Make existing content more interactive.
Share and reflect! Review a page a week with your teaching team.
Are you campus leadership? Email a page a week as a challenge. Prizes help!
Collaborate with other teachers online @SMARTpln
Connect and share on social media #SMARTchampion

SMART Whiteboard
Steps
| 1 | Tap Whiteboard  Choose to add ready made resources or activities or add a page background. Add multiple pages with different backgrounds. To change the page background, the page you want to change. Tap |

 from the Whiteboard’s floating toolbar, then tap
 | 2 | Expand pages  Expand the whiteboard space so you’ll never run out of room. Tap the page and begin to move it until check appears. Use two fingers to navigate the space. |
| 3 | Customize your pen Change the pen’s thickness and color.
|
| 4 | Working with objects You can move, rotate, or resize an object (including ink) on the whiteboard page by tapping it. You can undo or redo the actions. |
| 5 | Delivering pages to student devices Students join hellosmart.com. Choose between Teacher paced and Student paced. Add a blank page or an instant Shout It Out activity. Note When you’re not in Delivery mode, changes to the file are saved automatically. |
| 6 | Create a new page background Tap Tap the image, then tap The image becomes the new page background and you can draw over it. |
 to search for and add a royalty-free image.
 Lock.
Lock.| 7 | Converting ink to text You can write words that automatically converts into text. Tap
If the text isn’t correct, tap the text, tap |
 and start writing on the display. Wait a couple of seconds and the writing converts to text.
 , and select the correct word.
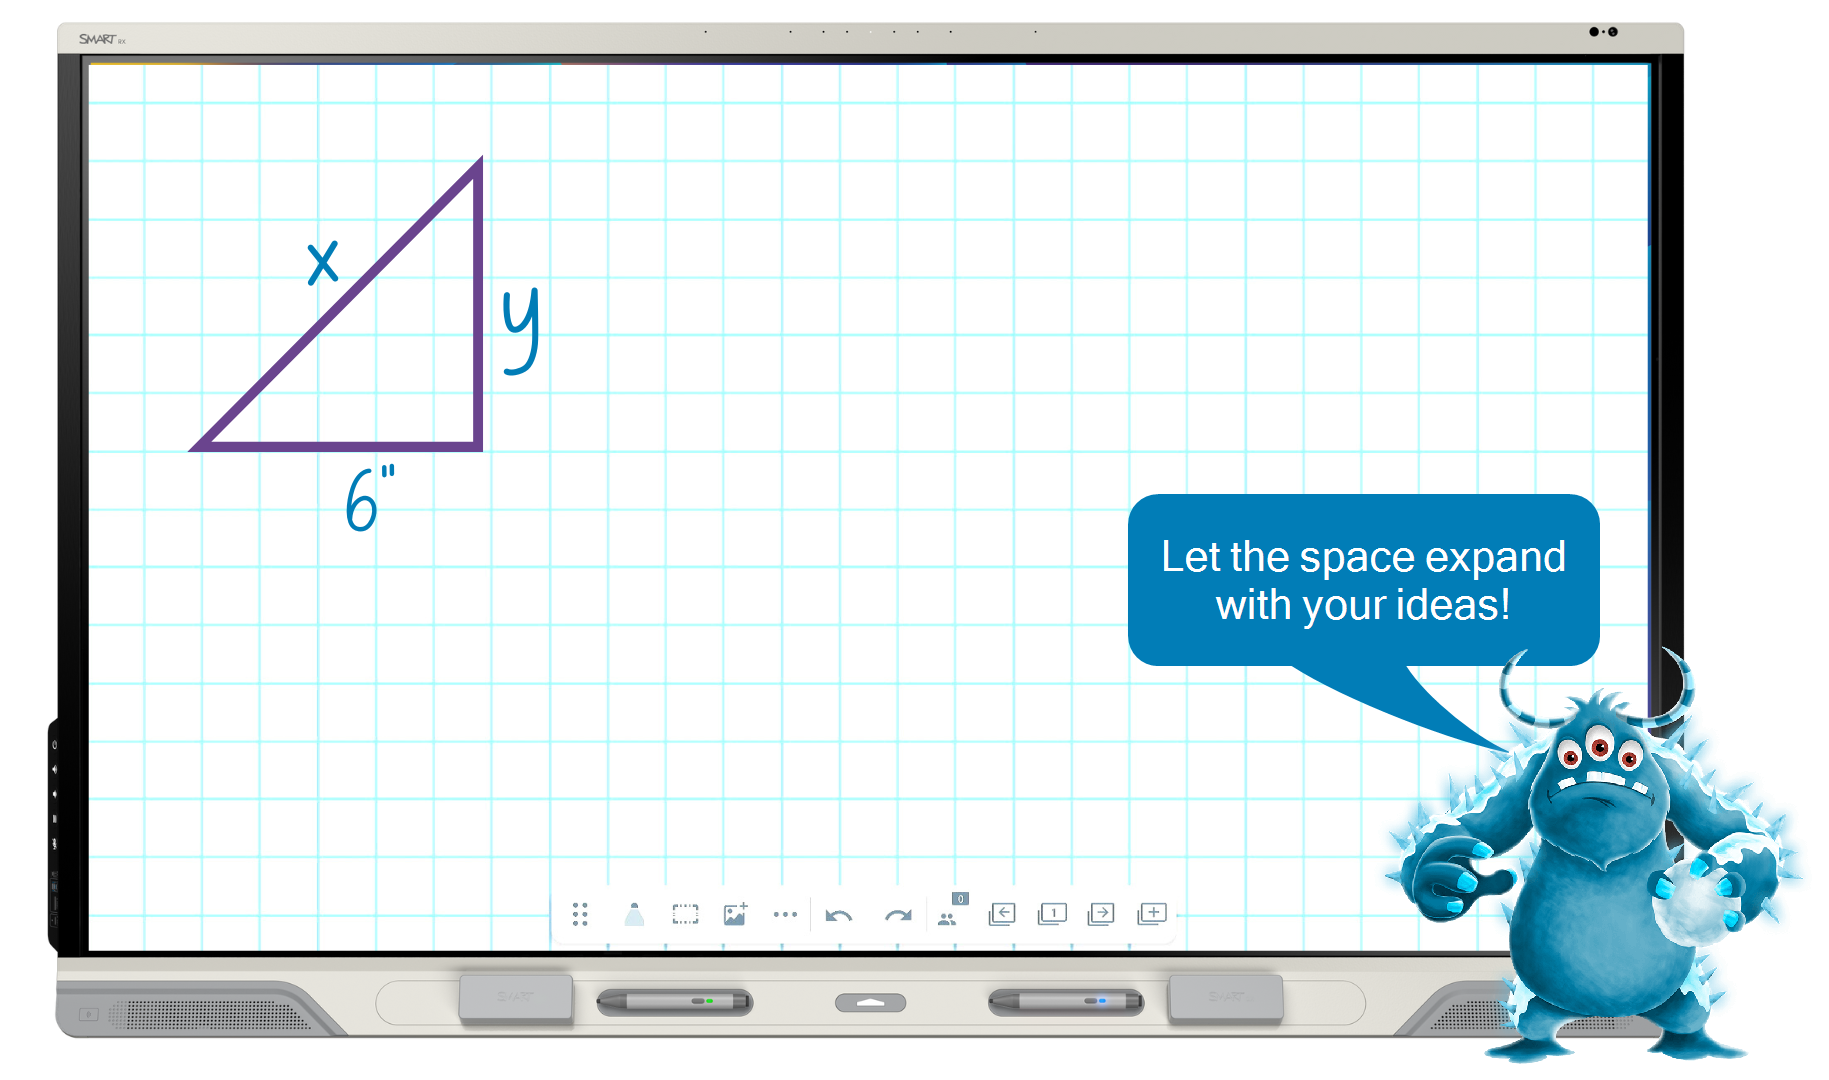
Instructional ideas
Engage your students by leveraging digital backgrounds to capture students’ ideas, show students thinking, and create artifacts of meaningful discussions.
Expand your workspace to brainstorm ideas, questions, examples, and non-examples.
Use the handwriting paper to practice letter recognition or use graphic paper to organize data for student evaluation.
Enhance your lesson by using a variety of integrated tools.
Use the variety of pen tools, colors, and line thickness options to interact with and highlight critical content during your lesson.
Use the expandable whiteboard to place hidden problems or teaching points in different corners of the whiteboard. Use gestures to zoom in and out of the whiteboard to reveal information.
Use the measurement tools (Ruler, Compass, Protractor, Geodreieck)
Extend learning by putting students in the lead.
Leverage the SMART Whiteboard as a student collaboration area to encourage brainstorming and discussion.
Add problems, information, or parts of the lesson to a whiteboard and use the whiteboard as part of a student-led station for problem-solving.
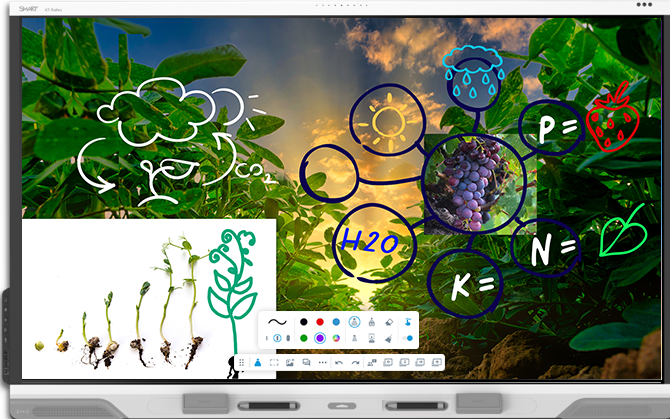
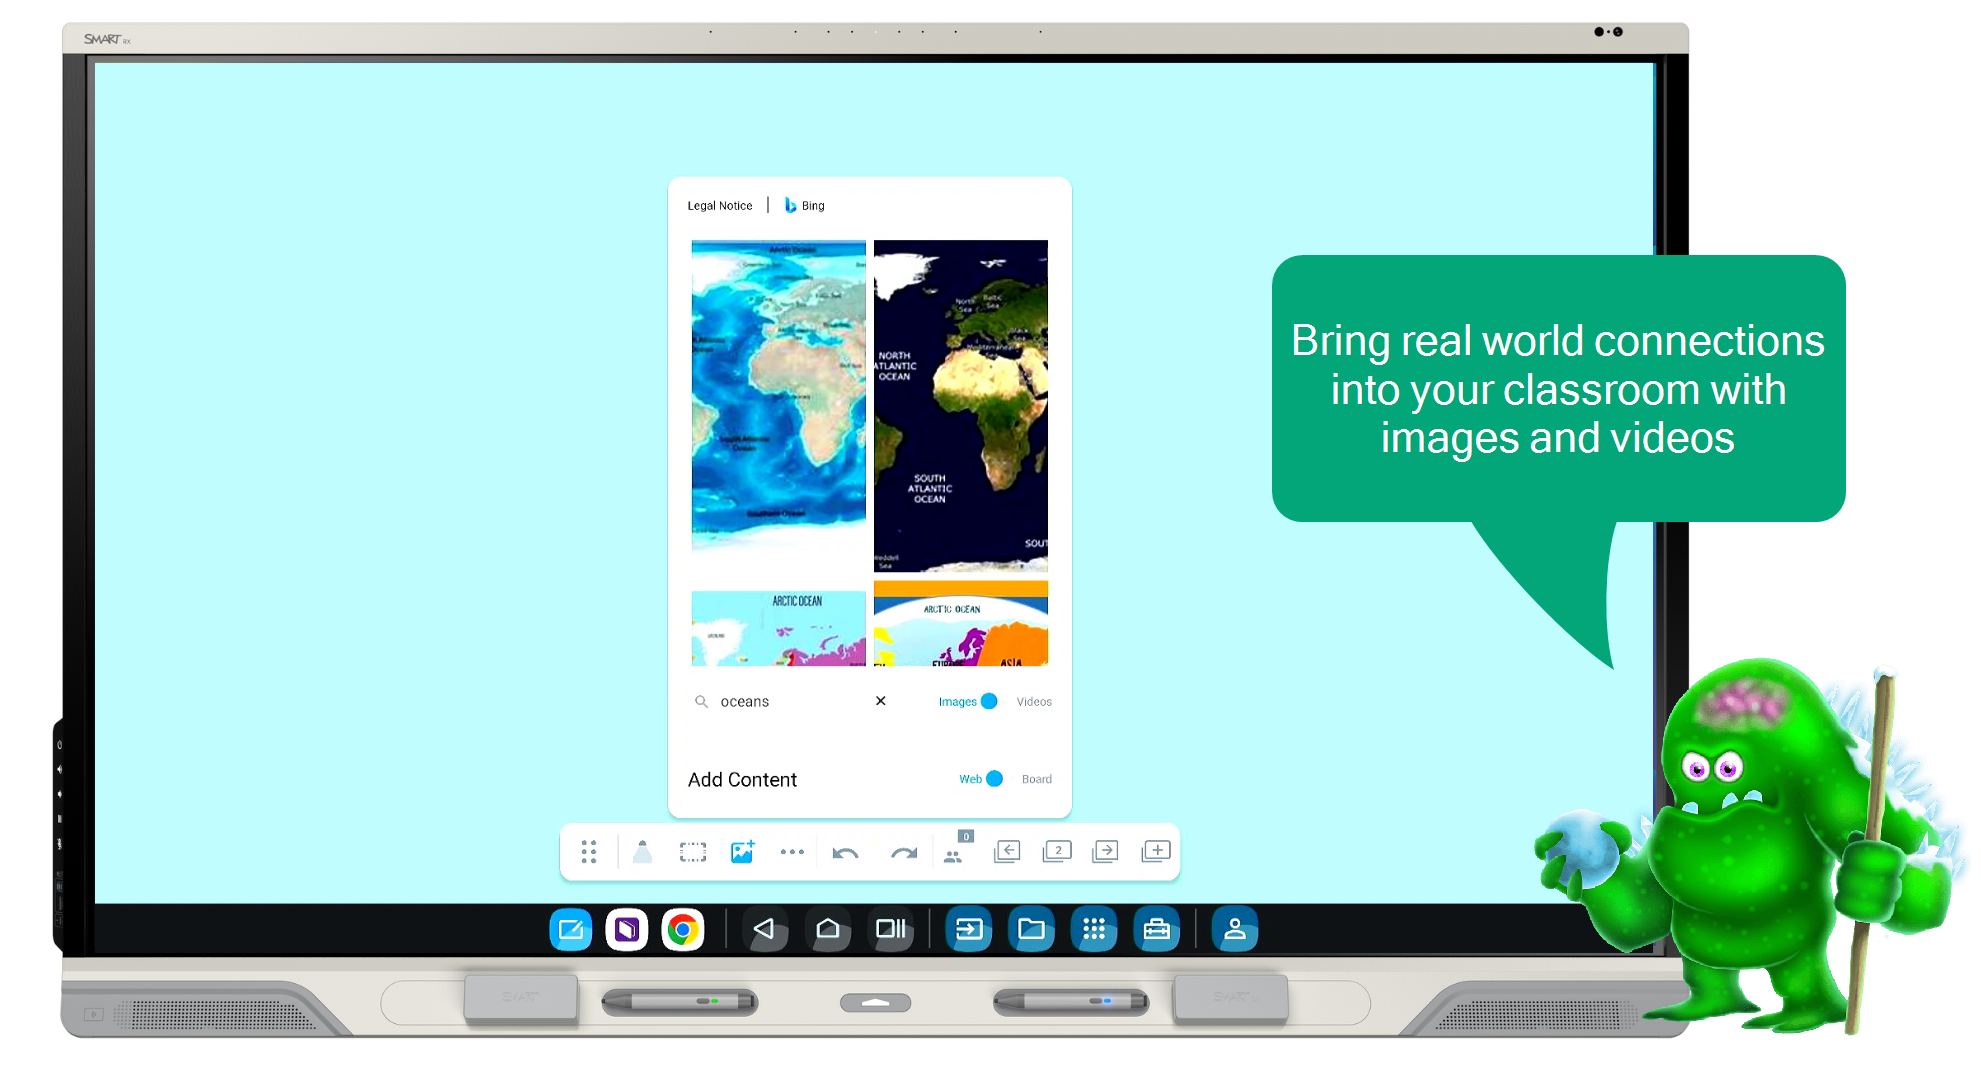
Adding multimedia to a whiteboard
Steps
| 1 | Insert a video or picture Tap |
| 2 | Insert a picture that’s saved to the display Tap |
| 3 | Add a math tools Tap You can move, resize, or rotate the measurement tool. |
| 4 | Add an angle using the protractor If you can’t add an angle, tap Tap the protractor. Press and hold the angle handle and then move the handle to create an angle. Tap |
 to insert an angle.
| 5 | Create a new page background Tap Tap the image, then tap The image becomes the new page background and you can draw over it. |
Instructional ideas
Engage your students by using images and videos that connect your lesson to real-life examples.
Add video or images to the collaborative whiteboard. Insert a graphic organizer for students to complete together.
Insert an image and lock it as a background. Then, have students write notes, labels, and brainstorm ideas over it.
Enhance your lessons by combining multimedia on the whiteboard with other applications on the display.
Insert images of real-world problems in math, such as bridges, abstract art, and more. Use the classroom tools to measure, label, and discuss findings in collaborative groups.
Use a variety of background options, such as lined paper, alongside images or videos to create centers for students.
Extend learning by providing students access to resources outside of the classroom and connecting lessons to real-life skills.
Connect students to the whiteboard from their own devices with hellosmart.com to capture digital notes with screenshots for review outside of the classroom.
Use the whiteboard alongside digital multimedia to support research findings and create visual representations of student research or projects.
Adding ready-made activities
Steps
| 1 | Insert a graphic organizer 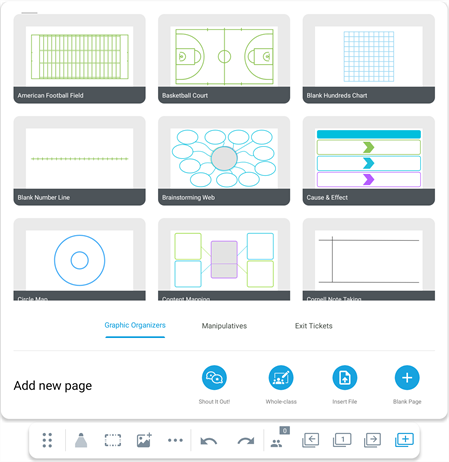 Open a SMART Whiteboard file on the display and browse to a page. Tap Select Graphic Organizers, Manipulatives, or Exit Tickets. Tap the ready-made activity you want to add to the file. Note You can also open a new SMART Notebook file with a ready-made activity from the Files Library. |
 to add a ready-made activity after the current page.
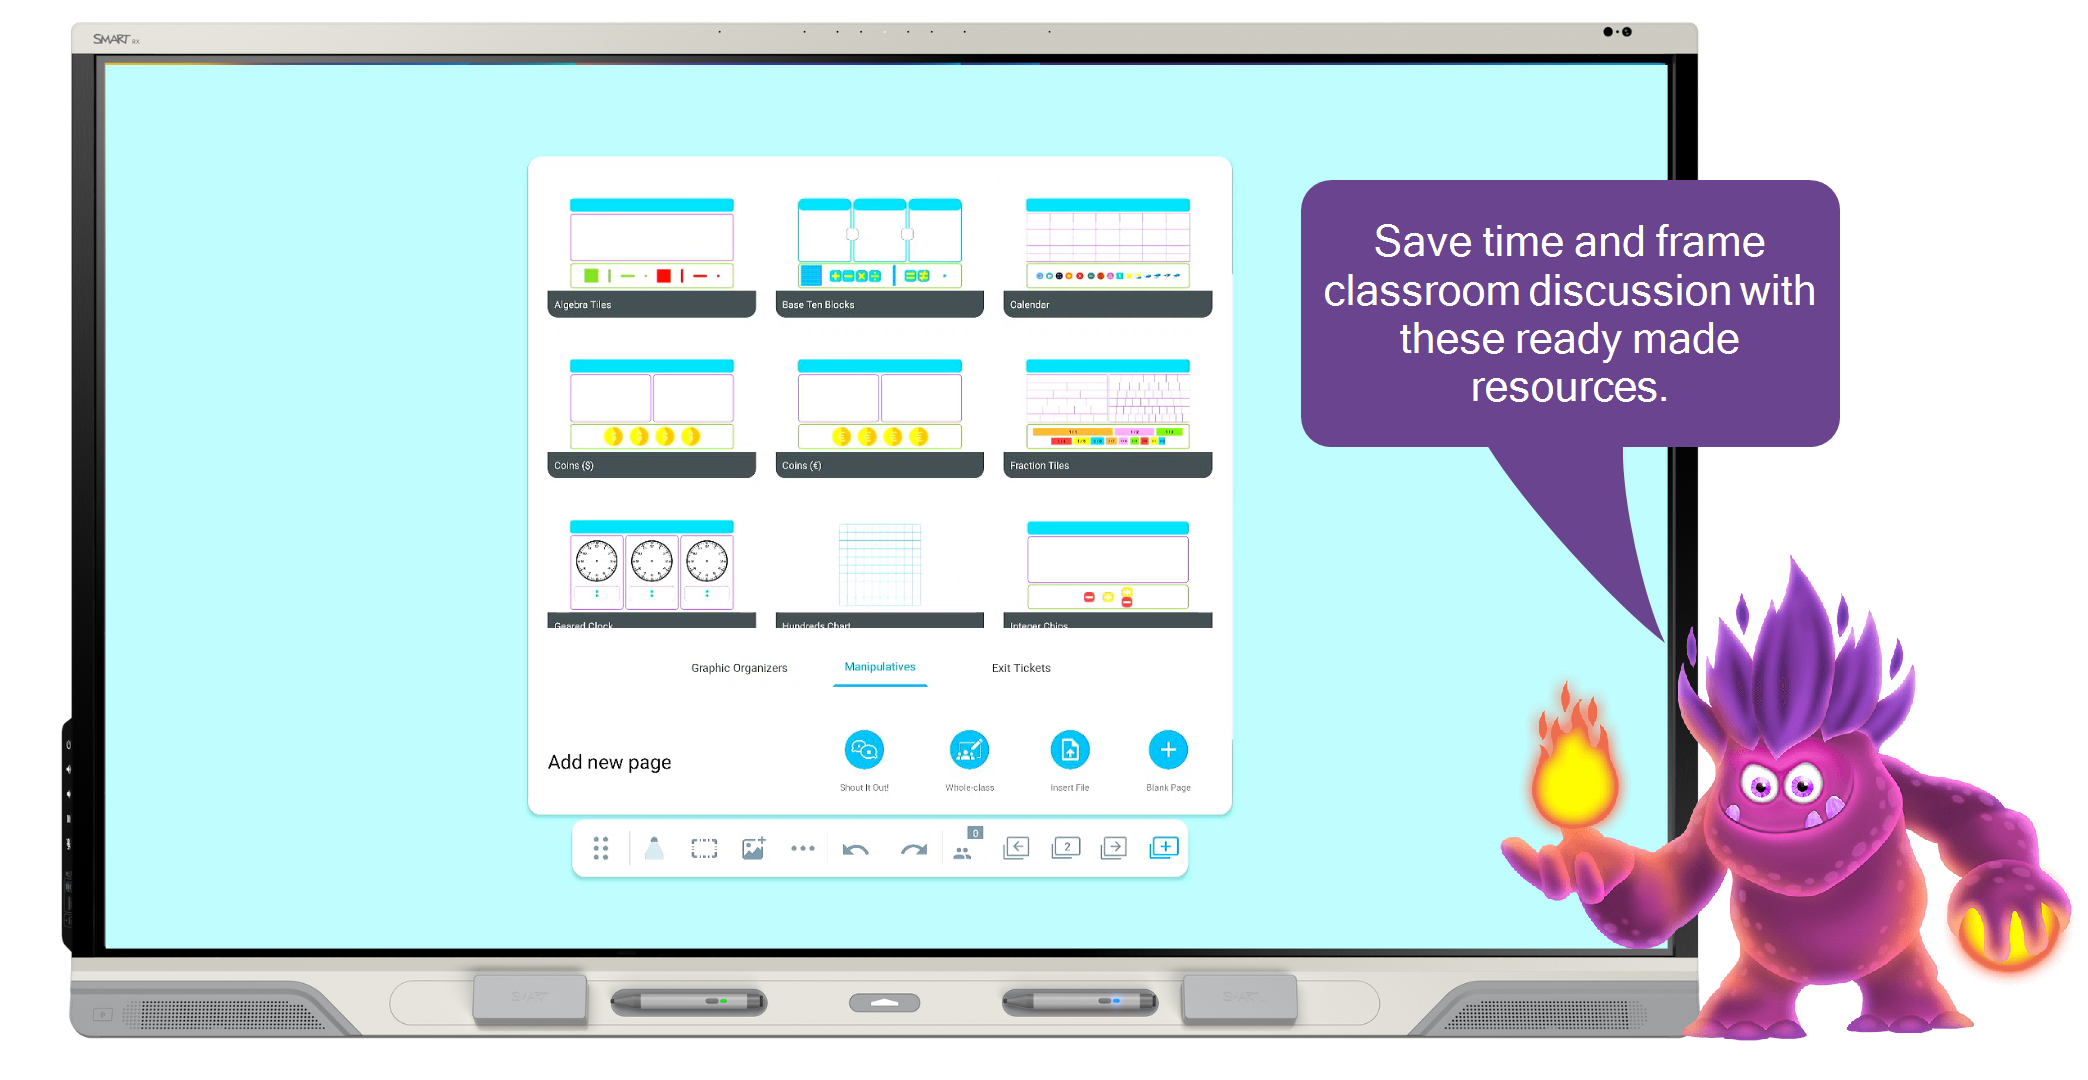
Instructional ideas
Engage students by inserting ready-made graphic organizers to structure content and organize lesson points.
Use a Venn diagram to compare and contrast topics from the unit of study.
Insert a Brainstorming web as a way to organize class ideas for a unit of study.
Enhance learning by using digital manipulatives as a student station.
Convert the activity to a whole-class whiteboard or connect with Lumio to convert to an Individual Handout or Group workspace.
Encourage students to lead one another in peer-to-peer teaching activities.
Extend learning by pairing a ready-made activity with the classroom tools.
Integrate student choice into learning by adding a spinner paired with learning prompts to a graphic organizer or digital manipulative page.
Connect to Lumio! Make lessons available on student devices in the classroom and at home.
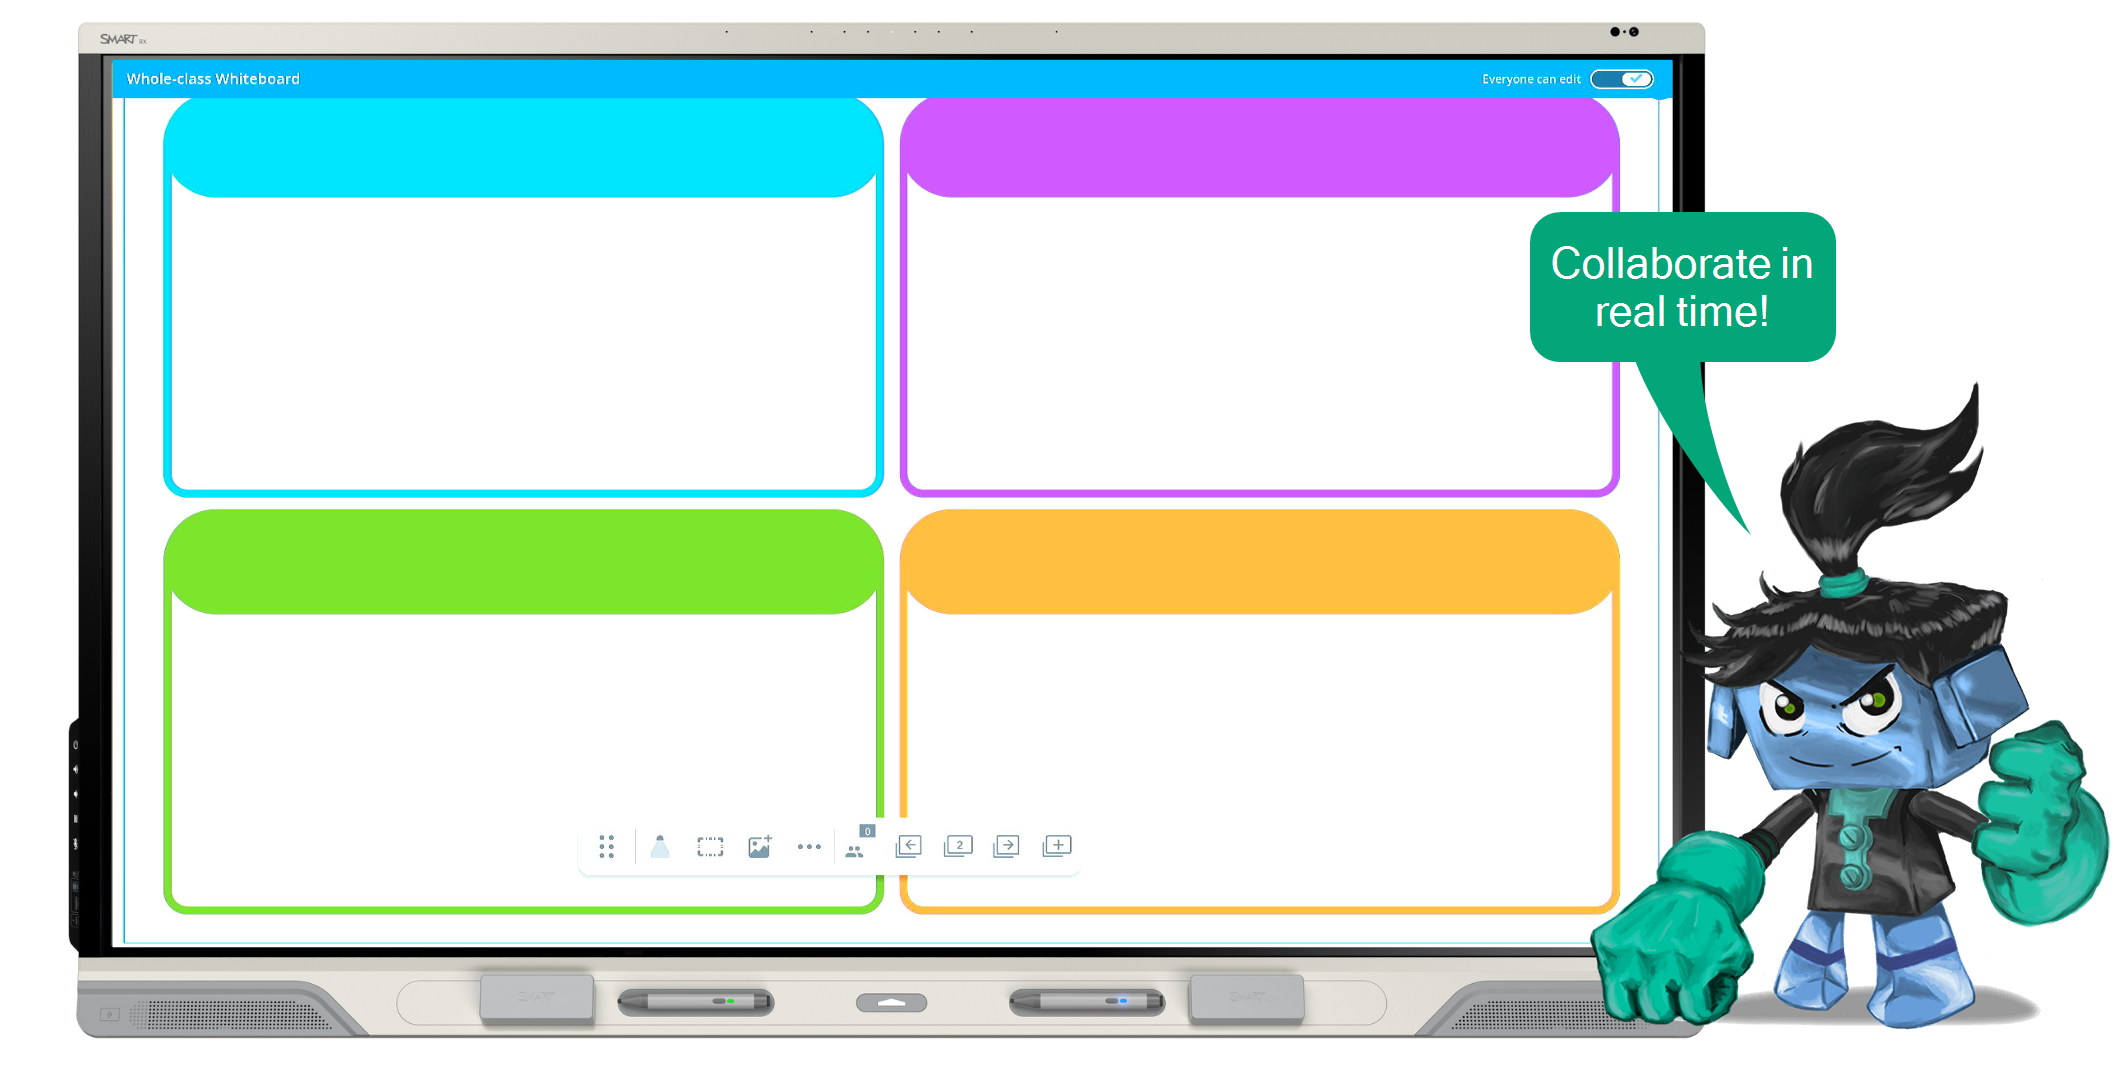
Adding a SMART Whole-class Whiteboard activity
Steps
| 1 | Tap Whole-class Whiteboard A new page opens. By default, the workspace is set so that everyone can edit it. Tap OR Tap Select Whole-class page or choose from one of the built-in presentation pages. Convert the graphic organizers or manipulatives into activity pages by tapping |
 and selecting the Whole-class Whiteboard option.
| 2 | Tap The class code will display so students can connect their devices to the lesson without a subscription or student login. |
| 3 | Select lesson pacing  Choose betweenTeacher or Student to set if the students will follow along with your lesson or independently. |
| 4 | Pause to refocus the class Tap Everyone Can Edit in the top right-hand corner at any time to control whole-class collaboration in real time. |
Instructional ideas
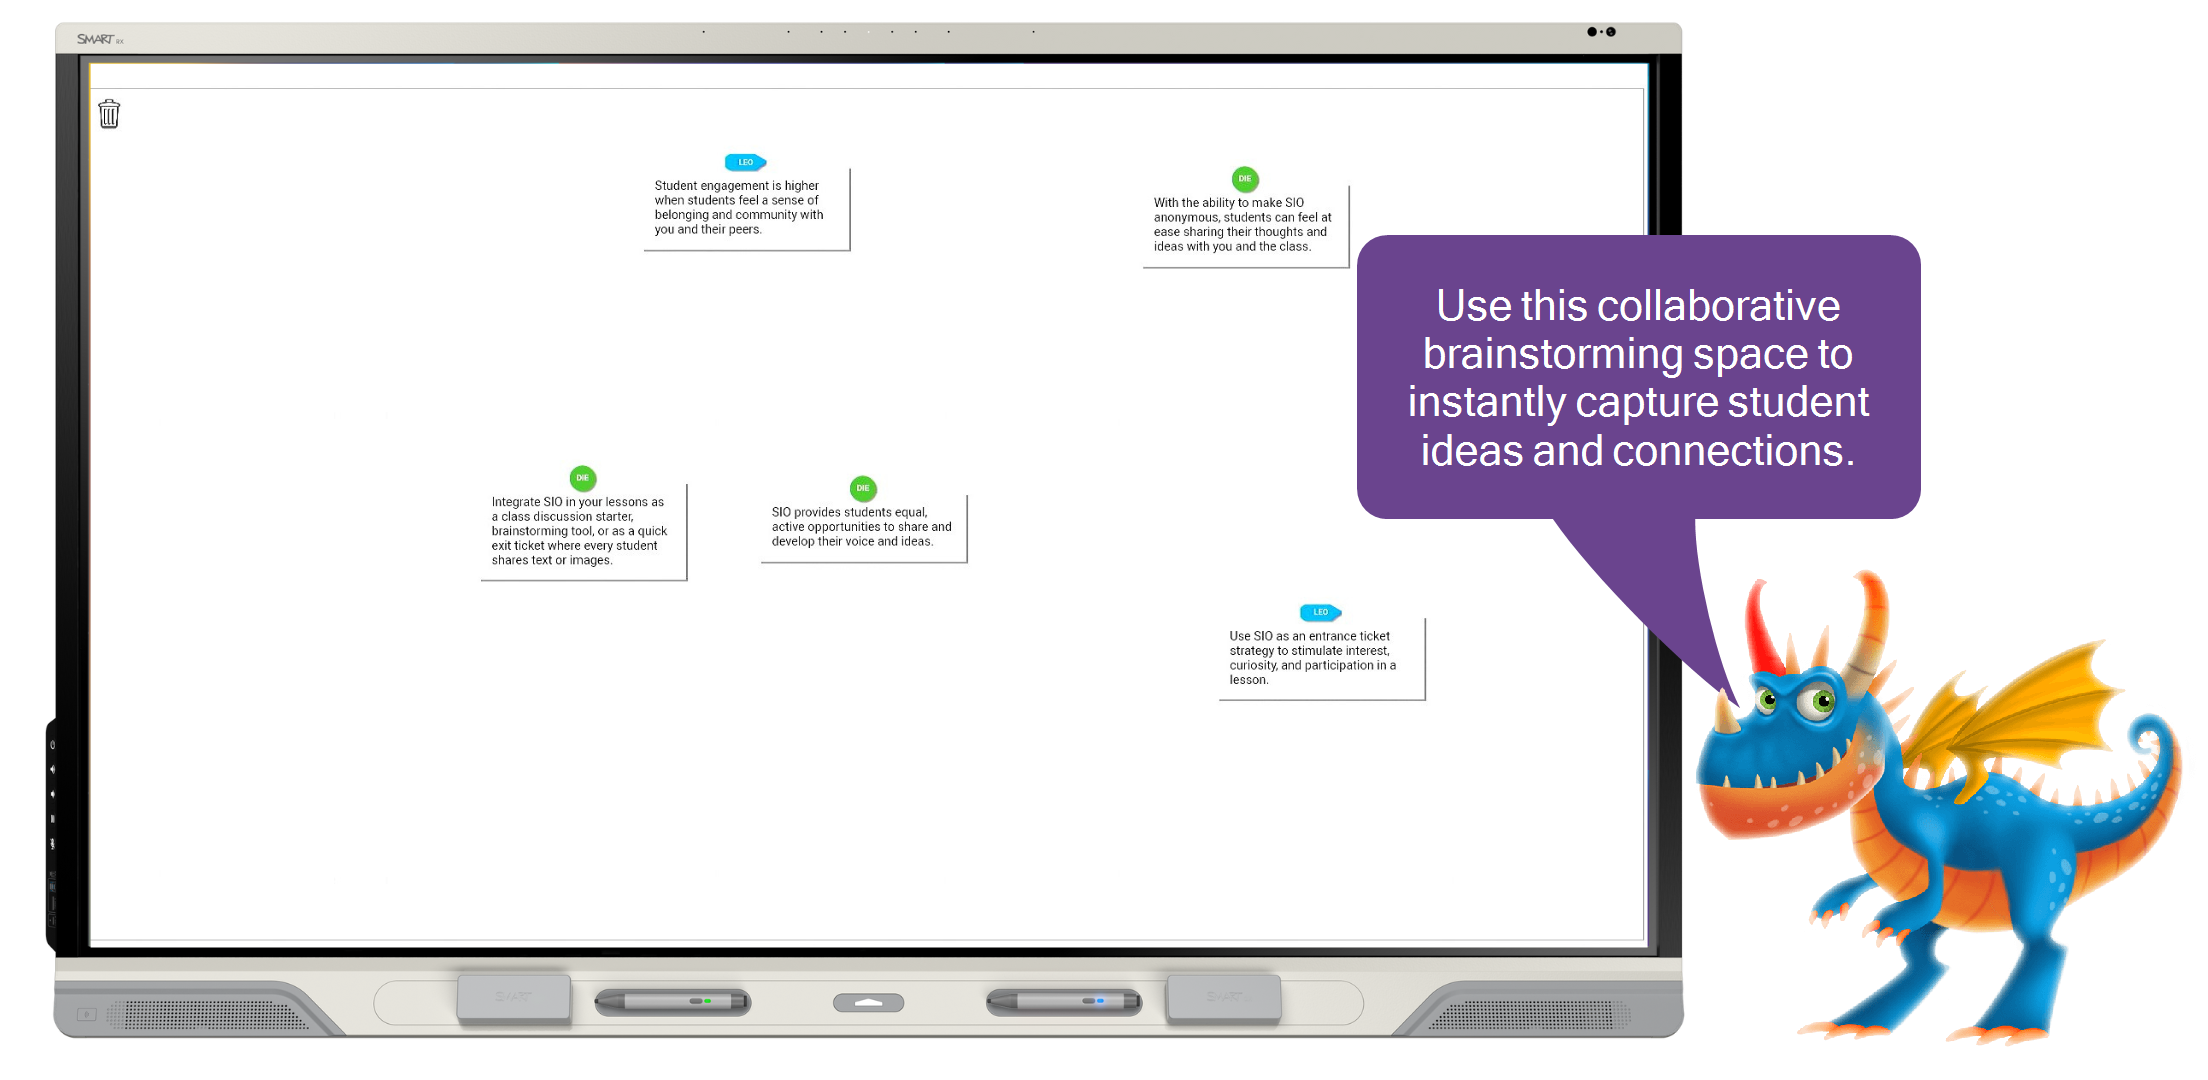
Engage students by adding a Whole-class Whiteboard to a lesson and using it to model a concept, brainstorm, or gather ideas.
In a Whole-class Whiteboard, students model concepts for their peers by solving a problem in a collective space.
In a Whole-class Whiteboard, students organize concepts and brainstorm together about a new topic.
Enhance your lesson with a Whole-class Whiteboard activity and have students create a digital poster to demonstrate their understanding of a topic.
Add a quotation or question to a Whole-class Whiteboard activity to start a digital discussion board.
Extend learning with a Whole-class Whiteboard activity where students can continue to apply their knowledge.
Have students use the space outside of class to ask peers for help with homework and assignments.
Brainstorming with Shout it Out! activities
Steps
| 1 | Start a Shout it Out! in an existing lesson Tap Browse to a page, tap OR Start an instant Shout it Out! in a new file Tap |
 and open a SMART Notebook lesson file or SMART Whiteboard.
| 2 | Have students connect and contribute Have students enter hellosmart.com in their web browsers. Have them select your class to join the activity. |
| 3 | Start the activity Tap Start on the SMART Board display to begin the Shout it Out! activity and have students use their devices to contribute. |
Instructional ideas
Engage your students by adding an Instant Shout it Out! activity to check for understanding, create an exit ticket, or brainstorm on the fly.
Ask students to share examples and non-examples on a topic or subject matter.
Encourage students to share key vocabulary, then create a summary statement that uses the words shared by students
Enhance your lessons by adding an instant Shout it Out! for students to share their goals for class or reflect on what they accomplished individually or in a group.
Start a Shout it Out! to and ask, “What challenges are you facing?”
Start a Shout it Out! to and ask, “What do you expect to complete by the end of class?” or “What could you have done differently?”
Extend learning by adding an instant Shout it Out! and asking students to compose essay questions or math problems. Encourage them to submit potential questions for an upcoming assessment to aid in review.
Students can pose debate questions for the next class related to the concepts taught that day.
Have students share and ponder big questions of future impacts and innovations related to the topic.
Sign in and sync your lesson files
Steps
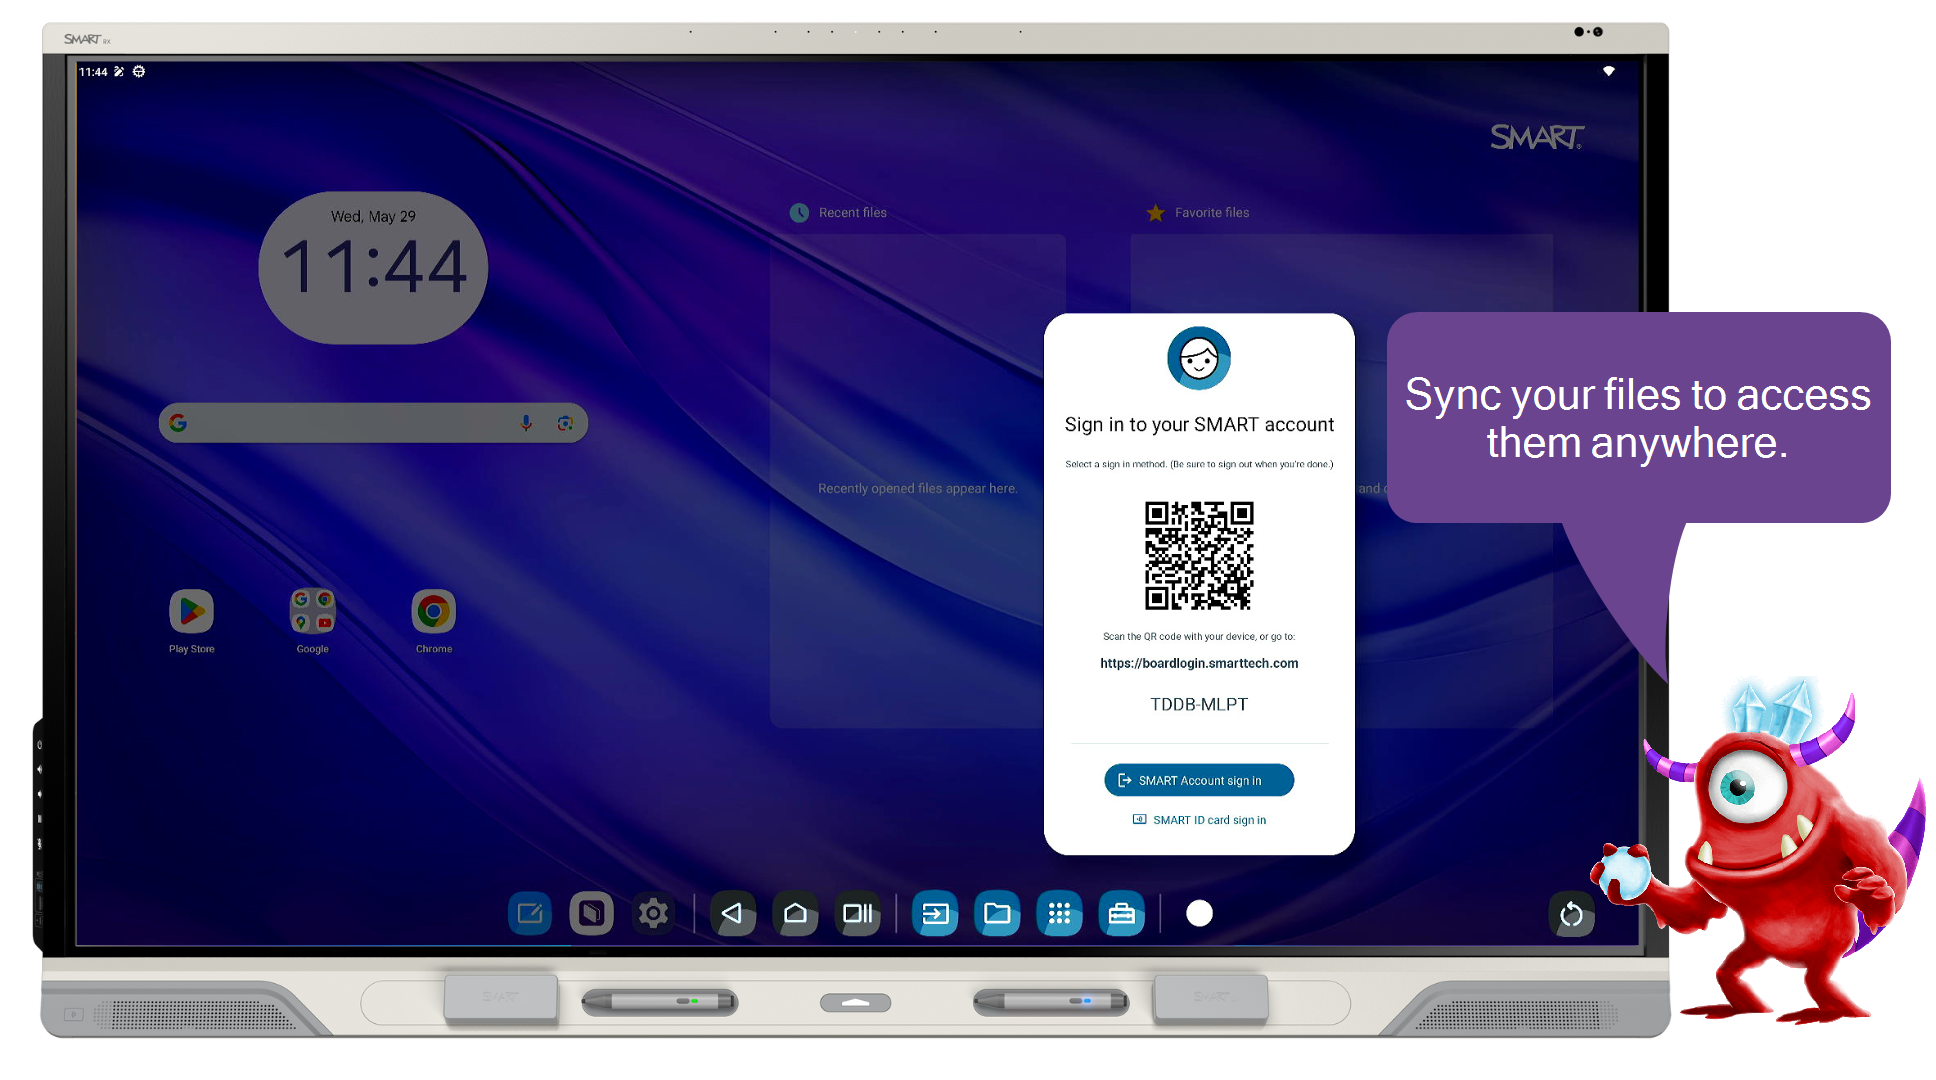
| 1 | Sign in to your SMART Account  On the SMART Board display with iQ, tap Once signed in, the File Library |
 in the navigation bar. Tap SMART Account Sign In and follow the on-screen instructions to sign in. This is the same account you use to access SMART Notebook or Lumio.
  will sync with your Lumio library to show your lesson files.
| 2 | Sync your Google Drive If your SMART Account is associated with your Google account, you can sync to your Google Drive and access your lesson files from there. Tap File Library |
| 3 | Open lesson files Tap the lesson file’s tile in the File Library (Lumio or Google Drive folder) to open it in the Whiteboard app. Tip You can also use the Lumio app to open lessons. Learn more. |
Instructional ideas
Engage your students by preparing daily tasks (such as calendars and morning messages) in a Whiteboard, leaving your teacher computer available for other tasks.
Link current events, “On this day in history”, riddles, or interesting facts as warm-up material.
Create substitute plans in Lumio and send them to the display when you’re out of the classroom. Ensure you are signed in and File Sync with Lumio is enabled or, if available, leave an NFC card to allow substitutes to sign in to the display.
Enhance your teaching by importing existing lesson content to make it dynamic and interactive.
Import a PDF page into the Whiteboard for students to access in centers, small groups, or from their student devices.
Download lesson content from a USB drive or download files from the OneDrive or Google Drive applications.
Extend learning by creating open-ended challenges and task cards for students to access after they complete their work.
Create a choice board in Whiteboard, such as a tic-tac-toe choice board, with possible extension activities.
Export files, such as Whiteboard files, to PDFs to import lesson content into your LMS.
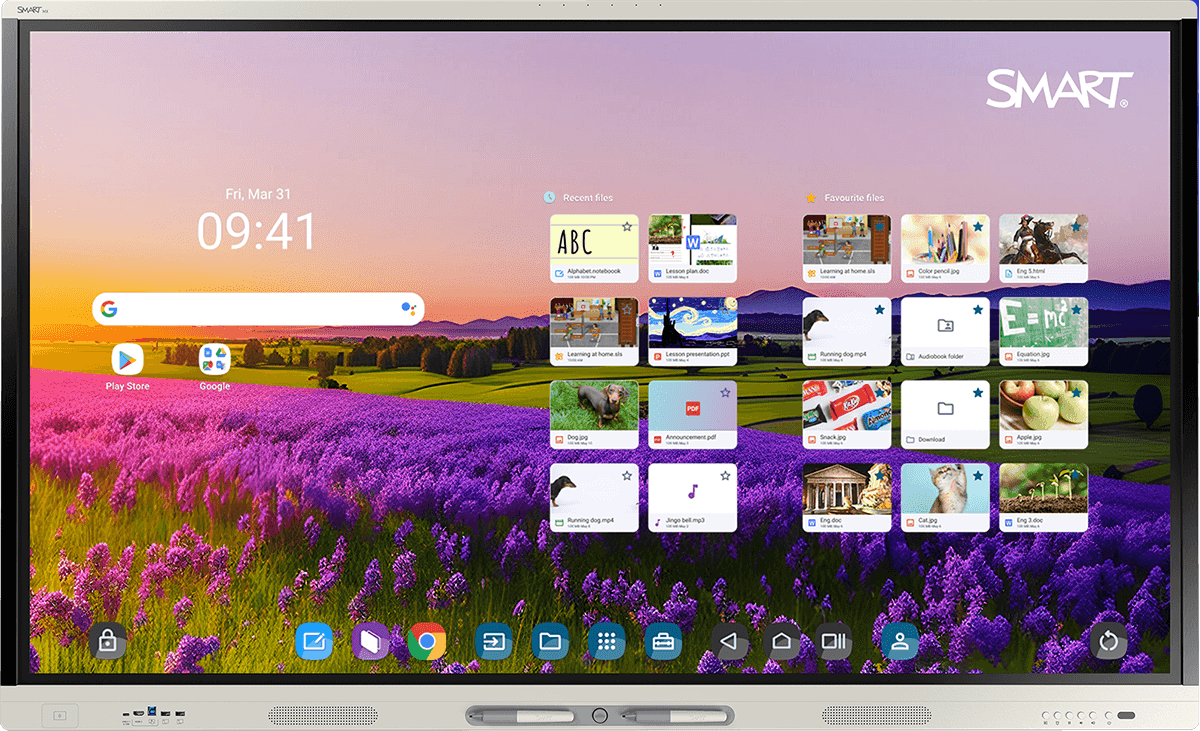
Files Library
Steps
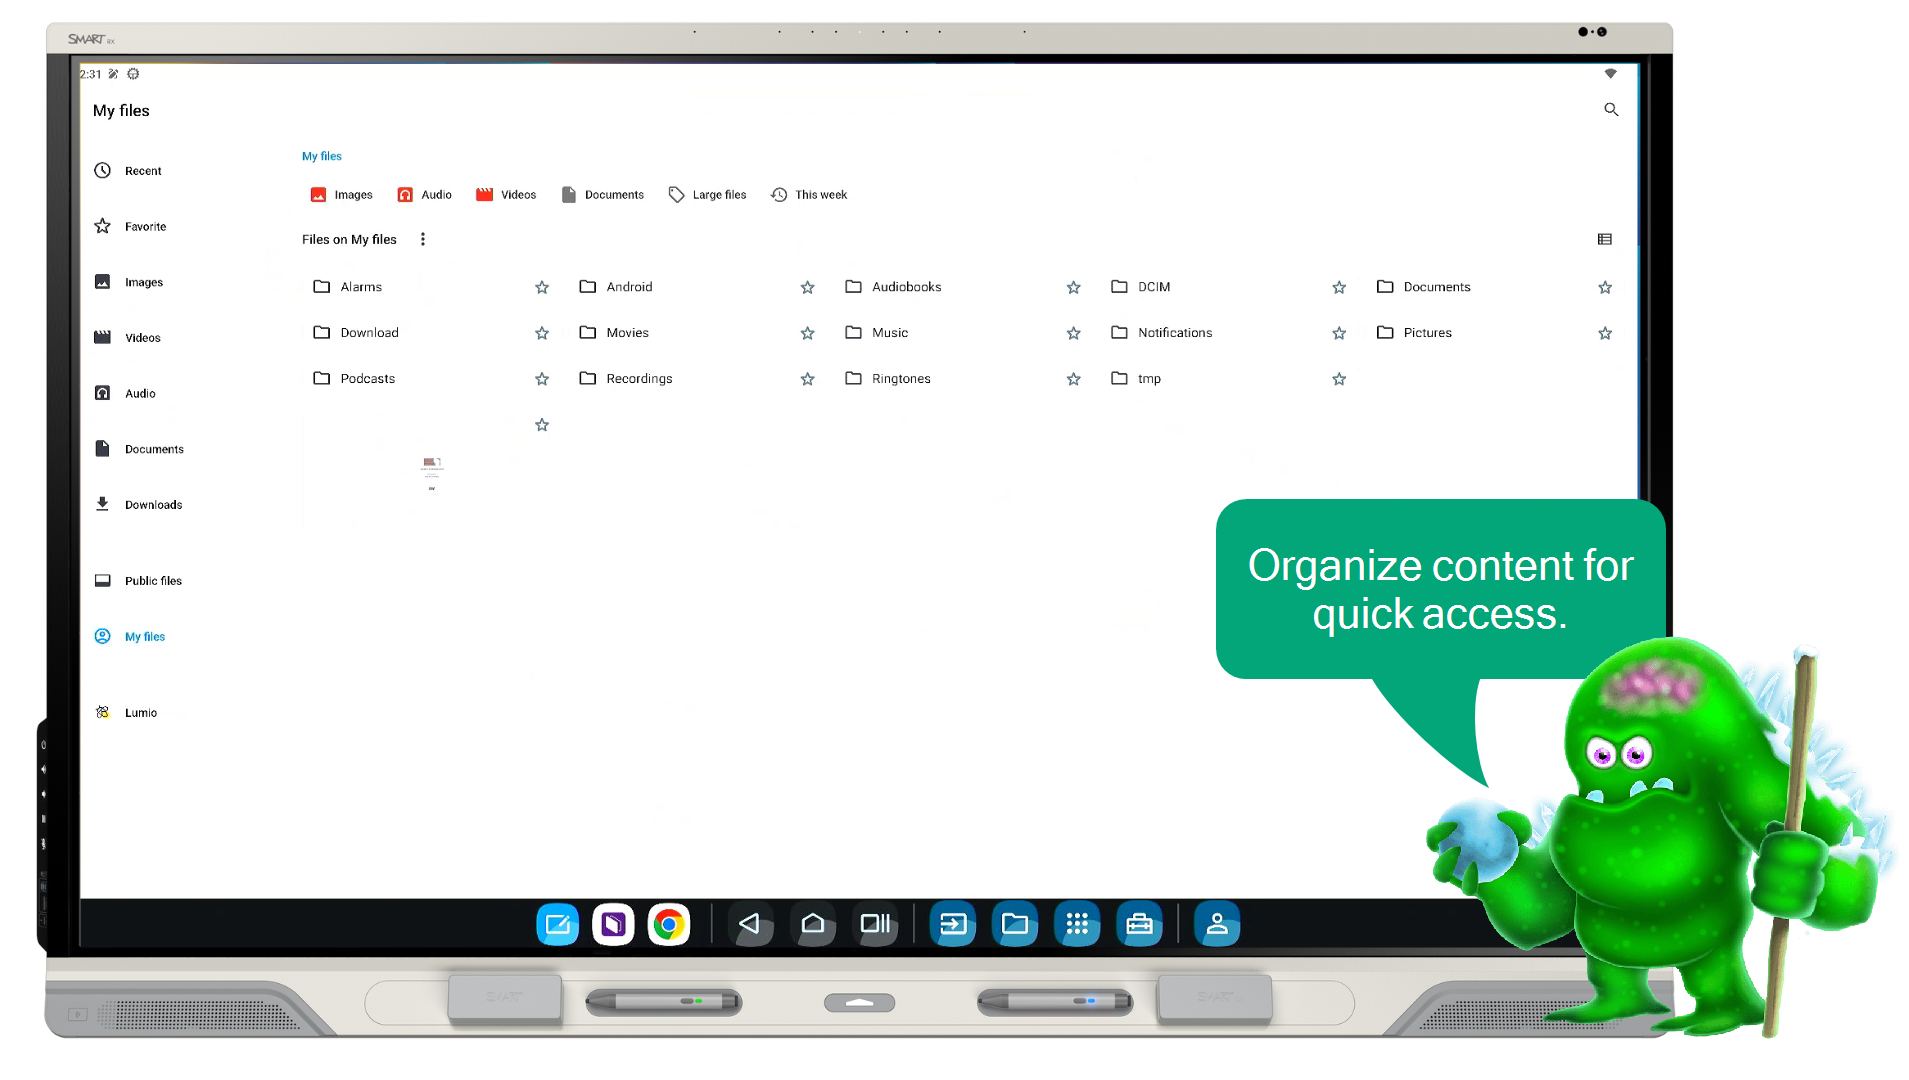
| 1 | Open the Files Library From the home screen, tap |
| 2 | Rename files Tap and hold a file until the menu pops up. Tap the file’s name. Use the on-screen keyboard to rename the file. Tap anywhere on screen when you’re done. |
| 3 | Create, move, and sort Move files around by tapping and holding its icon, then dragging it around the screen. To move a file into a folder, tap and hold to select it and drag it into a folder. Tap anywhere on the screen when you’re done. Filter the list of files shown by selecting one of the tags at the top. Sort content by type, name, or the date when it was last modified. |
| 4 | Open a file and go Open the file in the Files Library you’d like your students to work on. To let your students interact with a lesson on the display, open the lesson in SMART Whiteboard. You can do this with signing in and syncing files or by saving the lesson material to a USB drive. SMART Whiteboard can open SMART Notebook, Lumio, and PDF files. |
| 5 | Export files to a USB drive You can export SMART Whiteboards, SMART Notebook files, and screenshots to a USB drive as PDF files. Connect a USB drive to the display, tap |
Instructional ideas
Engage our class by creating class or subject-specific folders.
Organize class notes, student response spaces, agendas, and collaborative brainstorming for reference later.
Create a folder to use for each small group where students can save their files for easy access or add extension activities by group.
Enhance your lessons by creating a folder of activities or rotations for students to complete independently on the board. Tap the star on the folder to pin it to Favorites so students can access the folder from the Home screen.
Add reference websites, interactive Lumio files, or PDFs to document student thinking.
Create a folder for student-created work for presentations, grading, or reference.
Extend learning by creating tiered folders for differentiation.
Create folders for vocabulary review, application practice, and open-ended critical thinking activities.
Create folders that contain background information with videos or scholarly texts for differentiation and real-world connections.
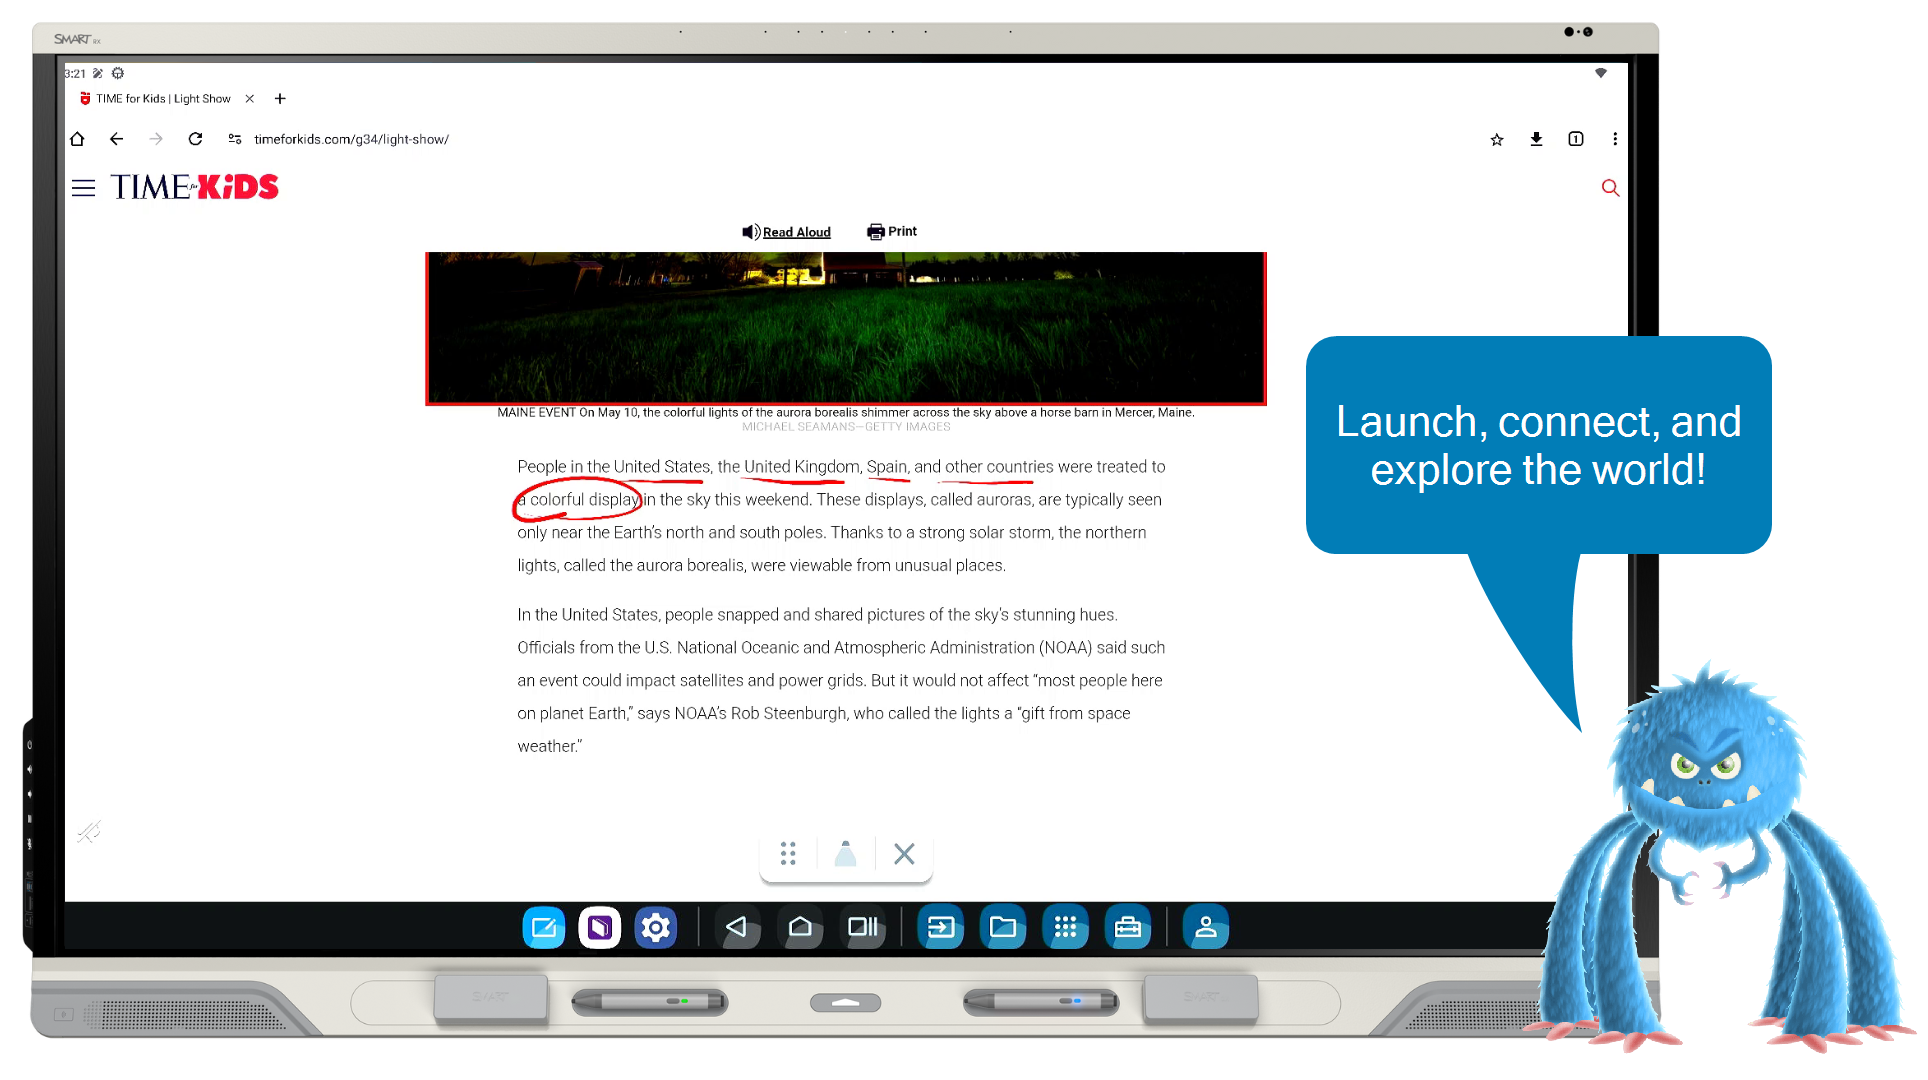
Browser
Steps
| 1 | Open the Browser On the Home screen, tap Note: The Browser doesn’t support Adobe Flash Player. If you need to use Adobe Flash, connect a computer to the display. |
 . In the address bar at the top of the screen, type a web address or search term.
| 2 | Use the floating keyboard Use the floating keyboard to type in the Browser. You can move the keyboard by dragging the plus sign (+) in the upper-right corner. The keyboard is hidden when you don’t need it. |
| 3 | Write and draw Pick up a pen to begin writing notes over the Browser and light gray diagonal lines appear. Change the pen’s color by tapping the pen icon on the left side of the screen. |
| 4 | Add favorite sites On the Home screen, under the Recent category tap the star to add a recently-visited website to the Favorites category. |
| 5 | Download files or images While browsing the internet, tap a file or image to save it to the display. In the Files Library |
Instructional ideas
Engage your students by adding interactive websites to your bookmarks for easy access and invite students to interact on the display.
Use the annotation layer to annotate articles or current events to capture student connections.
Encourage small groups to use the browser as a center for research, finding media, and reading, discussing, and dissecting information.
Enhance your lessons by opening a resource on the board and adding notes over it.
Open multiple tabs of pictures to share with students, take notes, and more.
Encourage students to make connections by writing their own notes or drawing over the browser tabs.
Extend learning by encouraging students to use the browser to conduct research in small groups and interact with the content for reference outside of the classroom.
Use the screen capture tool along with the browser to save notes, capture relevant information, and provide absent students with the content within your LMS.
Extend learning by opening browser notes in a split screen window and pairing it with another application, such as a whiteboard, for students to dissect information, engage in discussion, or complete a graphic organizer on their student device.
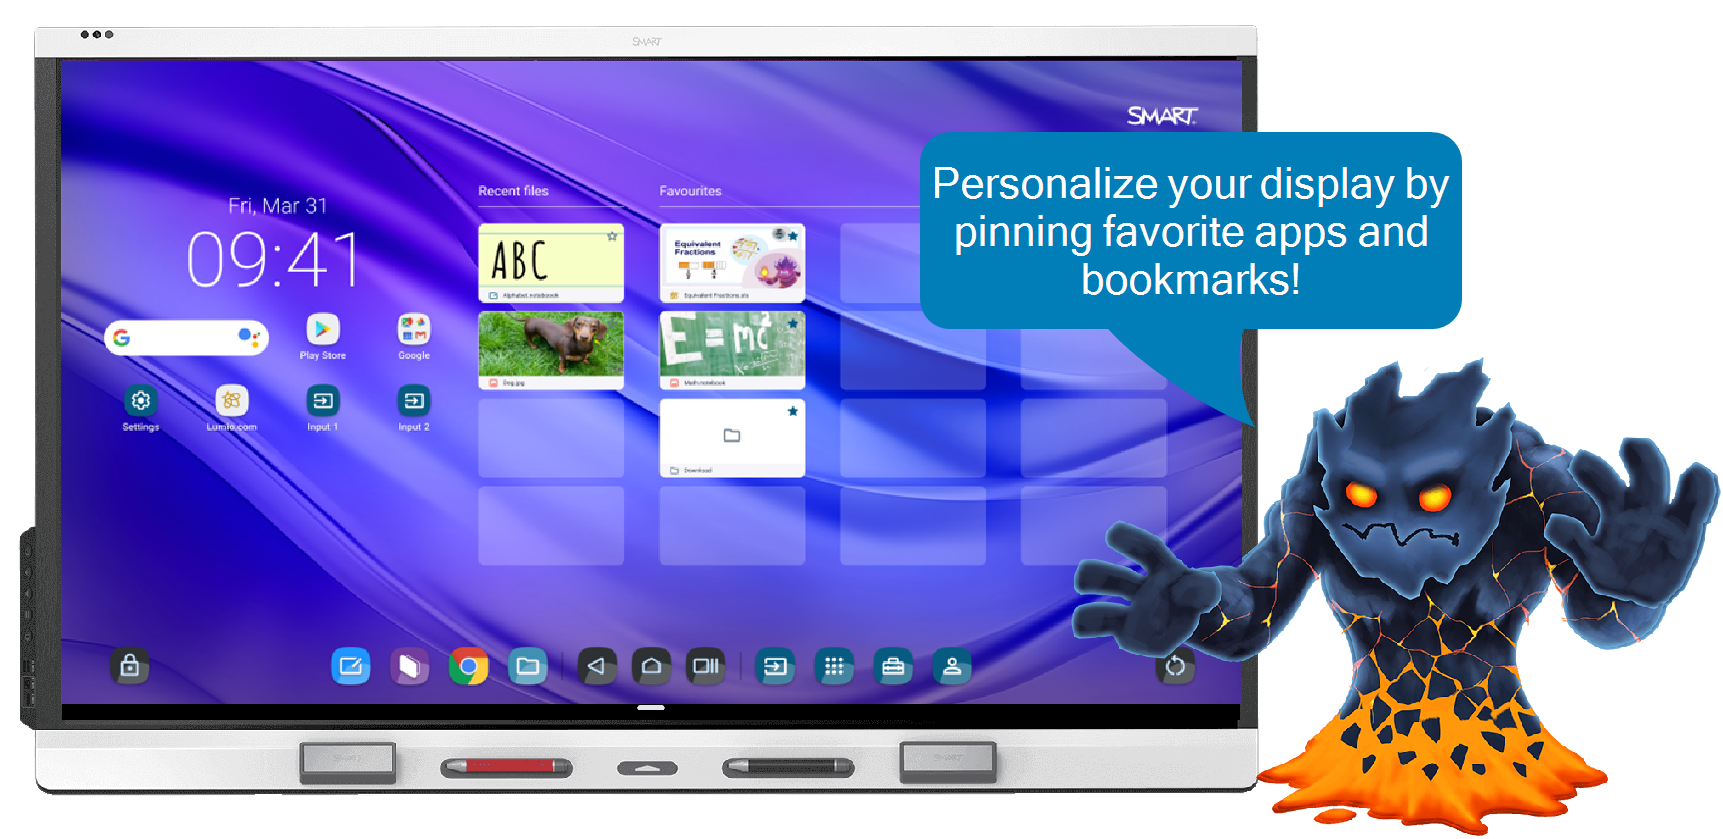
Adding apps and pinning frequently used items
Steps
| 1 | Install apps You can add an app from the Google Play store. From the Home screen, tap |
 and then Play Store to access apps available for download.
| 2 | Add bookmarks Open the Browser app and navigate to the website you want to bookmark. Tap More |

| 3 | Add files to Favorites If the file appears under the Recents section on the home scree, you can tap it’s star to add it to the Favorites section. Otherwise, you can locate the file in the Files Library and star it to add it to favorites. |
| 4 | Remove files from Favorites Tap the star on the file under Favorites that you want to remove. |
Instructional ideas
Engage your students by adding bookmarks to frequently used websites and tools on your home screen.
Improve classroom management with apps like Class DoJo or Go Noodle.
Leverage content from sites like Brainpop, Wonderopolis, and Newsela.
Enhance your lessons by downloading education-specific applications from the Google Play store.
Add Google Drive or Microsoft OneDrive for quick access to lesson content.
Add the Microsoft Suite of applications and/or science, math, reading, or other favorite applications for quick use and reference on your display.
Extend learning by adding your learning management system application to access class lessons and assignments.
Use Google Classroom, Canvas, Schoology, or other LMS apps to open student assignments for discussion and presentations in class.
Clearly define expectations and resources for learning and collaboration outside of class by integrating your LMS with your SMART Board display.
Adding teacher tools
Steps
| 1 | Add a widget 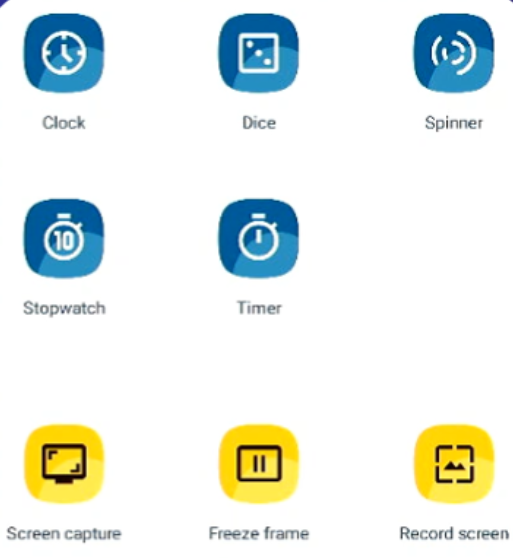 Tap SMART Tools Tap the widget you want and it appears on the screen. |
 to open the widgets panel.
 | 2 | Customize the widget 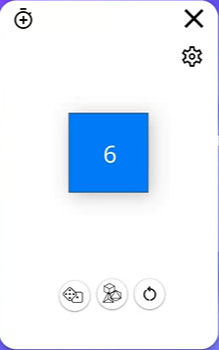 Tap |
 . The widget’s Settings will open and you can use the available options to customize it.
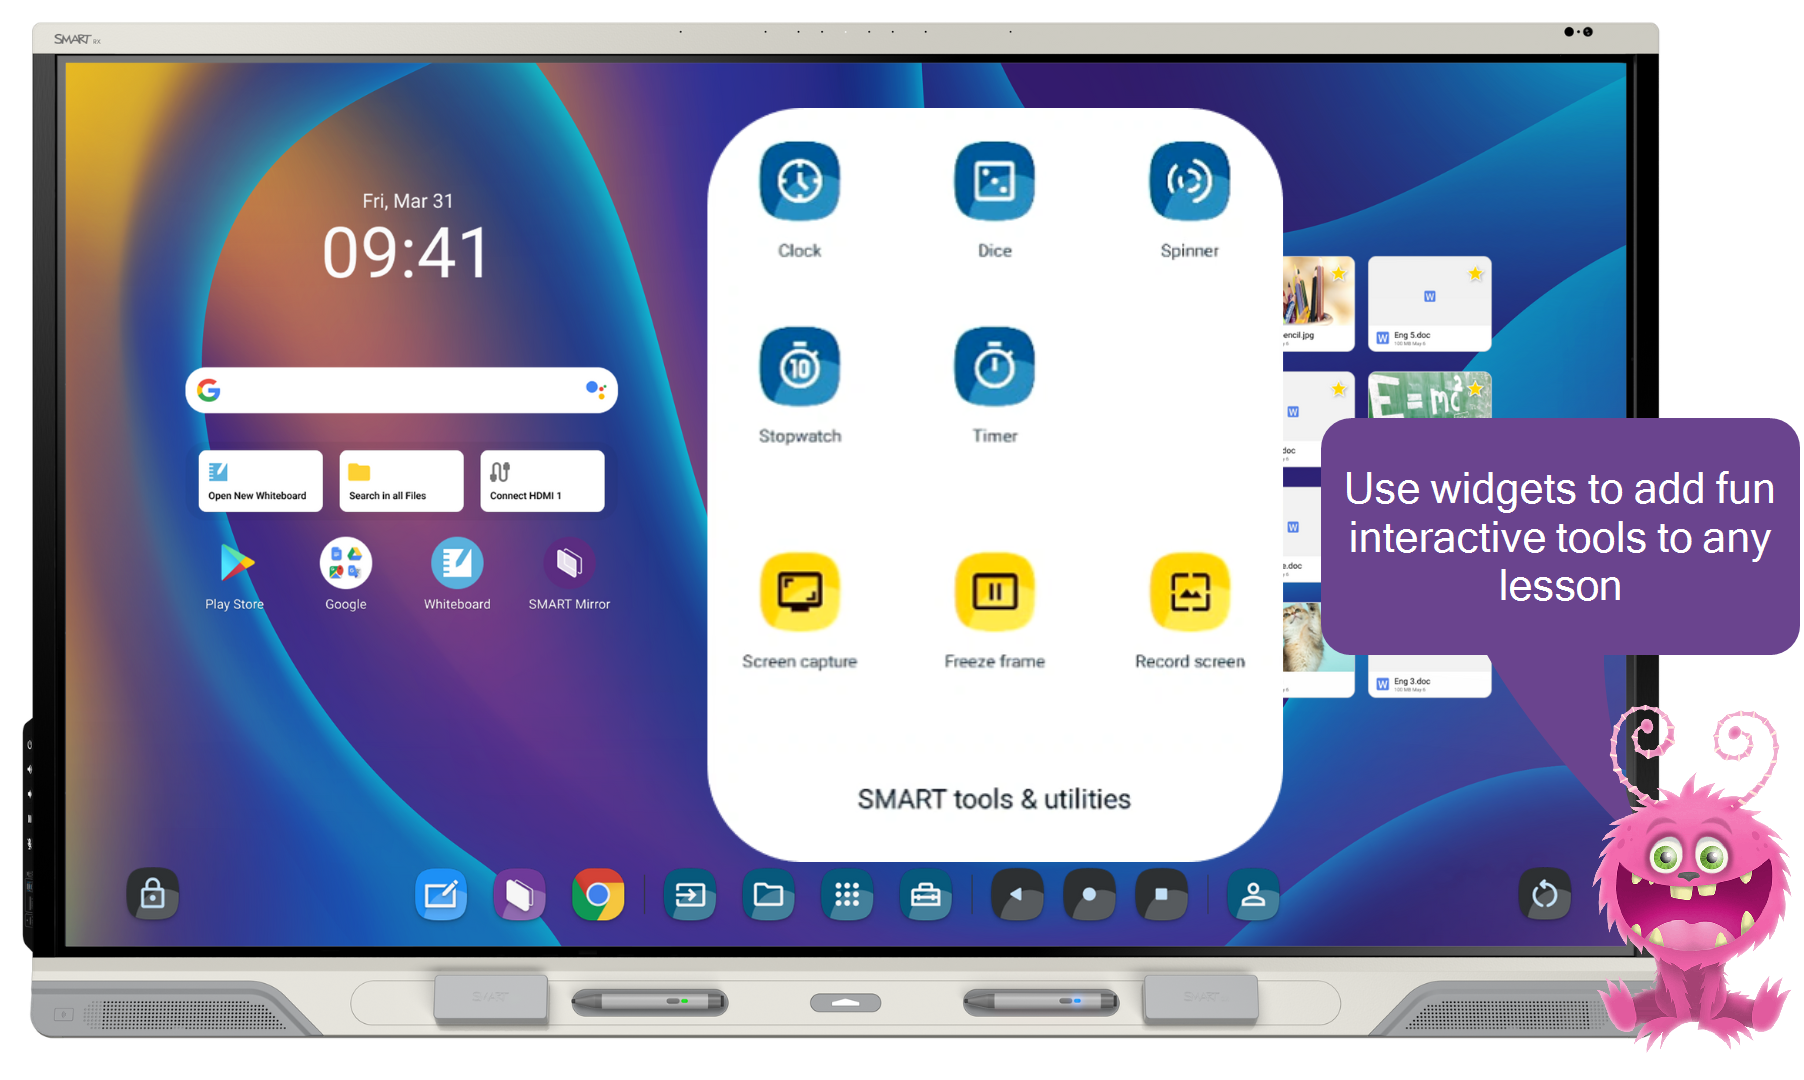
Instructional ideas
Engage your students with interactive classroom engagement tools for hands-on learning and interactive classroom management.
Add the clock tool; choose analog, digital, or both. Students can move the clock hands to practice telling time or to work on elapsed time problems.
Set recurring alarms on the clock tool to remind students of transition times or the start/end of the class period.
Use the timer tool to help students track the time to rotate stations or the deadline to complete the classroom task.
Enhance your lessons with engagement tools to guide student creation and small-group learning.
Create custom lists in the spinner with text, shapes, or images for quick reference or to create student choice.
Use the spinner on a SMART Whiteboard space as a starting point for challenges. For example:
Create a writer’s spinner with sections for setting, character, problem, and resolution.
Create a Math spinner with numbers and math symbols and have students spin it to create their own math problems.
Utilize the built-in spinner templates for quick activity building.
Extend learning by having students use the classroom engagement tools to manage their own learning.
Use the timer tool to track different tasks to complete at the board and to promote student time-management best practices.
Use the spinner tool or dice tool to identify their role in a group project, to select a brain break activity, or to select from provided student choice activities.
Use split screen
Steps
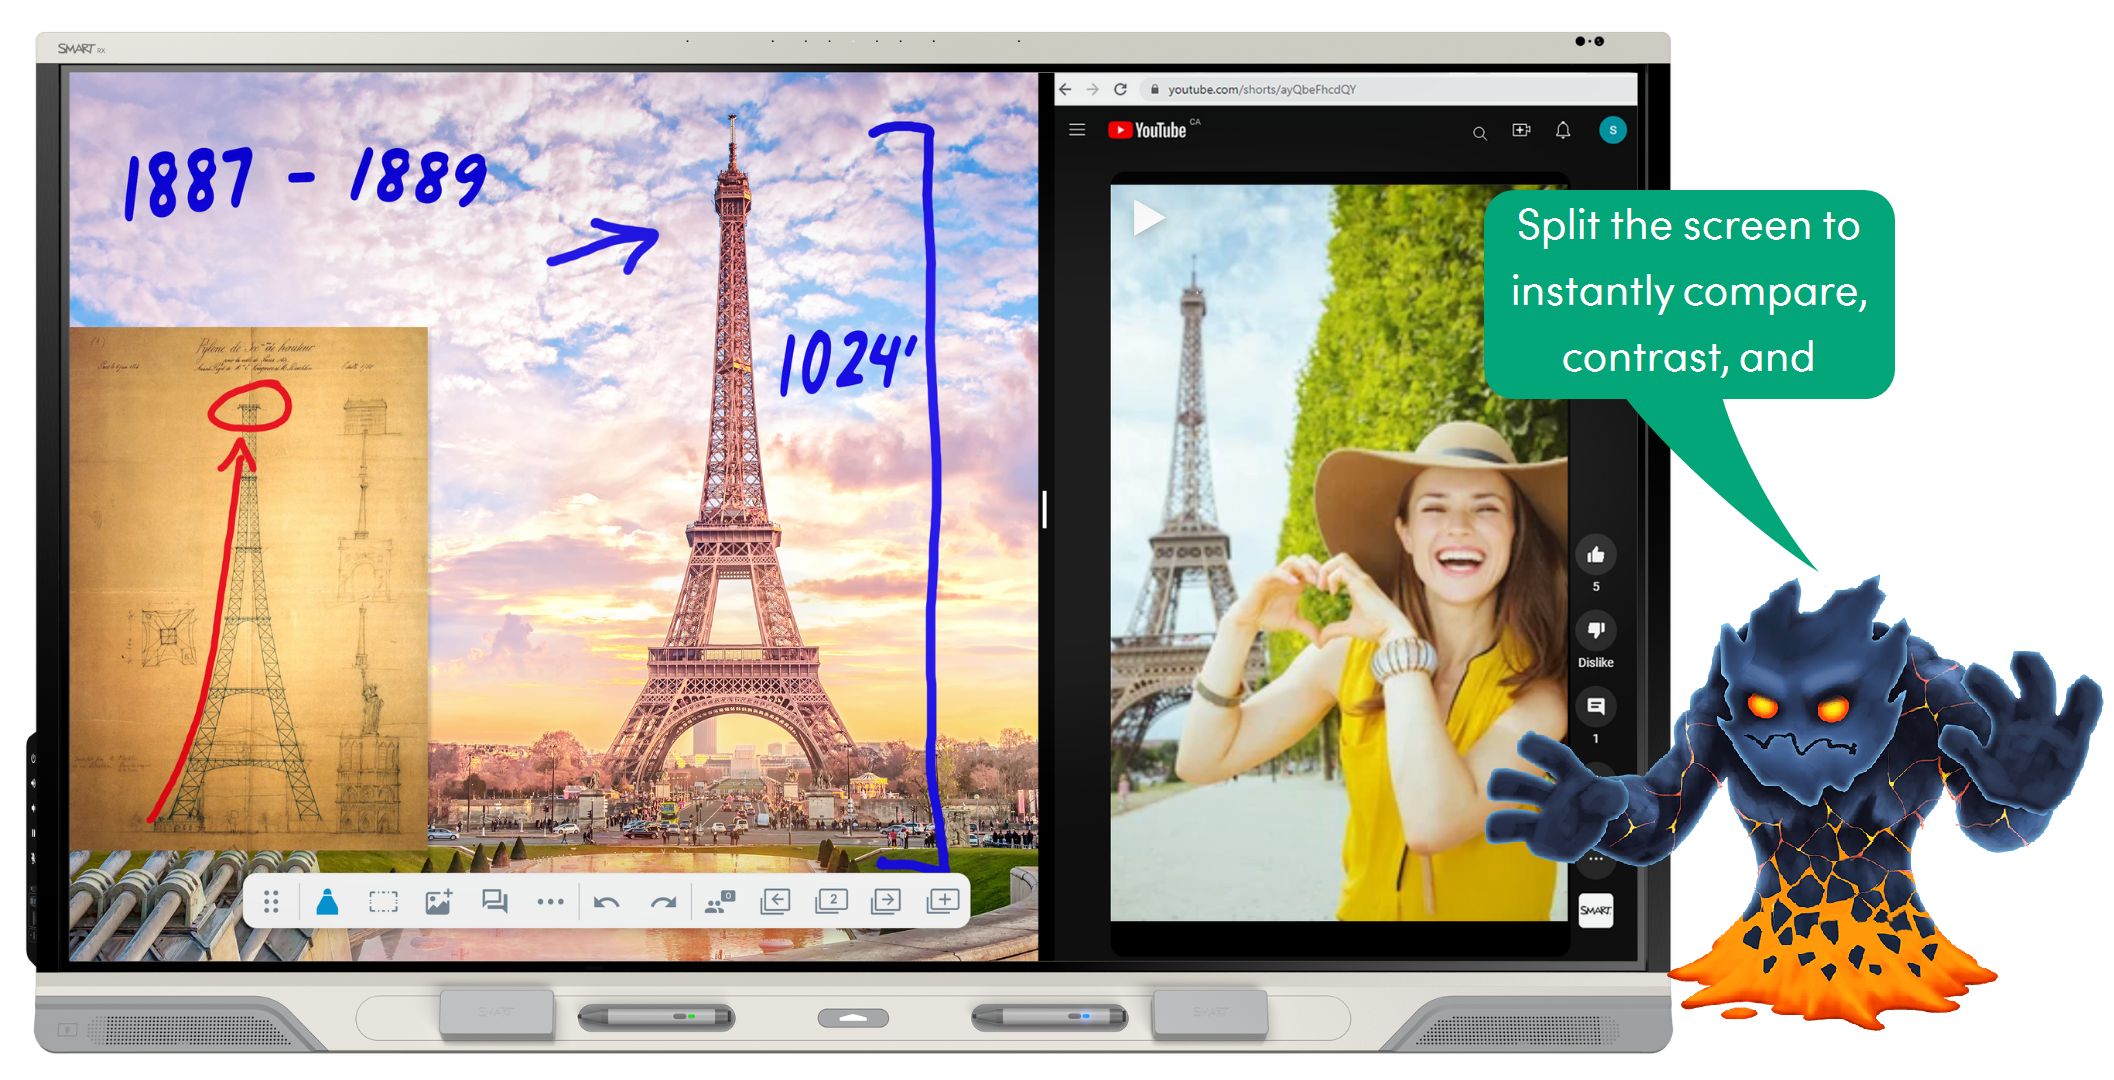
| 1 | Split the screen Open the first app you want to include in split screen view. From the home screen, tap Recents Note This option is available only when an app supports split screen. |

| 2 | Interact with both screens Drag the divider left or right to adjust the size of each view. Then tap the screen you want to interact with. Use the display’s pens to annotate or gestures to interact with the selected screen. |
| 3 | Close split screen view When you’re done, drag the divider all the way to the left or the right to close the split screen view. |
Instructional ideas
Engage your class by using split screen to easily compare, contrast and analyze lesson content.
Split between a text and the whiteboard so students can analyze vocabulary, author’s purpose, text features, and more.
Use two texts side-by-side to compare and contrast writing styles, author’s tone, and other reading elements.
Enhance your lesson with split screen by encouraging collaboration with student-led stations.
Students use a browser window and the whiteboard app to analyze and annotate selected texts to promote discussion.
Use split screen to interact with interactive lesson content, such as PhET science activities. Use the interactive whiteboard to record notes and track hypotheses.
Extend your lesson by encouraging students to apply problem-solving and critical thinking skills with split screen.
Use the Desmos app and a ready-made graphic organizer in the iQ whiteboard to have students graph functions in real time and analyze, compare, and make inferences about future plots.
Encourage discussion and problem-solving by analyzing media in the browser (such as current events, news clips, or articles) and brainstorming about the impacts students can have on those events in an instant Shout It Out! activity.
Share a screen
Steps
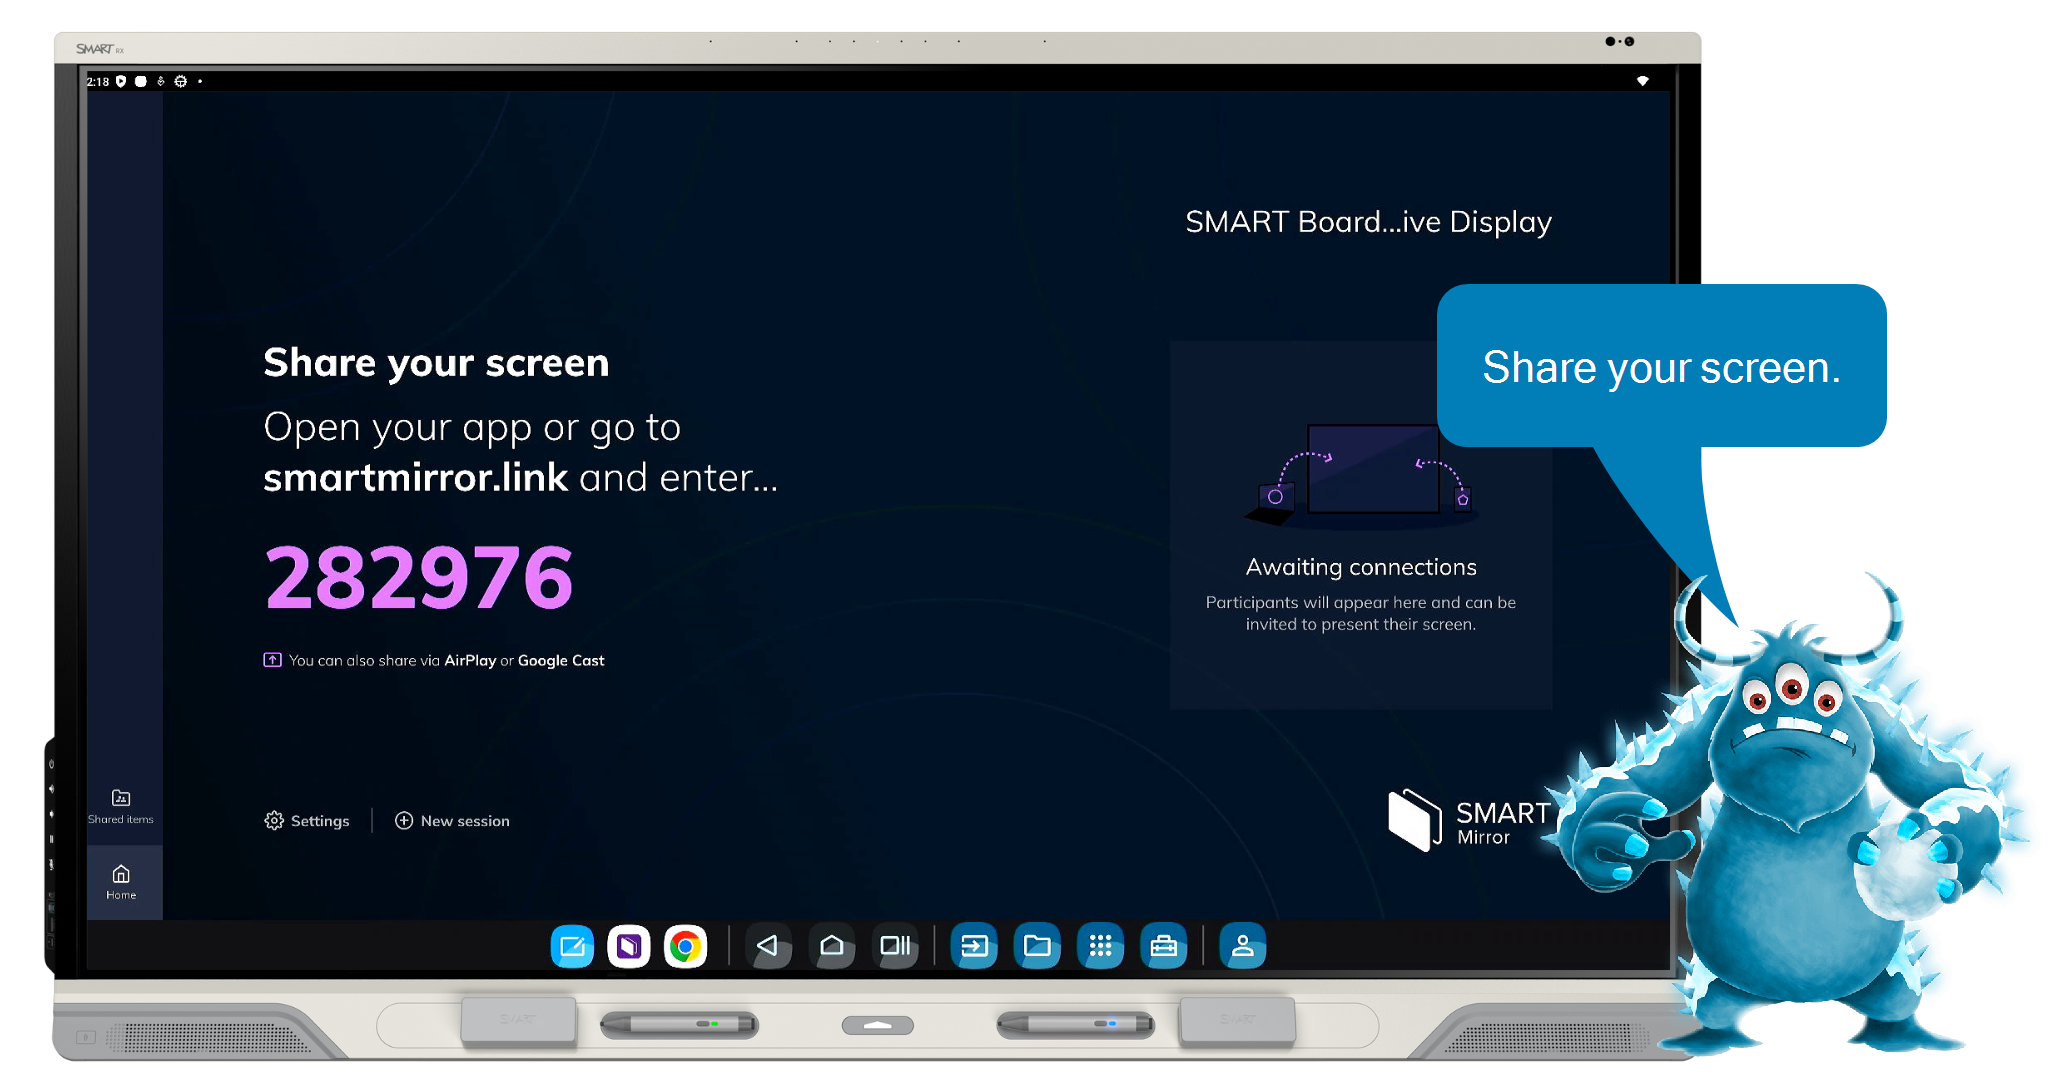
| 1 | Open the screen sharing app On the home screen, tap SMART Mirror |
 . Make sure your device is connected to the same Wi-Fi network as the display.
| 2 | Connect your device Click one of the links below to learn how to connect and share the device’s screen. |
| 3 | Get help Having issues connecting? |
Instructional ideas
Engage your students by sharing a device screen to present a video, slideshow, PDF, or other lesson content.
From your device, walk through step-by-step directions to help students understand the lesson instructions.
Enrich discussions by sharing content from multiple devices, including student content.
Enhance our lessons by asking students to share videos, images, or work that relates to the subject matter and share their thoughts with the class.
Students can look for images, news articles, current events, or songs to connect ideas.
Students can create metaphors or similes for the concepts they’re studying to show a deeper understanding.
Extend learning by having students share student-directed productions that use a variety of media and tools to present their ideas.
Students can display slideshows, original movies, and digital work from their devices.
Students can share notes and approaches to problem-solving and compare similarities and differences.
Record lessons
Steps
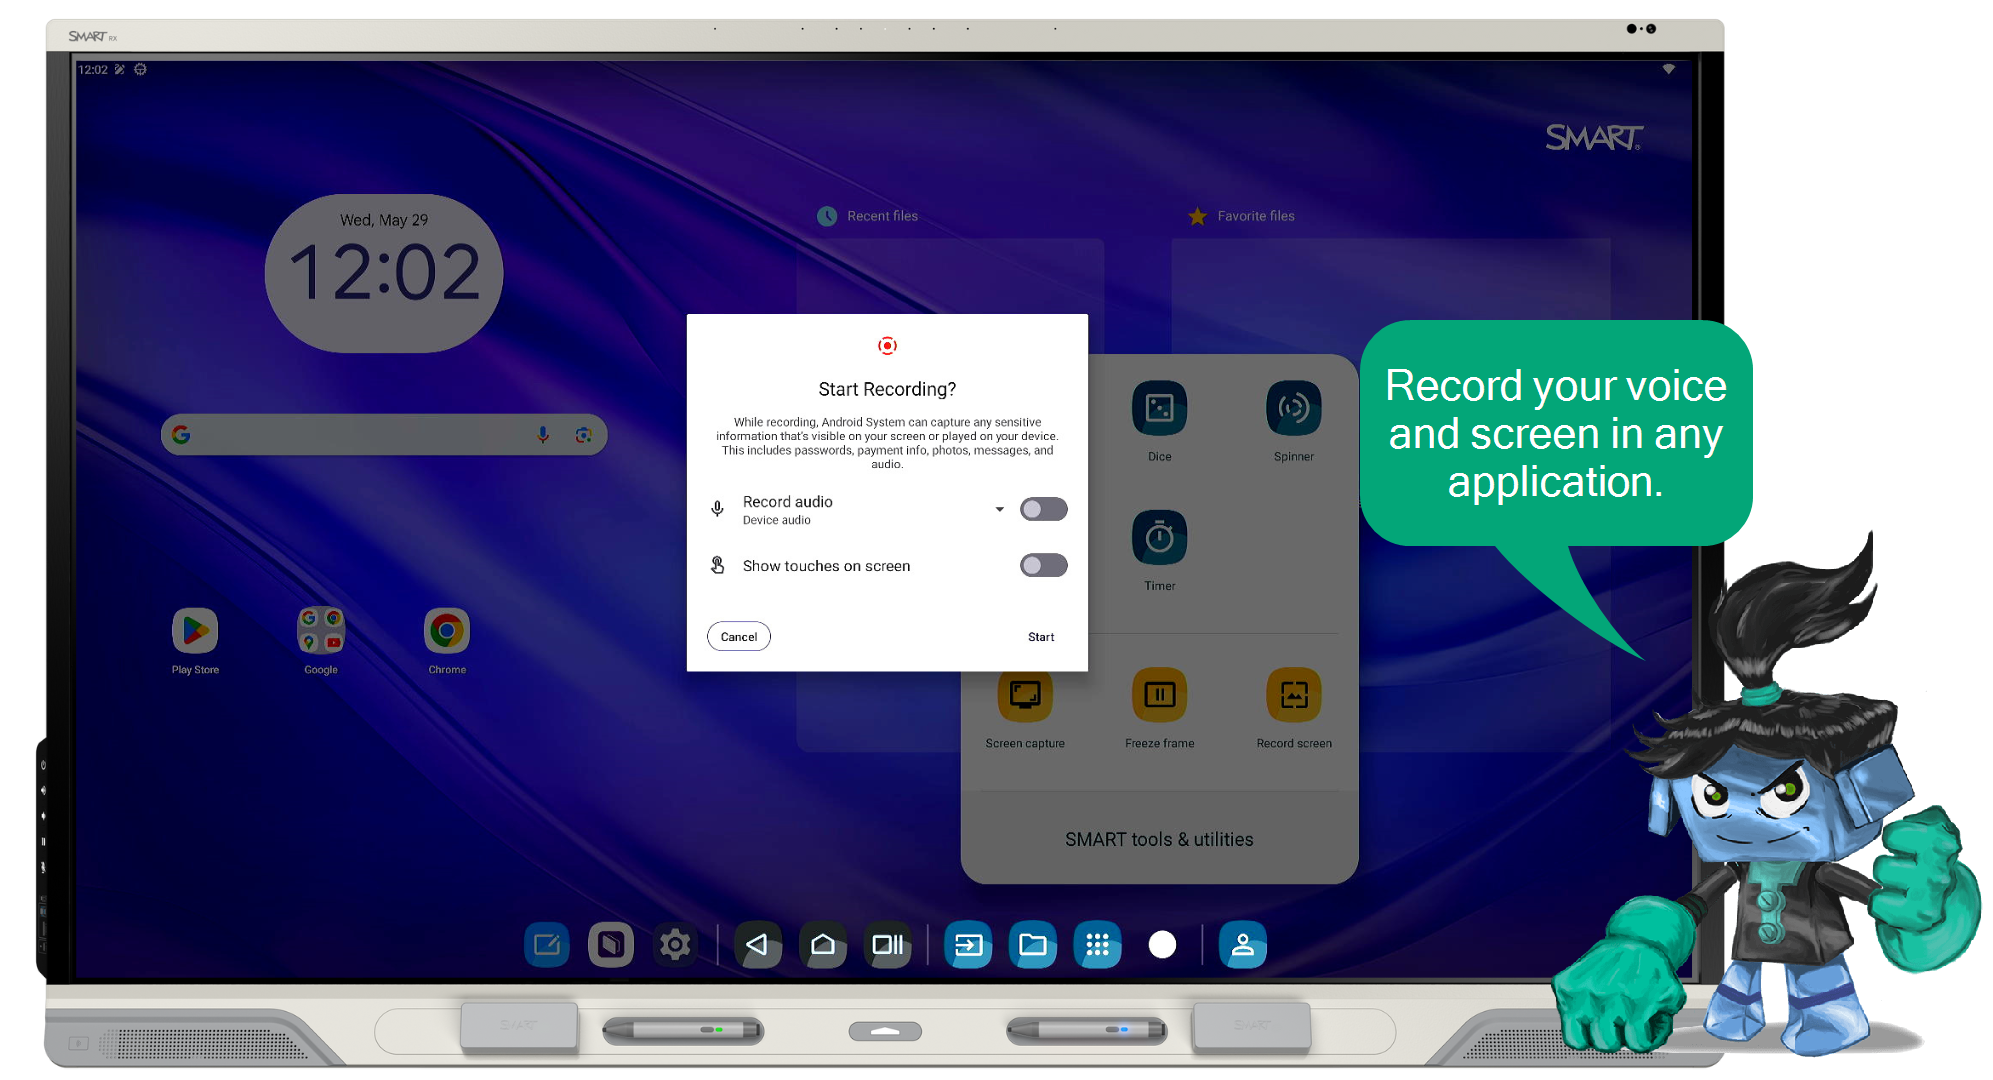
| 1 | Open the record screen app On the Home screen, tap SMART Tools |
| 2 | Tap Record screen Tap Record screen Note You can access screen recordings later by tapping File manager |
 .
.
Instructional ideas
Engage your class by using the Screen Recorder tool to demonstrate examples, modeling, and explanations.
Record new ways of solving math problems to share with parents.
Record and share key processes for students to refer to outside of class or within your LMS.
Enhance your lessons by using the Screen Recorder tool to capture student presentations, centers, and small group visual thinking.
Create digital artifacts of class presentations.
Use screen record to capture thoughts and work from student groups while using the display as a center.
Extend learning by using the Screen Recorder tool to capture lessons for students absent or in need of additional review for outside of the classroom.
Introduce key vocabulary and big ideas before class to enhance prior knowledge or reinforce concepts.
Provide an overview of the process so students can receive support in areas they did not understand during class time.
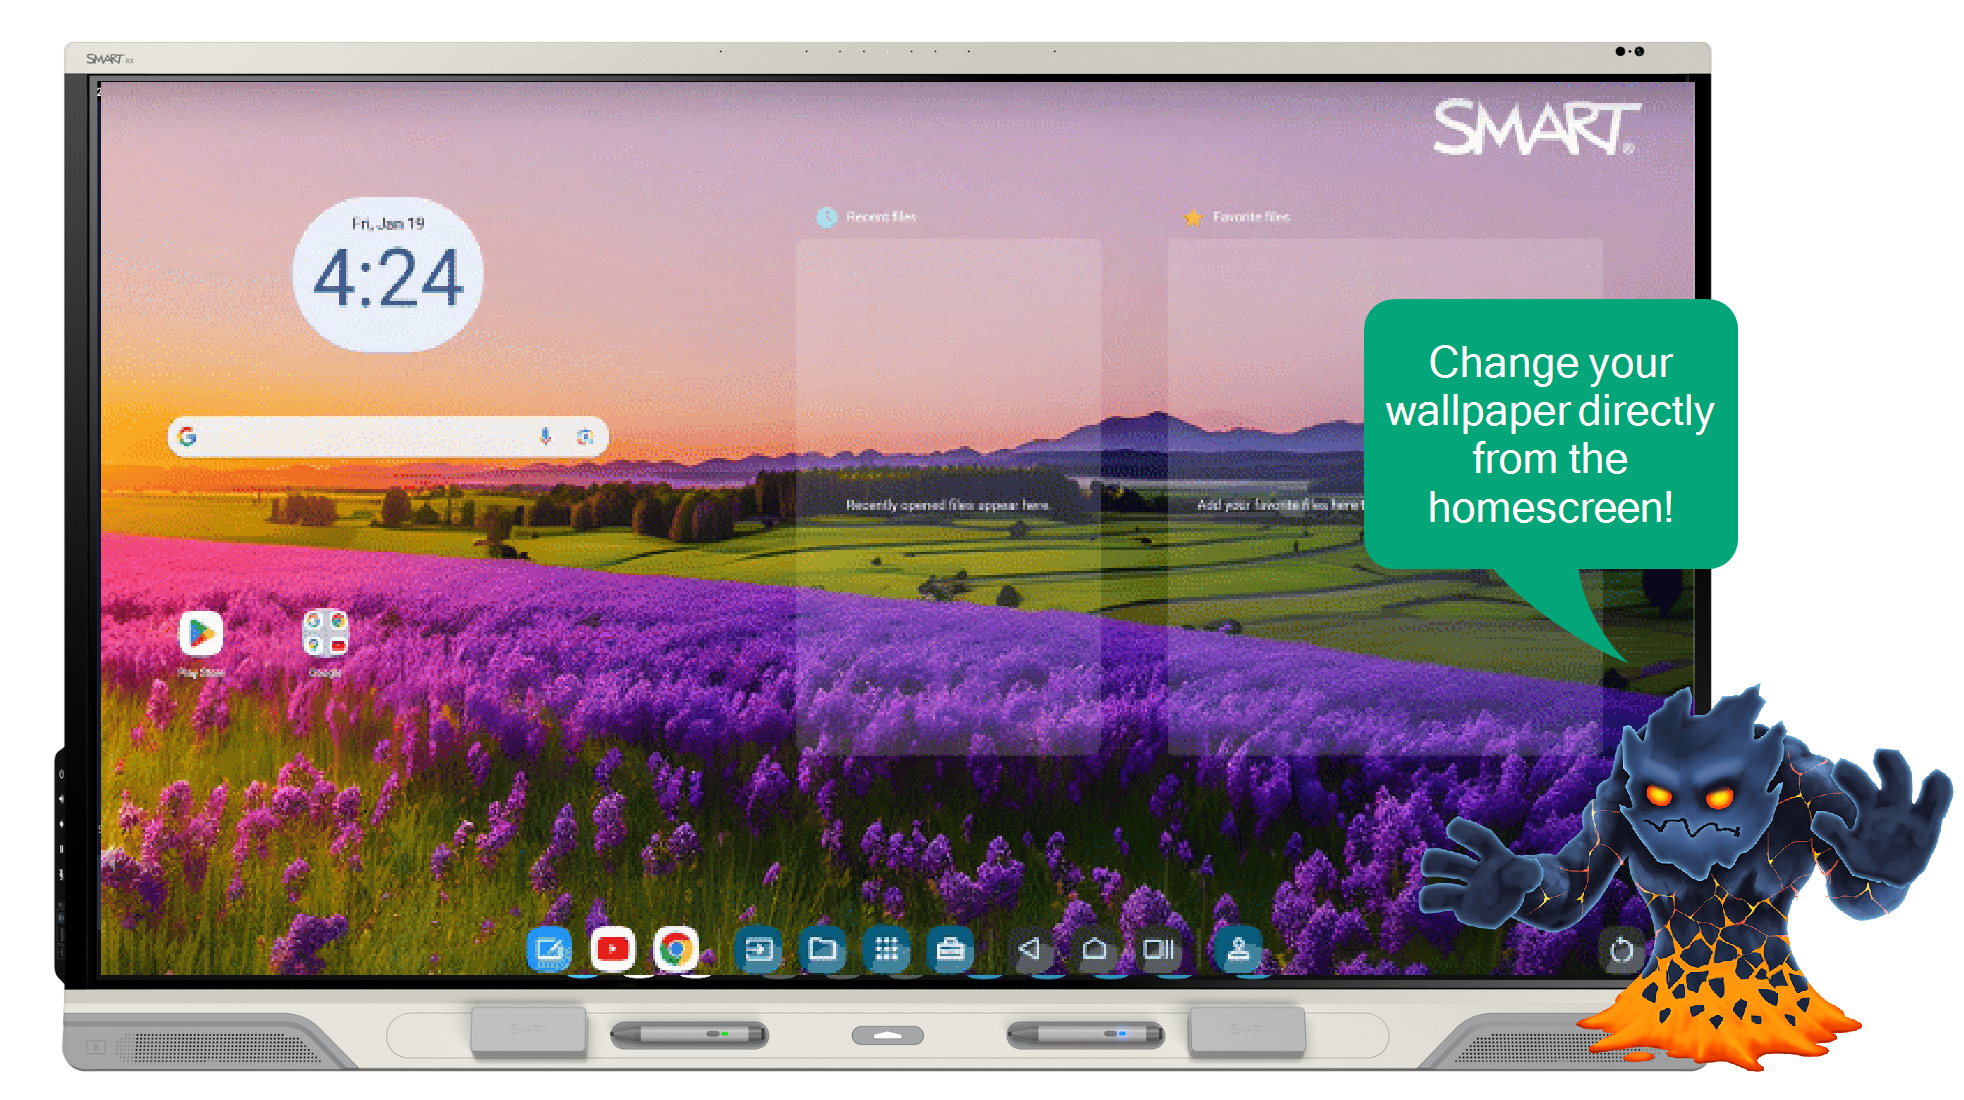
Change the wallpaper
Steps
| 1 | Change the wallpaper from the home screen You can change the display’s background to personalize your display. Tap and press a blank section of the home screen, then select Wallpapers and follow the prompts. OR Tap Apps |
| 2 | Upload your own wallpaper image Tap My photos to add your own image. |
| 3 | You can insert a USB drive and select an image from the drive to set it as your background. Note For best results, use a .jpg or .png file with 1920 × 1080 resolution. |
Instructional ideas
Engage your students by using background images that represent a unit of study, a mission statement, or a metaphor.
Display historical images, famous artwork, important people, or significant places around the world.
Add a picture of your classroom, school events, or the school mascot to infuse school spirit into your classroom.
Enhance your classroom culture and encourage creativity and ownership by using student-created designs as the display’s background.
Use student-created art, digital posters, word collages, and more.
Upload photographs taken by students to cultivate a sense of pride or accomplishment in their work.
Extend learning by adding a variety of themed wallpapers to transport your students into learning.
Change the wallpaper to reflect different eras in time to promote discussion and discuss the cultural and historical significance of the imagery.
Use wallpapers featuring maps or geographic landscapes to encourage students to explore different regions, countries, or historical locations to reinforce learning.
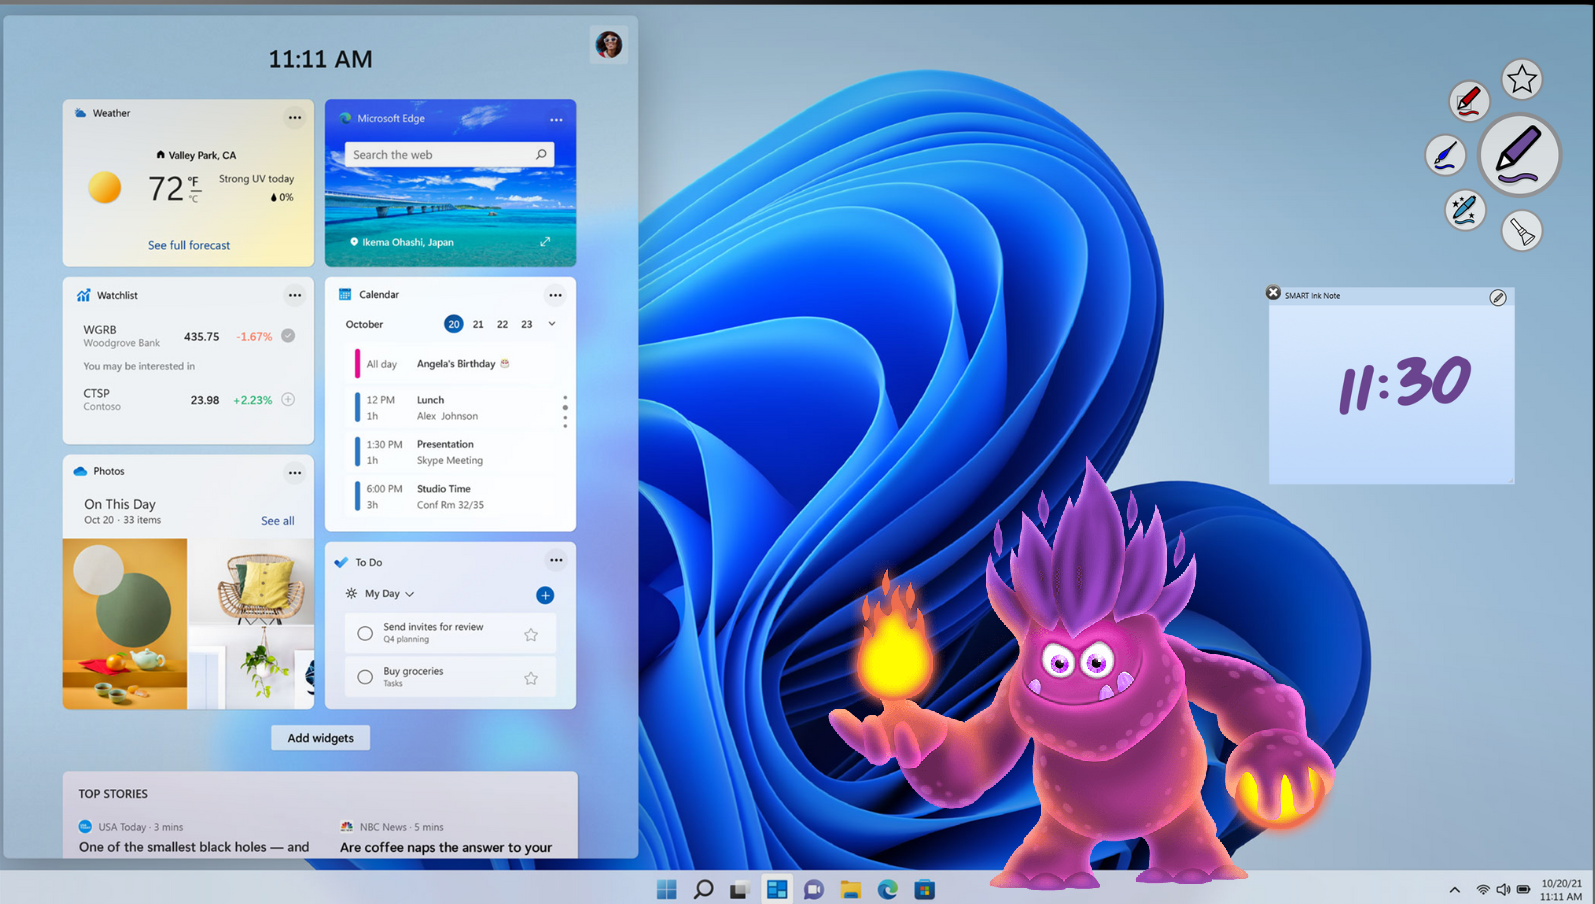
SMART Ink
Steps
| 1 | Pick up and write  When you pick up one of the display’s pens, SMART Ink’s dynamic toolbar appears. Start writing, even on the desktop. |
| 2 | Customize your pen style 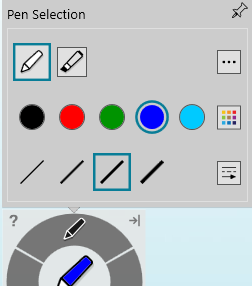 Tap the dynamic toolbar and choose the pen. A window opens in which you to select a pen or highlighter, the ink color, and line thickness. |
| 3 | Use the Toolbox 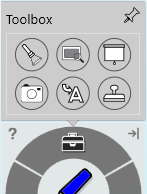 Tap the dynamic toolbar and choose the toolbox. Spotlight or magnify an area or use the Screen Shade to slowly reveal the screen in any application. Easily navigate to any website using the ink-to-text tool. |
| 4 | Capture and save  In the toolbox, tap |
 to take a screen capture of any notes. Save it to your desktop or add it directly to SMART Notebook.
Instructional ideas
Engage your students by opening a piece of writing (for example, a poem) and using the toolbox’s Screen Shade tool to cover the screen.
Identify details that support the article’s big idea, highlight important vocabulary words, or identify inference evidence.
Lower the shade, one line at a time, and students can highlight figurative language examples, circle rhyming patterns, and so on.
Enhance your lessons by finding an article or image online for students to read and annotate.
On an image of a map, use the toolbox’s Spotlight tool to shine a light on certain areas. Use the magnifier to zoom in on other areas of the map.
Capture student work and ideas using screen capture in the toolbox.
Extend learning by having students use SMART Ink tools during student presentations to communicate key points and processes.
Students can annotate over web pages, images, or the desktop to capture class thoughts.
Students can annotate over Microsoft files, such as PowerPoint, Word, and more.
Note
SMART Ink is available on the computer input of a SMART Board interactive display with iQ. SMART Ink, which is included with SMART Notebook or downloaded separately, must be installed on the computer before you can use it.