Running a Trace test
The Trace window displays the precise x,y coordinates that correspond to points of constant or intermittent contact with the interactive screen. This window provides you with a visual counterpart to the x,y coordinates that are logged in the log window when any contact is made with the interactive screen.
You can use the Trace test to verify that pen and finger presses register over the entire surface of the interactive screen.
To trace screen contact
In the SMART Board Diagnostics window, click Trace
 , or select Tools > Trace.
Touch the interactive screen.
The points of contact appear either as segments, dots or dotted segments.
To run a Trace test
Using a pen, draw horizontal and vertical lines to form a grid across the entire screen.
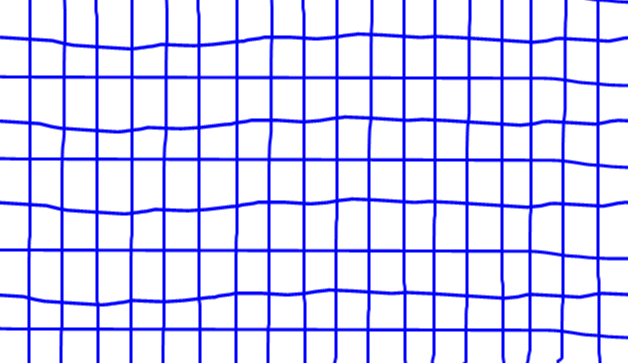
If you see any breaks in the pattern, try drawing in that area again. If the area is still unresponsive, take a snapshot of the system to diagnose the problem (see Taking a camera snapshot).
If you see any waves in the lines, calibrate the cameras to eliminate this problem.
Note
If you encounter a problem, save an image of the trace pattern. You can capture it to a .notebook file using the Screen Capture tool.
To close the Trace window, press ESC.