Using the document camera software to view live images
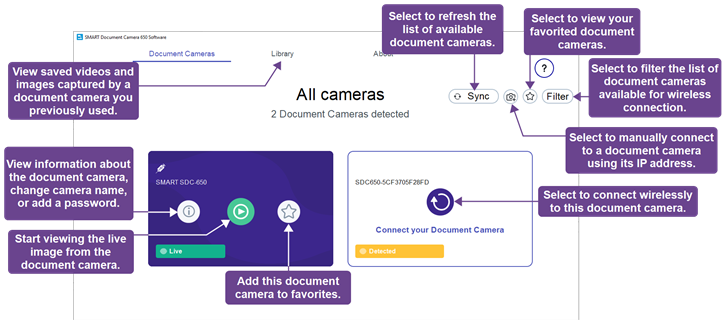
You can use the SMART Document Camera software to view live images from the document camera to a device connected through a USB or wireless connection. When you first open the SMART Document Camera 650 software, you will see the following main window with the following features:
To download the software for Windows and Mac operating systems, visit Related downloads.
For SMART Board interactive displays with iQ, visit the iQ app store on the display to download the software for Android.
When you open the SMART Document Camera 650 software, you will see the available cameras you can connect to. If there are multiple cameras are listed, you can filter the list or add a document camera to your favorites.
To connect to an available camera
Open the SMART Document Camera 650 software.
Note
In iQ, access the SMART Doc Cam app by tapping Apps > Featured Content. In the Android section, tap SMART Doc Cam.
Find the document camera you want to connect to and select
 .
.Tips
If you use the document camera often, select
 to save it to your favorites list for quicker connection in the future.
Select Filter and select In my classroom to view a local list of available wireless cameras.
Note
If you are trying to connect to a wireless camera, you may need to select
 before you can start viewing the live image.
The live stream window opens, showing the live image from the document camera.

To add and connect to a document camera manually using its IP address
Open the On-screen display menu for the document camera.
Navigate to the System > Information tab to find the IP address.
In the SMART Document Camera 650 software, select Add Camera
 .
.The Add Document Camera dialog box opens.
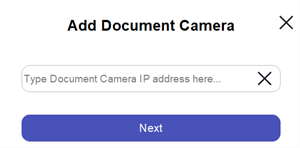
Enter the document camera’s IP address and select Next.
When the connection is successful, the Save Camera screen appears.
(Optional) Enter a name and password for the document camera. A name helps you identify the document camera more easily, and the password will prevent unwanted users from connecting to your document camera wirelessly. If you don’t enter a name, the document camera’s serial number is used.
Click Done.
When you view the live image from a connected document camera, the following controls appear:
No. | Description |
|---|---|
1 | Closes the live image viewer. |
2 | Freezes the document camera’s live image. Select again to unfreeze. |
3 | Opens the drawing tools to annotate over the live image. |
4 | Takes a screen capture of the entire live image. |
5 | Opens the video recording tools: 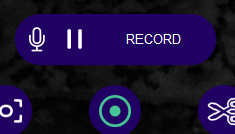
|
6 | Takes a screen capture of a selected section of the live image. 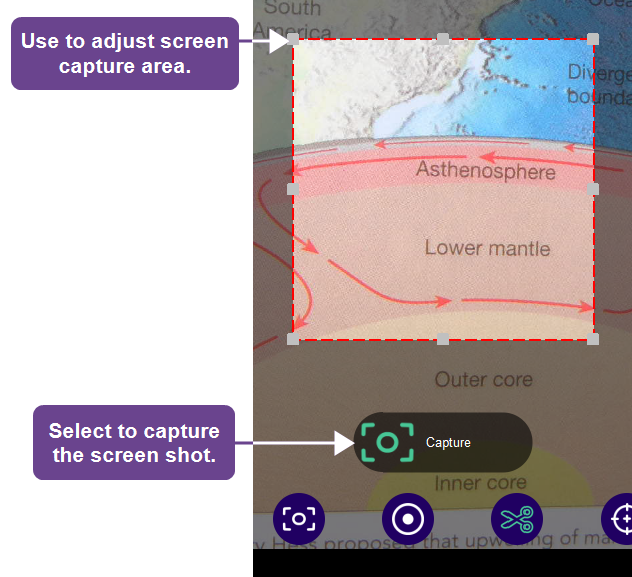 |
7 | Opens the focus controls: 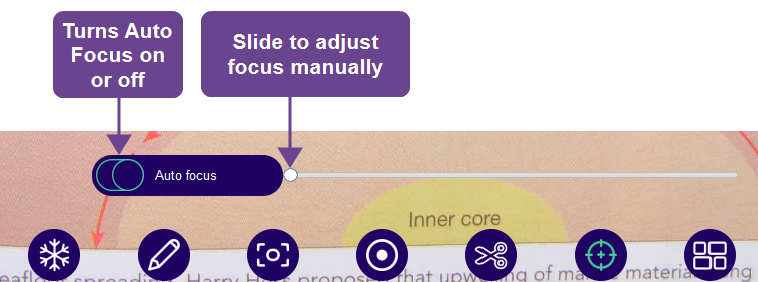 |
8 | Enters split-screen mode to view images side-by-side with the document camera’s live image. Click Add File to browse to an image saved on your device and add it to your split-screen bar at the bottom of the window:  Then select the images you want to view alongside the live image, then click the check mark. 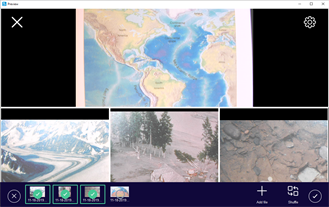 To stop split-screen mode, clear the selection of all the images you previously selected, then click the check mark to apply the changes. Click the X in the split-screen bar to close it. |
9 | Rotates the live image. |
10 | Accesses the zoom and panning controls: 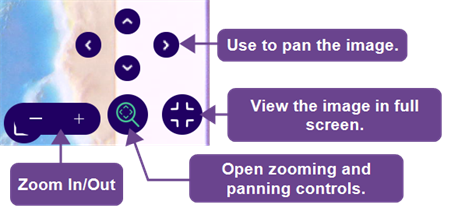 |
11 | Opens the document camera’s settings. Learn more about changing the settings. |
From the settings menu, you can change settings for the camera, display, recordings, and network usage options.
Tab | Settings |
|---|---|
Camera | Adjust resolution and the document camera’s image mode and image frequency. |
Display | Select the tools you want to appear in the toolbar, such as Freeze, Annotate, Screen shot, and so on. |
Record | Choose settings for video recording and screen captures, such as:
|
Advanced | Adjust the usage rate for network bandwidth. |
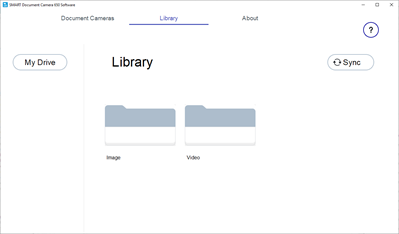
Recordings or screen captures you take using the SMART Document Camera 650 software are saved to the Library, which is synchronized with your device’s local drive. To view saved images and videos, open the Library tab. Then select either the Image or Video folder to see saved files.
Tip
Saved files and videos can be used during split screen mode to show side-by-side with the live image.
When using the SMART Document Camera 650 software on a Windows computer, you can add and export images and videos in the software’s library.
To add images or videos on a Windows computer
Open Windows’ File Explorer.
For images, browse to Pictures > SMART Document Camera 650 software .
OR
For videos, browse to Videos > SMART Document Camera 650 software.
Copy the files you want to a new location.
To export images or videos on a Windows computer
Open Windows’ File Explorer.
For images, browse to Pictures > SMART Document Camera 650 software .
OR
For videos, browse to Videos > SMART Document Camera 650 software.
Copy the files you want to a new location.
Models |
|
Keywords |
|
Related documents |