Installing and activating
Start the installation by downloading the software from the SMART website. After you’ve downloaded and run the installer, you or the teacher need to activate the software.
Tips
If you are deploying SMART Notebook on multiple computers, refer to the SMART Notebook deployment guides.
For Windows operating systems, you can install SMART Notebook using the USB installer or the web-based installer. If you’re installing SMART Notebook on multiple computers, use the USB installer so you only have to download the installer once, saving you time. The USB installer is also for use if you’re installing SMART Notebook on a computer that doesn’t have internet. However, an internet connection is required for activating the software. To find the USB installer, go to smarttech.com/products/education-software/smart-learning-suite/admin-download
Go to smarttech.com/products/education-software/smart-learning-suite/download/purchased.
Select the operating system.
Click download and save the file to a temporary location
Double-click the downloaded installer file to start the installation wizard.
Follow the on-screen instructions to complete the installation.
Tip
Windows operating systems only
To have SMART Notebook basic version run as the default program, on the final installation screen select the Use Notebook basic version by default check box. This will prevent SMART Notebook from asking for activation when the program is opened and will prevent notifications asking users to upgrade.
When the installation is complete, the following SMART software and tools are installed in addition to SMART Notebook:
Software / tool | Description |
|---|---|
SMART Ink | SMART’s digital ink software. |
SMART Product Drivers | Software required for SMART Ink and enabling touch interactions on SMART Board interactive displays. |
SMART Gallery Essentials | A package of images, multimedia files, Notebook pages, backgrounds, themes, and other content that teachers can use in their lessons. |
SMART Lesson Activity Toolkit | A package of images and Notebook pages teachers can use to build their own interactive activities. |
SMART Product Update (SPU) | Tool for updating all SMART software installed on the computer. |
SMART Uninstaller | Tool for uninstalling SMART software. |
SMART Ink Document Viewer | A PDF file viewer designed and optimized to work with SMART Ink. |
SMART System Menu | Menu from which you can access many functions and tools:
|
Follow the procedure below for the activation method you’ve chosen. See Determining the best activation method for additional details about activation methods and the SMART Admin Portal.
To activate SMART Notebook with a SMART Account (provision email)
Provide the teacher with the email that you provisioned in the SMART Admin Portal.
Have the teacher create a SMART Account with the email you provisioned, if they haven’t already.
Have the teacher open SMART Notebook on their computer.
In the Notebook menu, the teacher clicks Account > Sign in and follows the onscreen instructions to sign in.
To activate SMART Notebook with a product key
Find the product key you copied and saved from the SMART Admin Portal.
Note
A product key may have also been provided in the email SMART sent after you purchased a subscription to SMART Notebook.
Open SMART Notebook.
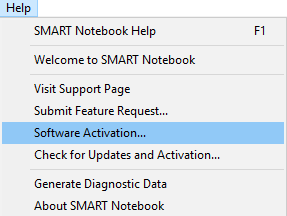
In the Notebook menu, click Help > Software Activation.
In the SMART Software Activation dialog box, click Add.
Paste the product key and click Add.
Accept the terms of the license agreement and click Next. Continue following the on-screen instructions to finish activating SMART Notebook. After SMART Notebook is activated, you can access all its features for the duration of the subscription.