Share this guide
#WeareSMART
Tips for using this guide

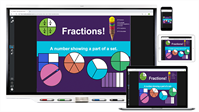
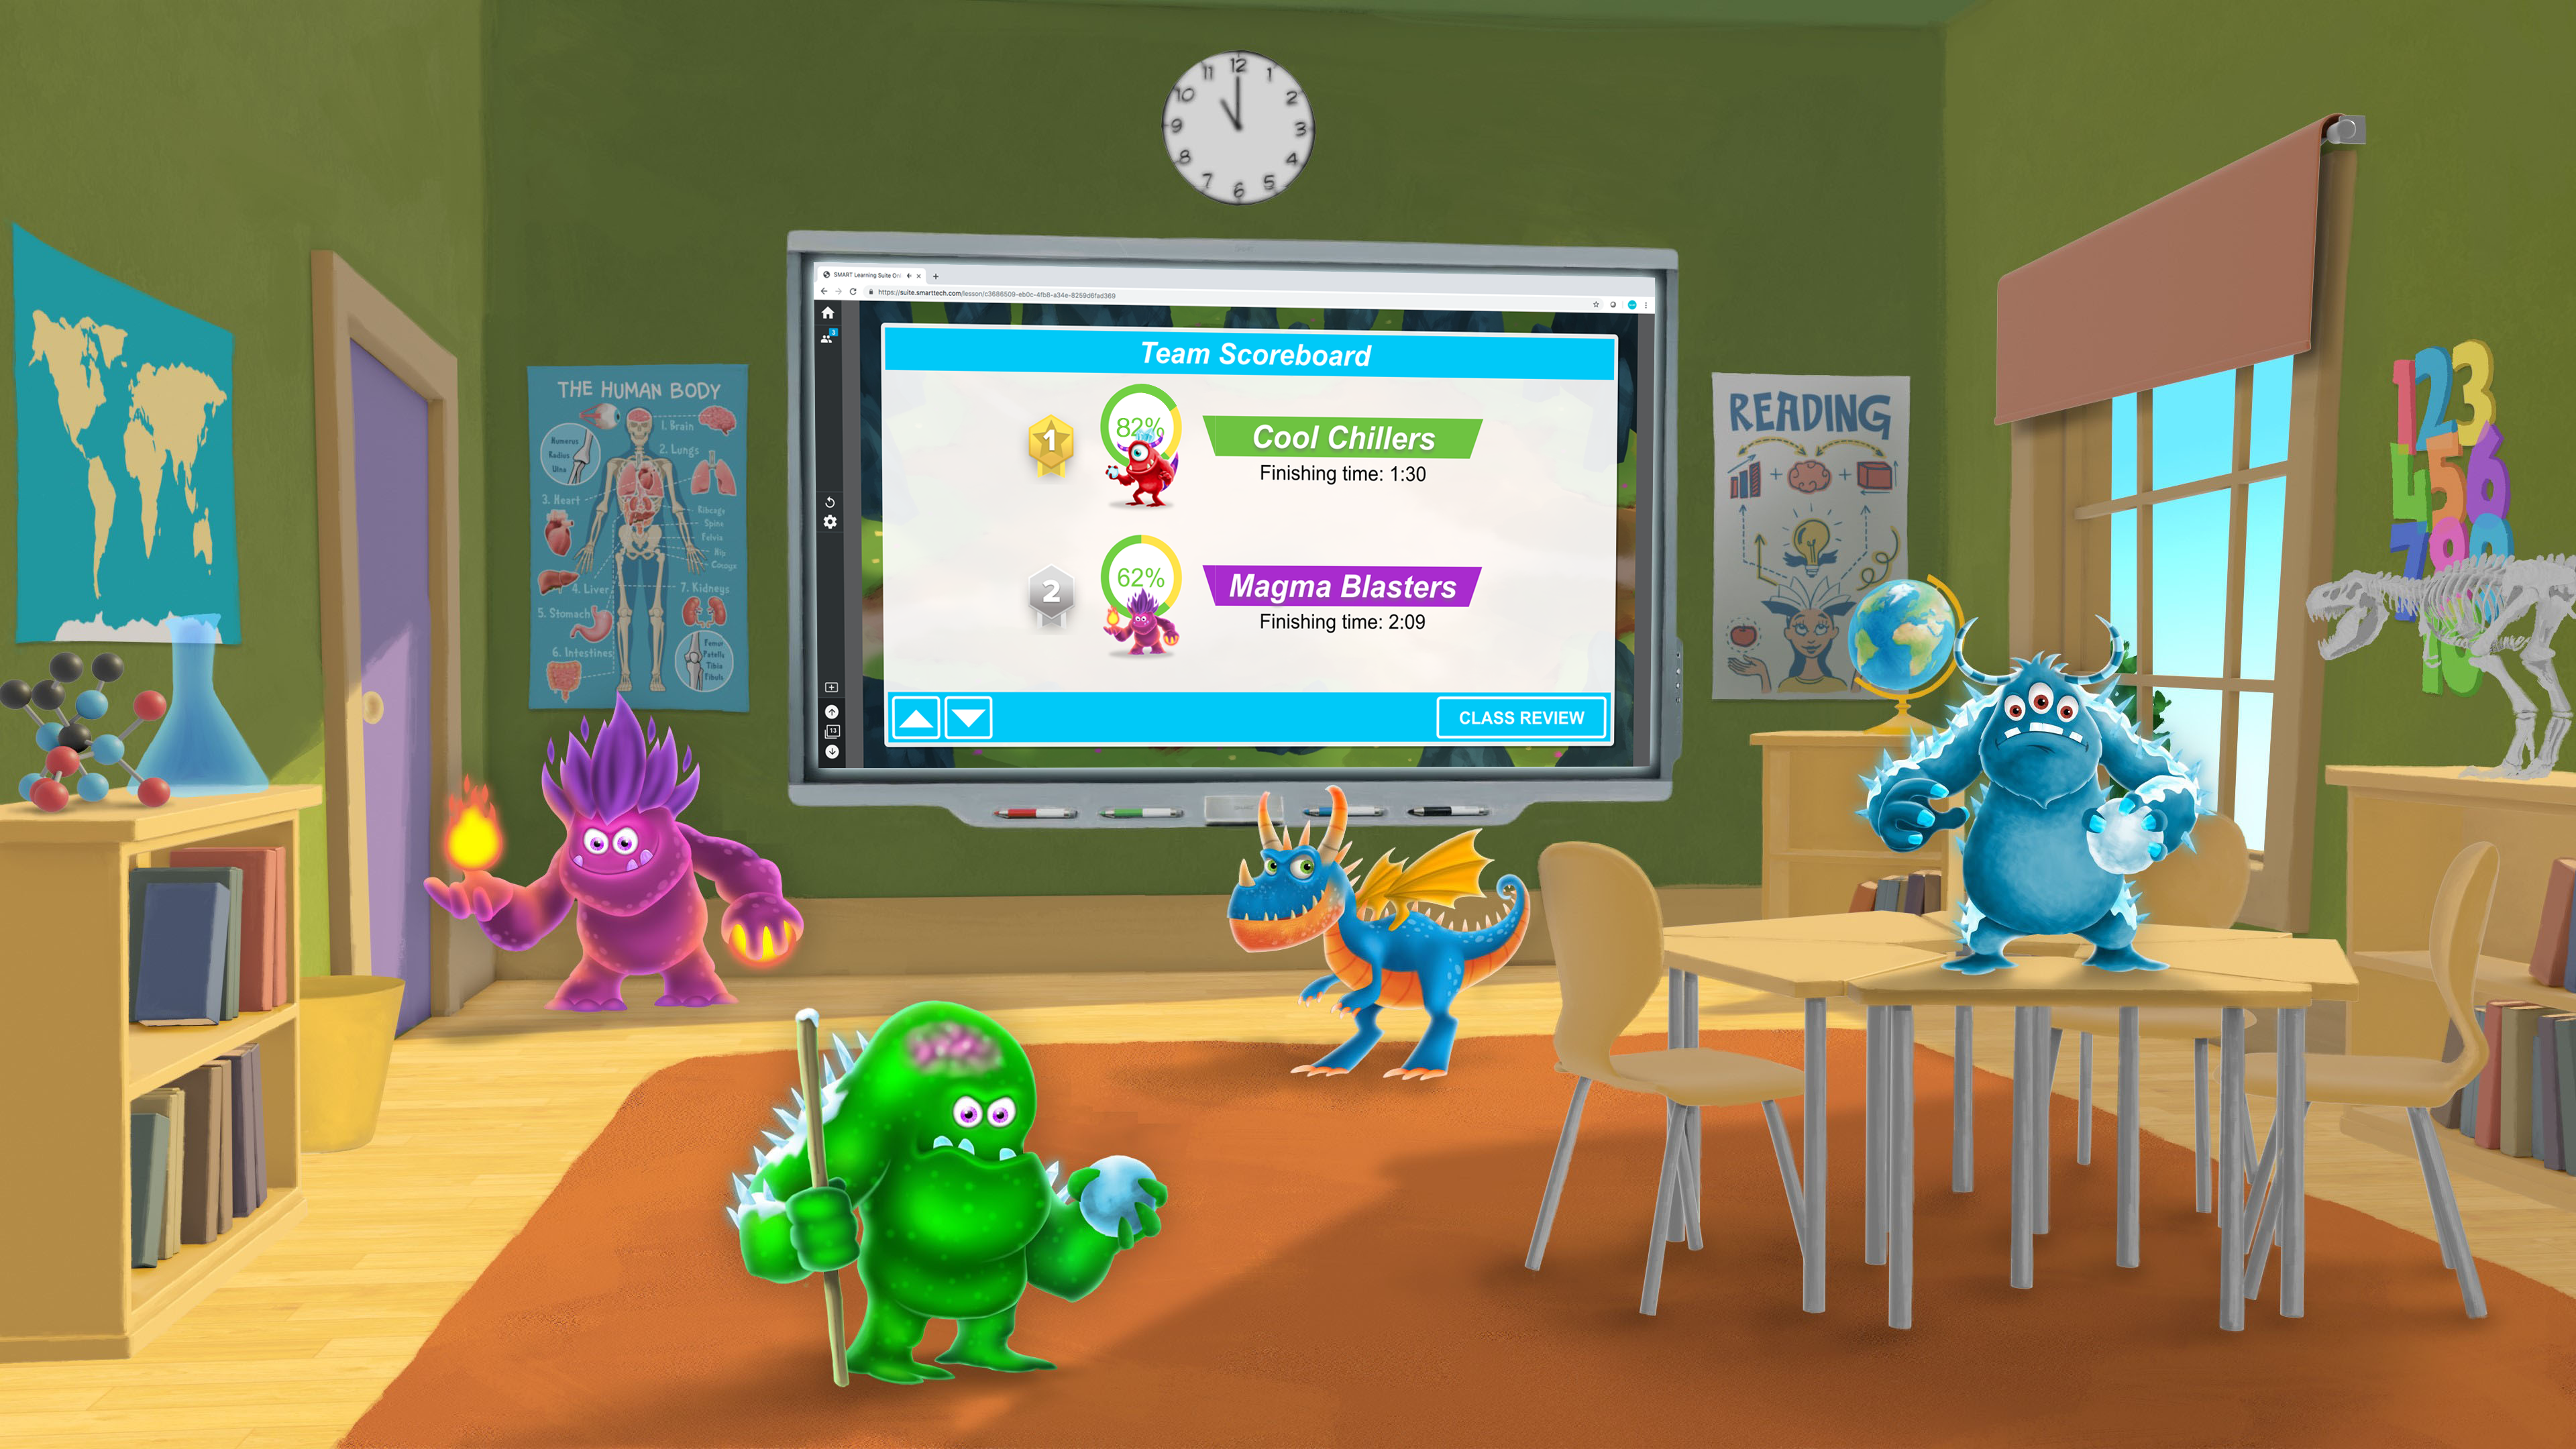
Use this guide anytime, anywhere, on any device.
Follow the Steps on a page to learn how to use a tool, then choose an Instructional idea to try.
Try one new tool and idea a week. Learn, try, and reflect!
Instructional ideas are divided into three stages:Engage your class, Enhance your lesson, and Extend learning. Choose the stage that’s right for you.
Make existing lesson content more interactive.
Share and reflect! Review a page a week with your teaching team.
When you see this logo
 , it indicates that the feature is part of SMART Notebook Plus. Learn more.
Are you campus leadership? Email a page a week as a challenge. Prizes help!
Collaborate with other teachers online @SMARTpln
Connect and share on social media #SMARTchampion

Build a lesson from scratch or import existing materials
Steps
Open SMART Notebook

On your computer, open SMART Notebook.
Build your lesson
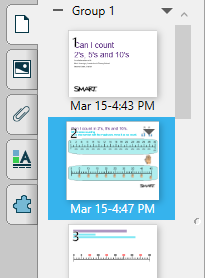
Create a new lesson from scratch or use existing resources. Download a lesson from the SMART Exchange or import a PowerPoint (Windows only) or PDF file.
The page sorter on the side shows you the different parts of your lesson.
Make it interactive
Use tools such as the Infinite Cloner, the Gallery’s interactive tools, activities, and assessments to build engaging lessons.

Save your work
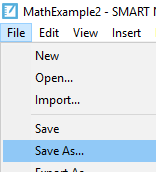
Click Save to save your SMART Notebook file.

Instructional ideas
Engage your class by importing existing lesson and curriculum resources and adding interactive activities.
Add an interactive activity or an assessment to the file you imported.
Create a three-page SMART Notebook file with a hook, learning experience, and a check for understanding:
Page 1: The hook–Spark curiosity and grab students’ attention.
Page 2: Learning Experience–Layer an engaging activity to help your students work with the subject matter.
Page 3: Check for understanding–Use activities or assessments.
Enhance lessons by downloading SMART Notebook files from SMART Exchange and customize them for your class.
Introduce your lesson, the hook, by adding a YouTube video or an activity like Fill in the Blanks to spark curiosity in your students.
Add a quote, a picture, a short poem, or line from a song to a blank page. Have students participate in a Chalk Talk.
Extend learning by importing student created content.
Create a SMART Notebook file for use in centers or stations.
Use Infinite Cloner to build math stations, or create a variety of activities to reinforce learning.
Use the timer to help students know when to rotate to their next station.
Check for understanding: Use Shout It Out!, assessments, or writing on a blank Notebook page as students leave as an exit ticket or when they arrive as an entrance ticket.
Add images
Steps
Get started

Open SMART Notebook on your computer and click the Add-On tab.
Search for royalty-free images

Choose Image Web Search to find a royalty-free image and drag it onto the SMART Notebook page.
Set transparency

Get rid of the white rectangle around the image by selecting the image, clicking the down arrow in the top-right corner, and selecting Set Image Transparency.
Crop the image

Crop an image or zoom in on one part by selecting the image, clicking the top-right arrow, and selecting Mask.

Instructional ideas
Engage your class by inserting images of possible characters, settings, and problems. Students can work in small groups to create a story based on the images.
Enhance your lessons by using an image that sparks curiosity and questions about an upcoming unit or topic. Have students come up and write or draw over the image. They can share what they’re thinking about, things they wonder, questions they have, and connections they’ve made.
Extend learning by using images that link to other pages in a SMART Notebook lesson or even to a website you would like your students to visit. Linking to another page within a lesson is a terrific way to differentiate stations or content for students.
Add text and shapes and group and lock objects
Steps
Add text and shapes

Tap
 to view available shapes and select the one you want. Then tap
  and click the page to add text.
 Tip: Use the properties options on the toolbar to change the look of the shape or text object.
Select the objects

Tap Select
 in the toolbar, then click and drag over the Notebook page until a rectangle surrounds the text, shapes, or other objects you want to select. A selection rectangle appears around the selected objects.
Group objects

Tap the menu arrow of any one of the selected objects, and then select Group > Group. To ungroup the objects, tap the group’s menu arrow, and then select Group > Ungroup.
Lock objects

Select the object or objects you want to lock. Tap the menu arrow, select Lock, and then choose how you’d like the lock to work (for example, you can lock the object but still allow it to be moved). Once locked, selected objects have a lock icon in place of the menu arrow. To unlock, tap the lock icon and select Unlock.

Instructional ideas
Engage your class using the text tool to add questions that help start a class discussion, activate prior knowledge, or communicate key ideas.
Enhance your lessons by adding text and a shape. Group the objects and lock them to move only horizontally or vertically to reveal more key information.
Extend learning by hiding grouped shapes and text off the page. Students can extend their learning by sliding out the images to discover new challenges, extra hints, or connected ideas.
 Create a game-based activity
Steps
Start the activity wizard in SMART Notebook

Click
 in the SMART Notebook toolbar to start the activity wizard. The activity wizard provides templates for building a variety of activities.
Build the activity

Select an activity and follow the instructions to add lesson material. Some activities let you add images or choose fun themes.
Note: If it’s your first time, you're prompted to make an account using Google or Microsoft.
Play
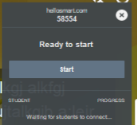
Tap START to play games on the display, or tap
 to send them to student devices through hellosmart.com.
Tip: Add game elements to help facilitate the activity.

Instructional ideas
Engage your class using SMART activities to get students interacting with your lesson.
Spark curiosity or introduce vocabulary using the Fill In the Blanks activity, which works well with a quotation, poem, or definition. Students organize the words and reflect on possible meanings. Discuss.
Practice and review: use Match ’Em Up for vocabulary or math practice, or try Game Show for a fun review.
Use formative assessments to check for understanding. Monster Quiz gives instant feedback. The class can review and dispel misconceptions at the end.
See Game-based Learning with SMART Activities for more ideas.
Enhance your lessons by using SMART’s interactive activities to build deeper understanding of concepts and demonstrate applied higher-order thinking skills.
Reinforce learning with Super Sort. Have students sort examples and non-examples of concepts.
Use the Rank Order tool to help students explain their thinking by ranking concepts from most to least important or most influential to least.
Tip
Select Do not check to create open-ended answer possibilities.
Extend learning by creating a pretest followed by two or three levels of activities and an extension task. Students will complete activities based on their needs in or outside of class.
Give students assignments that offer choices:
Flip Out: Give students a variety of learning experiences and let them choose which they would like to do.
Label Reveal: Give differentiated tasks for parts of an image.
 Create a formative assessment
Steps
Get started

Open SMART Notebook on your computer and click the assessment icon in the SMART Notebook toolbar.
Make your question set
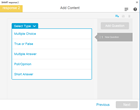
Create your question set using a variety of question types, such as multiple choice, true/false, multiple answer, and short answer. Add images and text to questions.
Start your assessment

Click
 on the assessment page. Ask your students to go to hellosmart.com and enter the teacher code shown on the assessment. Click Start. Students use their device to answer questions.
Review and export results

After all students have submitted their answers, tap End to start the review. Students get instant feedback on their devices. You can also export your students’ results by tapping Export Results in the bottom-right corner.

Instructional ideas
Engage your students with formative assessments. Use the Response assessment to get instant data and meet with students to give them personal and immediate feedback.
Create a poll or a survey to set the stage for a great Socratic Dialogue or debate with students. Use polls and surveys to get to know your students and build relationships.
Enhance your lesson by using data from the Response assessment to drive instruction (review, skip ahead, grouping, and so on).
- Create a two-question pretest. Use the short-answer question type so students cannot guess. Look at the data. Did students miss both? Need intervention. Did they get both right? Ready for a challenge. One right, one wrong? Ready for instruction.
With the click of a button, you can export the student data from the assessment as an Excel spreadsheet.
Tip
When students connect to the activity, have them enter their last names or sign in with Microsoft or Google so the spreadsheet matches your gradebook.
Extend learning by giving students differentiated tasks based on the results of a Response assessment.
Give a pretest that allows students to test out of material they’ve mastered and work on a project or a leveled-up assignment.
Add differentiated game-based activities and a choice board using Flip Out or Label Reveal for extension tasks. Students will complete certain tasks based on assessment results.
Insert an ad-free video from the web
Steps
Get started

Open SMART Notebook on your computer, click the Add-ons tab in the sidebar, and select YouTube.
Search for videos

Use the Video Search add-on to search for and find the perfect video for your lesson. Preview videos by clicking the play button.
Find the right video

When you find a video you like, click its title and select Add video.
Ad-free movie time

The video is added to the Notebook page. You're ready to hit play and share the video, ad-free!

Instructional ideas
Engage students by adding scholarly and culturally responsive YouTube videos and introduce them to experiences or ideas that they haven’t encountered before.
Insert a video that will encourage curiosity. Pause it at a point that will cause students to wonder. Allow students to ask questions and make predictions.
Add a video to encourage empathy and understanding about different backgrounds and perspectives.
Enhance your lesson by adding related SMART activities alongside the video.
Add a blank page for students to share connections after watching the video.
Add a Shout It Out! activity where students can identify connections to the video’s main idea. Start the Shout It Out! activity and have students use it as a back channel as they watch the video. After the video is over, go back to the Shout It Out! to sort, discuss, and label student contributions.
Extend learning by making the whole lesson available outside of class to reinforce concepts for a Flipped Classroom.
Find a video that brings the lesson together and watch it as a class to close the lesson. Have students record questions about the video. Use their questions to start the next class.
- Create a Flip Out activity with a series of questions or problems. Have students respond to or solve two or three of the questions or problems after watching the video.
Note
If YouTube is blocked on student devices, students won’t be able to watch videos.
Use the Infinite Cloner
Steps
Get started

Open SMART Notebook on your computer. Using Image Web Search from the Add-on tab, drag an image or shape from the Gallery tab, or paste an image from the clipboard into the SMART Notebook page.
Start the Infinite Cloner

Select the image or shape you want to clone, click its down arrow in the top-right corner, and select Infinite Cloner.
Clone infinitely

Click and drag the original shape or image to create a clone, which you can then place anywhere on the page. Continue clicking and dragging the original shape or image to make multiple clones.
Stop cloning
The original shape or image stays in clone mode until you turn the Infinite Cloner off by clicking the infinity symbol in the top-right corner and selecting Infinite Cloner again.


Instructional ideas
Engage students by creating manipulatives for hands-on learning, in-class discussions, and morning meetings.
Use manipulatives to practice math concepts and build number sense (for example, base ten blocks, hundreds chart, patterns, and five and ten frames).
Use the Infinite Cloner to track daily tasks on a calendar, such as the lunch count, how you are going home, and so on.
Enhance lessons by adding manipulatives for students to use in stations or small groups.
Add images of coins and bills. Set each to be infinitely cloned. Have students work in small collaborative groups to create various amounts of money or to solve word problems using coins and bills.
Create a "making words" lesson by adding letters and setting each one to be infinitely cloned. Have students use the letters to make the mystery word.
Clone numbers and math signs, allowing students to build a variety of equations. Students can then write word problems to connect to the math equations.
- Extend learning by adding infinitely cloned shapes to rubrics for student self-assessment.
Add a ready-made activity
Steps
| 1 | Create a blank page.  In the Page Sorter, navigate to a blank page or create a new one. |
| 2 | Insert a graphic organizer, manipulative, or graphic organizer.  Open the Gallery tab and expand the Ready-made resources section. Choose one of the categories and then expand the Notebook Files and Pages items. Click and drag the ready-made resource to the blank page to add it. |

Instructional ideas
Engage your class by using ready-made graphic organizers to structure student insights and organize teaching points.
Use a Venn diagram to compare topics from a unit of study.
Use the Brainstorming web as a way to organize class ideas for a writing unit.
Enhance learning by using a digital manipulative as a student station.
Convert the page to an individual Handout or collaborative Workspace.
Students can lead each other in peer teaching activities.
Extend learning by pairing a ready-made activity with a widget.
Infuse student choice into learning by adding a spinner with learning prompts to a graphic organizer or digital manipulative page.
Extend learning by connecting to Lumio. Make lessons available on student devices in the classroom and at home.
Add links
Steps
Select an object
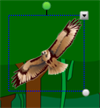
Tap Select
 in the menu and then select the object you want to add a link to.
 Add a link

Tap the object’s menu arrow, and then select Link. Choose the type of link to add. You can link to a web page, another page in the file, a file on your computer, or an attachment.
Tip: Select Launch by clicking > Object to make a larger area to click to launch the link.

Instructional ideas
Engage your class by inserting links to related resources.
Link to current events and news articles that are connected to your lesson.
Link to curated museum exhibitions and 3D tours.
Link to music that connects to the theme of the lesson.
Enhance your lessons by using links to other pages in a SMART Notebook lesson or to a website you’d like your students to visit. Linking to another page within a lesson is a terrific way to differentiate stations or content for students.
Create links to challenge pages.
Create links to support information, such as key vocabulary and definitions.
Add links to review videos so students have support resources at their fingertips.
Extend learning by using links to create HyperDocs where students can use varied resources to draw conclusions and create a variety of student-created products.
Create or import HyperDocs into SMART Notebook for students to use during stations.
Create choice boards that link to a variety of Web 2.0 applications (blogs, social networking sites, Wikipedia, and so on).
Use widgets to add interactivity
Steps
Get started

Open SMART Notebook on your computer and then open the Gallery tab. The Gallery includes a wide variety of searchable content, such as hundreds charts, graph and handwriting paper, 3D shapes, and more.
Find interactive widgets
Type Widgets in the search bar and click
 to search for the available interactive tools.
Select a tool

Click the tool you want to use and drag it into the SMART Notebook page.
Customize your tool

Click
 to personalize the interactive tool.

Instructional ideas
Engage your class with interactive widgets for hands-on learning and classroom management.
Use the clock widget; choose analog, digital, or both. Students can move the clock hands to practice telling time and to work on elapsed time problems.
Use the timer widget to help students know when time is up on a classroom task or to rotate between stations.
Enhance your lessons with widgets to guide student creation and small group learning.
Use the dice or spinner widgets on a whiteboard space for students to use as content for challenges. For example:
Create a writer’s dice, with sides for setting, character, problem, and so on. Have students roll it to help frame their writing.
Create a Math spinner with numbers and math symbols and have students spin it to create their own math problems.
Use two dice for an onset/rime challenge. Customize one dice with onsets and the other with rimes. Have students roll both dice and establish if the resulting word is a real or nonsense word.
Use the interactive tab to hide directions, answers, or challenge questions.
Extend learning by having students use widgets to manage their own learning.
Students use the timer widget to track different tasks to complete at the board.
Students use the spinner or dice widgets to provide a variety of different tasks for other students to complete aligned to the class’s objective.
Note
These tools are not compatible with Lumio. If you share this lesson to Lumio, these tools won’t be available.
Use SMART Notebook’s pen tools
Steps
Get started

Open SMART Notebook and tap the pen icon in the Notebook menu.
Select the Pen to see the available pen options. Pick a pen type and choose a color.
Use some fun pen examples

Convert hand-drawn shapes into clean digital shapes.
Draw a circle to shine a spotlight or a rectangle to magnify, or use disappearing ink.
Convert handwritten text to typed text and edit it with a variety of editing features.
Save your favorite pen style

Save a custom pen so your favorite pen is easily available. Select the pen tool and choose your settings. Open the Properties tab, select Line Style, then Save Tool Properties.
Make the toolbar accessible to everyone

Click the arrows on the top-right side of the toolbar to move it to the bottom.

Instructional ideas
Engage your class by using different pens to draw attention to different aspects of your lesson.
Use the Shape pen to draw a quick Venn Diagram.
Use the Magic pen to draw a circle over part of a map to spotlight that place, or draw a rectangle over a factor detail in an article to zoom in and focus attention.
Enhance your lessons by having the students use different pens in small groups or stations.
Add or open a blank SMART Notebook page. Students can use the Creative pen to write their high frequency or vocabulary words in rainbow ink.
Use the Text pen to help students practice editing and revising. Write sentences with the text pen and have a student come to the display to edit the sentences.
Extend learning by having students identify effective uses of the pens to communicate their ideas.
Have students partner up and use the Magic pen. One student writes a vocabulary word using the Magic pen and their partner then writes the word or definition using the regular pen. Students can take turns.
Encourage students to use the artistic style pens (Creative, Magic, or a custom pen style) for mind mapping, illustration, and creative responses.
 Use dual page mode
Steps
Turn on dual page mode

View two lesson pages at the same time by selecting View > Dual Page Display > On from the Notebook menu.
Pin a page

Pin a page to keep it in view while you browse through the rest of the pages in your lesson. To pin a page, select View > Dual Page Display > Pin.

Instructional ideas
Engage your students by providing background information on one page as a reference for completing the activity shown on the other page. You can also duplicate two of the same pages to give two groups of students their own space to respond.
Show a writing piece on one side and comprehension and analysis questions on the other page.
Add an image from history or a piece of art on one page and a graphic organizer for capturing connections and new ideas on the other.
Enhance your lessons by having student directions on one page and using the other page as a space for completing the task and recording their work.
Have multiple dice on one page and a recording sheet on the other. Have the student roll the dice to create math problems and record their answers on the other page.
Customize dice with letters and have students roll three dice to try to create CVC words. Students can record any real words they rolled.
Extend learning by showing two pieces students analyze to find parallels and contrasting ideas.
Compare and contrast two poems or nursery rhymes.
Compare two news articles from different time periods.
Compare two essential characters of significant people in history.
Use the Screen Shade tool
Steps
Open your lesson

Open your lesson and browse to the page you want to work son.
Add a Screen Shade to a page

From the menu, tap Show/Hide Screen Shade
 . The Screen Shade appears over the page.
 Tip: Tap the Screen Shade to automatically change its color.
Reveal the contents

Drag one of the Screen Shade’s handles (the small circles at the edges of the Screen Shade) to hide or reveal the page.

Instructional ideas
Engage your students by adding the Screen Shade to directions or a writing piece to keep students focused on the topic you’re covering.
Use the Screen Shade to help young students track reading lines in simple text.
Use the Screen Shade to reveal agenda items or key concepts one at a time.
Enhance your lessons by using the Screen Shade to slowly reveal an image or writing piece to allow students to predict and connect what they know with only a given set of information.
Add a picture from history aligned to your topic or a real-life example of the concept at work.
Slowly reveal a completed math problem from the bottom up and have students try to figure out the rules for the numbers in the equation at the top.
Extend learning by using the Screen Shade to slowly reveal questions or learning tasks, getting more in-depth with every question.
Have a question or task aligned to each level of Bloom’s taxonomy or depth of knowledge.
Create a question or task aligned to each component of depth and complexity thinking tools.
 Add game elements to an interactive activity
Steps
Open the activity

Browse to the page in your lesson that contains the activity.
Add game elements

Make an activity more interesting and engaging for students: tap
 to add a timer, buzzer, or randomizer.
Customize

Tap the game elements to edit the game element to suit your needs. For example, with the Randomizer (Magic Hat), you can choose to randomize items in the activity, numbers, and students.
Tip: Use the Students option to randomize more than just student names. You can edit a “student list” you create in the activity content manager to include any text you want and then use that list with the game element.
Play

Tap START to play games on the display, or tap
 to send them to student devices through hellosmart.com.

Instructional ideas
Engage students with game elements to add fun and interactivity to any lesson.
On the display, use the buzzer and call out problems that connect to the game. Students press the buzzer if they know the answer.
Increase participation by using the Magic Hat to call on students by name or using numbers.
Enhance lessons with game elements that challenge students to increase success with interactive content in small groups or stations.
Add the timer to have students increase their speed of recall and completion of activities.
Add the Magic Hat to turn games into a quiz-like format to increase students’ speed of recall.
Extend learning by adding a customized list of higher-order thinking questions to the Magic Hat.
Add question stems from Bloom’s taxonomy.
Select tasks or products for students to complete or create in small groups.
 Share a SMART Notebook lesson with teachers
Steps
Save and share
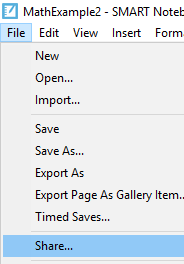
Click Save to save your lesson. Click File > Share to open the Share dialog box. SMART Notebook provides the option to upload the lesson to your SMART account by clicking Upload to SMART account.
Share to a SMART Board with iQ

If your classroom has a SMART Board with iQ, you can sign in to the display and view the shared files in your SMART account. You can open the lesson in the display’s Player app and deliver it to your students.
Share with colleagues

After uploading the file to your SMART account, click Get share link to share your work with colleagues or to add a link to lesson plans.

Instructional ideas
Engage more students by sharing lessons within a grade level.
Share a SMART Notebook file with your colleagues. They can click the link to download the file and modify it to meet the varied needs of their students. This allows you and other teachers to work smarter by sharing work.
Share with teachers at another campus. Students can work on the same material and participate in a shared Shout It Out! or Monster Quiz. Break down the classroom walls!
- Create a lesson aligned to your Scope and Sequence and share it with a teacher at another school in your district.
Enhance your teaching by organizing lessons by standards. You can refer to the collection and adapt lessons as needed.
Put links to shared SMART Notebook lessons directly into your lesson plan for easy access during class.
Create lessons connected to regional standards and upload them to SMART Exchange, tagging your school district.
Add lessons you’ve created or shared to a shared lesson plan, spreadsheet, or folder that colleagues can access.
Extend beyond your classroom. Share the link to your SMART Notebook lesson on social media. Align it with high-impact teaching practices and relevant educational conversations.
Create a resource or lesson aligned to an educational topic you’re passionate about and share it on social media using #SMARTchampion.
Based on professional reading that you have done, build a tool or lesson in SMART Notebook and share it on social media using #SMARTchampion.
Share with teachers at another campus. Students can work on the same material and participate in a shared Shout It Out! or Monster Quiz. Break down the classroom walls!
 Share a SMART Notebook lesson with your students
Steps
Save and share

Click Save to save your lesson. Click File > Share to open the Share dialog box. SMART Notebook provides the option to upload the lesson to your SMART account by clicking Upload to SMART account.
Find the shared lesson in Lumio
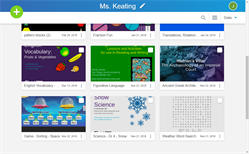
Sign in to Lumio and you’ll see your lesson there too. Now you can use Lumio’s tools to deliver the lesson.
Share a link to your lesson with students

After you sign in to Lumio, get a link to share the lesson with your students.

Instructional ideas
Engage students by sharing review material, notes, and SMART activities students can refer to at their own pace.
Sharing a file adds it to your lesson library in Lumio. From there, send the file to students to review in class or at home.
Create and share activities students can use to practice and review after class.
Share a file that includes review information students can refer to for homework or before a test.
Enhance your lesson and make it self-paced and differentiated by adding activities and handouts students can reference and work through outside of class.
Access the shared lesson in Lumio’s lesson library. You can use the Lumio’s tools to add handouts and activities for your students to complete.
Use SMART Notebook’s Infinite Cloner to add manipulatives to your lesson so students can practice skills at home (especially good for tactile students).
Add choice boards in Flip-Out and Label Reveal so students can respond to reading or reflect on what they’ve learned.
Extend learning by sharing student-centered projects that have practical applications in a flipped classroom setting so students can work on their own or collaboratively.
Make digital notes available outside of class.
After sharing to Lumio, add a blank collaborative Workspace to the lesson for students to complete as a homework help desk, where students help each other with questions about assignments.
