Working with pages in Whiteboard mode
Whiteboard files consist of one or more pages. You can create, rearrange, and delete pages. You can also display pages in different views and pan and zoom pages if you’re using Unbound Workspace.
You can use the Page Sorter to add pages to your Whiteboard file. You can add a blank page or create a duplicate (or clone) of an existing page.
Note
When you create a Whiteboard file in SMART Meeting Pro software room license, the software inserts one page in the file for each display connected to the room computer.
To add a page
Tap Insert Page
 .
.A new page appears after the current page.
Tip
You can also add a page by going to the last page and tapping Next Page
 .
.
To clone a page
Select the thumbnail of the page you want to clone.
Tap the thumbnail’s menu
 , and then select Clone Page.
A duplicate of the page is created.
You can display any page in a Whiteboard file using the Page Sorter or Organizer. You can display the next or previous page using buttons.
To display a page using the Page Sorter
In the Page Sorter, tap the thumbnail of the page you want to display.
To display a page using the Organizer
Tap Organizer
 on the SMART Business Toolbar, and then select the Pages tab.
Double-click the page’s thumbnail.
OR
Drag the page’s thumbnail to the appropriate display’s thumbnail.
The page appears on the selected display.
Tip
If you tap Identify Screens, a unique red number appears on each display and its thumbnail so that you can determine the thumbnail for each display.
To display the next page
Tap Next Page
.Note
If you tap Next Page
when viewing the last page in the file, a new, blank page appears.
To display the previous page
Tap Previous Page
 .
.
In Full Whiteboard view, SMART Meeting Pro software expands the page to fill the screen by hiding the other user interface elements. You can still access commonly used commands with the minimized SMART Business Toolbar.
Note
Depending on how you or the system administrator configured SMART Meeting Pro software, pages might display in Full Whiteboard view by default.
To display a page in Full Whiteboard view
Tap Full Whiteboard
 in the top-right corner of the page.
The page expands, and these buttons shown below appear on the SMART Business Toolbar:

Tap Next Page
or Previous Page to display pages.
To return to Normal view
Tap Normal View
 on the SMART Business Toolbar or in the top-right corner of the page.
Depending on how you or the system administrator configured SMART Meeting Pro software, the software presents pages in one of two styles.
Style | Description | Use |
|---|---|---|
Classic Workspace | Pages have defined boundaries, and the page area is usually the same or slightly larger than the viewable area. | Presenting content and making all the content visible at the same time in the viewable area |
Unbound Workspace | Pages have no defined boundaries, and the page area can be significantly larger than the viewable area. | Brainstorming and capturing more notes and drawings on a page than can be displayed in the viewable area at a single time OR Viewing a large, detailed map, diagram, or other image and zooming in on specific details |
In Unbound Workspace, you can pan and zoom pages and use the radar view, grid lines and bookmarks to navigate pages.
Tap Pan
 on the SMART Business Toolbar.
Tap the screen in a blank area of the page.
Drag in the direction you want to pan.

To zoom in or out with the Zoom In and Zoom Out buttons
Tap Zoom In
 to zoom in.
OR
Tap Zoom Out
 to zoom out.
To zoom in or out using multitouch gestures
Drag your fingers away from each other to zoom in.

OR
Drag your fingers toward each other to zoom out.

To return to 100% magnification
Double-click the whiteboard area.

OR
Tap Zoom to 100%
 .
.Tip
If the page contains more content than can be displayed at 100% magnification, double-click the whiteboard area again to zoom out until all content is visible.
To pan while zooming
Drag your fingers away from each other to zoom in.
OR
Drag your fingers toward each other to zoom out.
Move your fingers left, right, up or down to pan.

To show radar view
Tap Show Radar View
 on the SMART Business Toolbar.
Radar view appears.
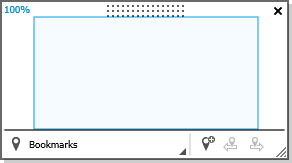
Notes
The blue box indicates the current viewing area. You can change the viewing area by dragging the blue box within radar view.
Use the buttons at the bottom of the radar view window to insert and navigate bookmarks.
You can move the radar view window by tapping and dragging its top side.
You can resize the radar view window by tapping and dragging its bottom-right corner.
To hide radar view
Tap Close
 .
.
To show the grid lines
Select View > Grid Lines.
Notes
As you zoom in, the space between the grid lines increases.
As you zoom out, the space between the grid lines decreases.
To hide the grid lines
Clear the selection of View > Grid Lines.
You can insert a bookmark anywhere on a page and at any zoom level.
After inserting a bookmark, you can do the following:
Rename the bookmark to represent the content the bookmark marks (for example, “Executive Summary,” “Initial Brainstorming” or “Northwest Entry”)
Change the order of the bookmarks on a page
Delete a bookmark if it’s no longer needed
To insert a bookmark
If radar view isn’t visible, tap Show Radar View
on the SMART Business Toolbar.Pan and zoom to the location where you want to insert the bookmark.
Tap Add Bookmark
 .
.
To rename a bookmark
If radar view isn’t visible, tap Show Radar View
on the SMART Business Toolbar.If the bookmark menu isn’t visible, tap Bookmarks
 .
.Select the bookmark you want to rename.
Tap the bookmark’s name.
Type a new name for the bookmark, and then press ENTER.
Note
If you don’t want to rename the bookmark, tap Cancel
 instead of pressing ENTER.
To change the order of bookmarks
If radar view isn’t visible, tap Show Radar View
on the SMART Business Toolbar.If the bookmark menu isn’t visible, tap Bookmarks
.Drag a bookmark’s row up or down to change the bookmark’s order.
To delete a bookmark
If radar view isn’t visible, tap Show Radar View
on the SMART Business Toolbar.If the bookmark menu isn’t visible, tap Bookmarks
.Tap the bookmark’s Delete Bookmark
 button.
You can navigate bookmarks two ways:
Use the Next Bookmark and Previous Bookmark buttons in situations where you want to navigate the bookmarks sequentially, such as presentations.
Use the bookmark menu in situations where you want to navigate the bookmarks non-sequentially, such as brainstorming sessions.
To navigate bookmarks using the Next Bookmark and Previous Bookmark buttons
Navigate to the next bookmark by tapping Next Bookmark
 .
.OR
Navigate to the previous bookmark by tapping Previous Bookmark
 .
.Note
If you navigate to a bookmark, pan or zoom, and then tap Next Bookmark
or Previous Bookmark, SMART Meeting Pro software navigates to the bookmark. You can then tap Next Bookmark or Previous Bookmark to navigate to the next or previous bookmark.
To navigate bookmarks using the bookmark menu
If radar view isn’t visible, tap Show Radar View
on the SMART Business Toolbar.If the bookmark menu isn’t visible, tap Bookmarks
.Note
The bookmark menu contains a row for each bookmark on the page. The row displays the bookmark’s name and a thumbnail image showing the page contents marked by the bookmark.
Navigate to a bookmark by tapping its thumbnail image.
If you want, you can rearrange the order of the pages in a file.
To rearrange pages using the Page Sorter
Tap the thumbnail of the page you want to move in the file.
A blue border appears around the thumbnail.
Drag the thumbnail to its new position in the Page Sorter.
A blue line indicates the page’s new position.
Release the thumbnail.
To rearrange pages using the Organizer
Tap Organizer
on the SMART Business Toolbar, and then select the Pages tab.Tap the thumbnail of the page you want to move in the file.
A blue border appears around the thumbnail.
Drag the thumbnail to its new position in the Pages tab.
A blue line indicates the page’s new position.
Release the thumbnail.
You can delete a page from the current file using the Page Sorter.
To delete a page
Select the thumbnail of the page you want to delete.
Tap the thumbnail’s menu
, and then select Delete Page.Tip
If you are using the classic Whiteboard style, you can also delete pages by tapping Delete Page
 in the Page Sorter.
Keywords |
|
Related documents |