Set up shared access mode
SMART iQ’s shared access mode provides secure, flexible access in shared environments such as classrooms where multiple people use the display regularly. In these spaces, the use of the Android lock screen can be disruptive because it prevents access to any users who do not know the PIN, password, or pattern used to set the lock screen.
To resolve this, when a display is in shared access mode, the Android lock screen has a button users can tap to gain access to the display quickly. This button is different depending on if a public profile or SMART Account’s lock screen is displayed. Learn more about each scenario below. These features ensure that any user can use the display without requiring Admin intervention.
Note
Shared access mode is available in iQ software 4.5 or later.
Shared access mode can be set up using one of the three following methods:
Using SMART Remote Management
Using iQ settings
During initial setup of iQ
Option 1: Use SMART Remote Management
Important
You can only use this option for SMART Board displays that don’t have a lock screen set on the public profile.
Sign in to SMART Remote Management (smart.glbth.com).
Click Repositories

 WorkflowAdd new.
Type a name for the workflow, then click Commands
Add commandRemove Google accounts from this device. Select Remove all accounts and click Confirm to return to the edit workflow window.
Click Add command
Remote executeAdd new.Create a remote execute command that has the following:
In the Command field:
Copysmartcli
In the Argument field:
Copyusersupervisor board_mode shared --reboot
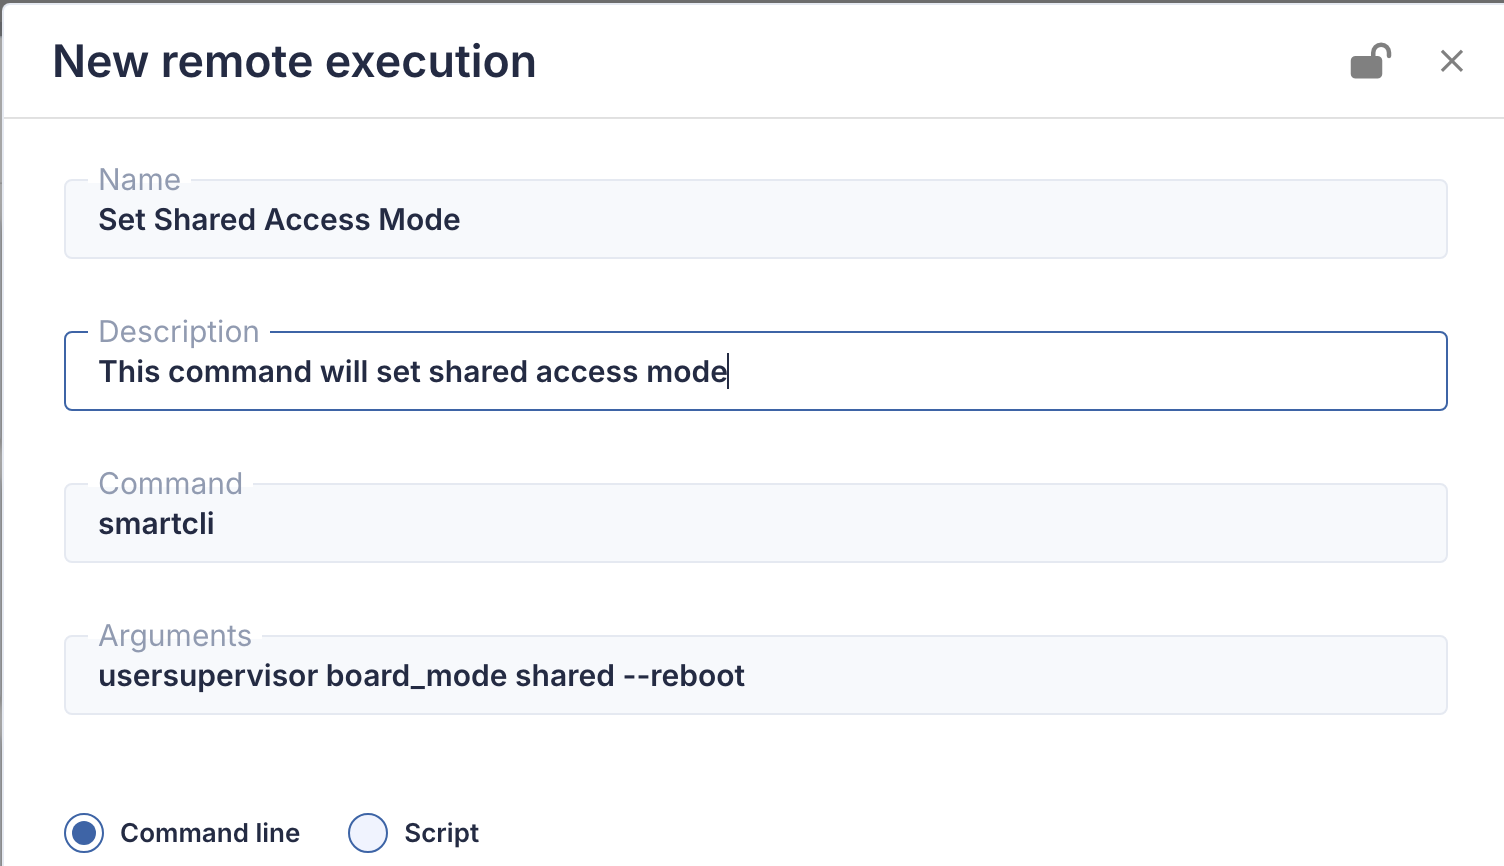
This applies the shared access mode setting to the display.
Click Confirm to return to the remote execute window, and then select the newly created command and click Add. The workflow should now have both actions listed:
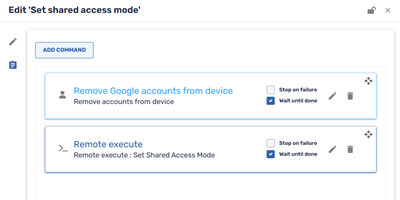
Click Confirm to save the workflow and return to the main window.
From the Devices
 view, select the display (or displays) you want to apply shared access mode to.
At the top of the view, click Workflow.
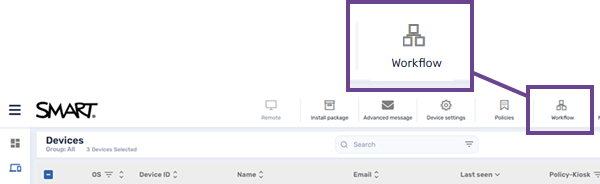
Select the workflow you created and click Apply.
Notes
If a display you are trying to apply this workflow to has a lock screen set for the public profile, this action will not work. In this case, SMART Remote Management provides a list of devices that could not be set to shared access mode. An Admin will need to remove the lock screen or reset those devices before trying again.
Changing the display’s mode resets the public profile and removes most settings and content. The following items are carried over after changing the mode:
A Google account that was added to the public profile before switching the display to shared access mode.
Anything saved in the Public Files location of the File Library (including Whiteboard files).
SMART Account users will not be affected.
Option 2: Use iQ settings
On the display, tap Settings
 SMARTSMART board mode.
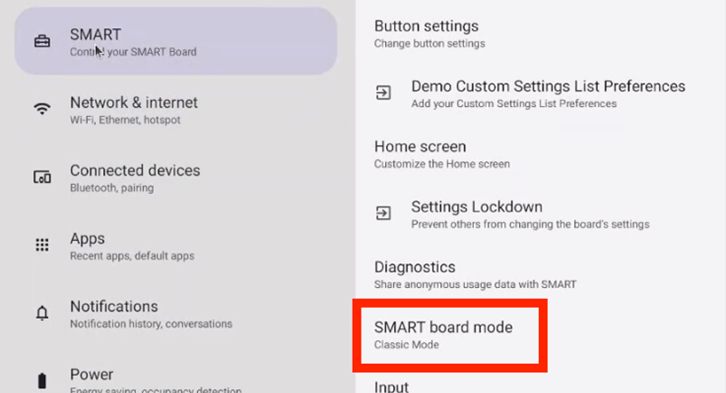
Select Shared Mode.
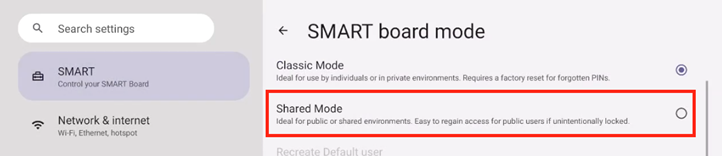
You will be prompted to restart the display before shared access mode is applied.
Note
If the Android lock screen has been set for board’s public profile, you are prompted to remove it.
You’ll need the existing credentials for the Android lock screen to remove it. Once you’ve entered the credentials, you are prompted to restart the display to finish applying shared access mode. If you don’t know the credentials, contact SMART Support for information on how to reset the display.
Option 3: Initial setup wizard
While setting up the display, the setup wizard provides an option to select which mode you want to use. By default, dedicated access mode is selected.
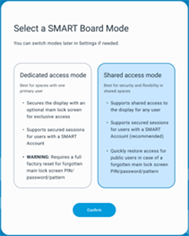
Tap Shared access mode, then tap Continue. This mode prevents a user from setting a PIN during the initial setup of the display.
At the end of the setup wizard, you are prompted to restart the display. Once complete, the display is in shared access mode.
Remove a public profile’s lock screen using shared access mode
When in shared access mode, it’s possible to set an Android lock screen on the public profile. As some policies require a lock screen to be set, a user is still able to set one on the public profile while the display is in shared access mode. In this scenario, if the credentials for the lock screen are lost or forgotten, you can tap the Lock Screen Clean Up button located on the Android lock screen for the public profile to quickly unlock and access the display.
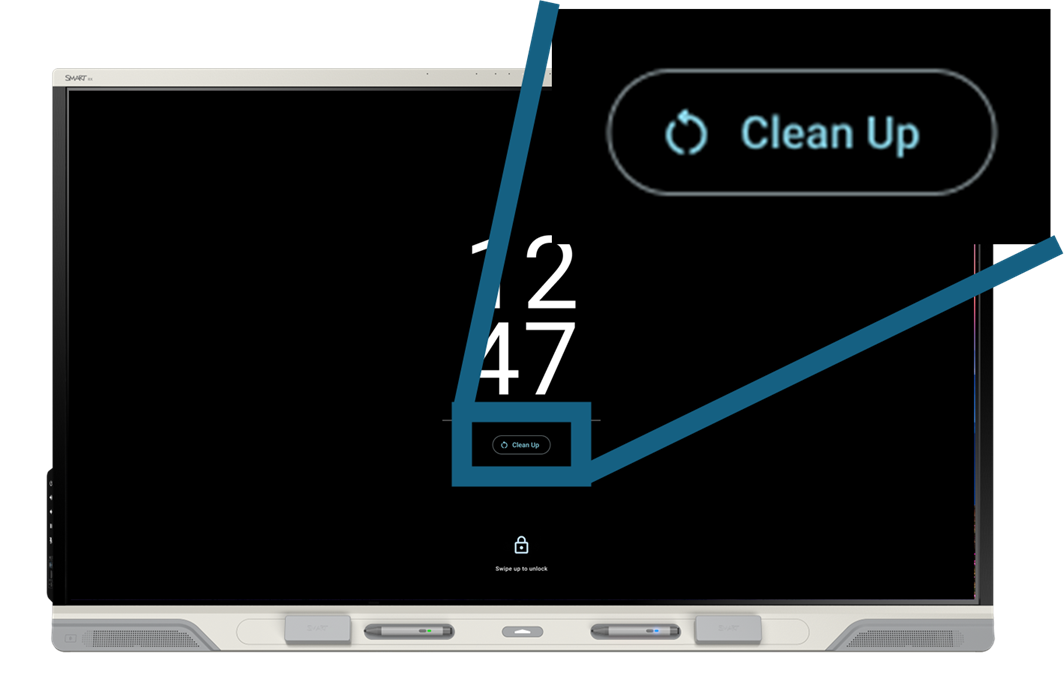
When tapped, this clean up button completely removes the existing public profile and creates a new one without the lock screen set. From here, anyone can use the public profile or sign into their SMART Account.
Notes
Most locally-stored data in the original public profile will be lost, except for any items saved in the Public Files location in the File Library (including Whiteboard files). These items are saved on the original public profile and will be accessible again if the display is switched back to the dedicated access mode in the future. Removing most locally stored data is necessary because removing the public profile is the only way to remove the lock screen that was set.
No data is lost for any SMART Account users that already exist on the board.
During the initial iQ 4.5 release for shared access mode, the display’s settings will be reset to factory default for the new public profile. Future releases are planned to add functionality that will allow Admin’s to carry over settings at their discretion.
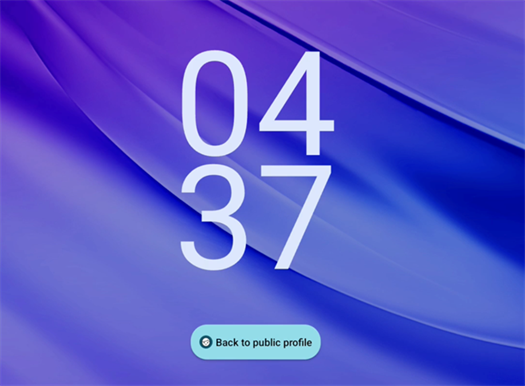
Returning to a public profile from the SMART Account profile lock screen
When in shared access mode, it’s possible to set an Android lock screen on a SMART Account profile. in this scenario, there is a Back to public profile button that appears on the Android lock screen.
Tapping Back to public profile will sign out the SMART Account profile and take you back to the public profile. There you can use the display as the public profile or sign into a different SMART Account profile. Unlike the Clean up button on the public profile in shared access mode, tapping Back to public profile does not remove any data or settings.