Creating concept maps to encourage dynamic participation from students
SMART Notebook Plus feature. Subscription required.
Use Concept Mapping to quickly create concept maps that encourage dynamic participation from students. Concept Mapping allows students to brainstorm, generate new ideas, and see the relationships and hierarchies between concepts
You can use ink gestures along with traditional interactions to build concept maps.
To begin using the Concept Mapping add-on, open it from the toolbar. A root node appears automatically. You then use additional nodes to create the concept map.
Tip
Not seeing this add-on? Make sure it’s enabled.
To create a root node
Tap Start a new concept map
 in the Add-ons menu.
 A root node opens.
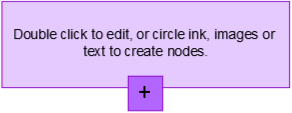
Double tap within the root node to edit the text. Tap Properties
 or Text
 to open the Text menu, where you can select text size, font and color.
To create additional nodes
Tap Add
 in the root node. A new node appears with a line connecting it to the root node.
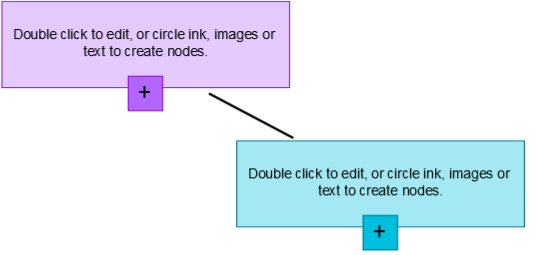
Double tap within the node to edit the text.
To use an image as a node
Open Concept Mapping and drag or paste an image, Ink, or text to the Notebook page.
Use a Notebook pen to draw a circle around the image.
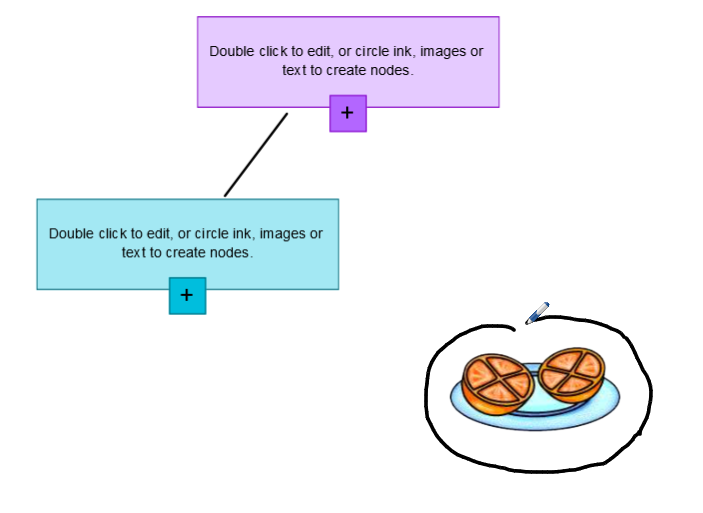
The image appears within a new node. Move the node to wherever you like on the Notebook page.
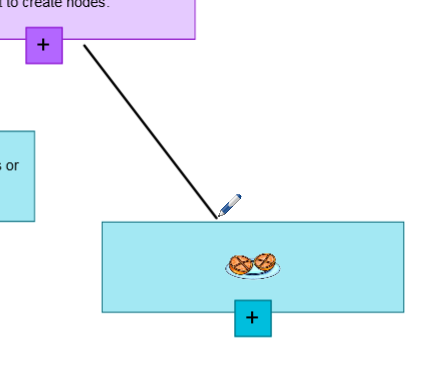
Now use the pen to draw a regular ink line from the new node to another node. The line turns into a segment and joins the two nodes.
Tips
Use Undo
 and Redo
 to undo or redo your Concept Mapping work.
If you delete a root node, all other nodes are also deleted.
You can resize the node by tapping the resize handle and moving it to make the node larger or smaller.