Creating a SMART Account as a teacher
Creating a SMART Account enables you to sign in to and use SMART software, such as SMART Notebook and Lumio. Your SMART Account connects all your SMART software applications, making it easy to your lessons and settings across products. If you’re using a SMART display with iQ while signed in to your SMART Account, the display’s File Library syncs with your SMART Account. Files you’ve shared from SMART Notebook or saved to Lumio are available directly from the display.
Note
To access Lumio or SMART Notebook with your SMART Account, you or your school must have an active subscription to SMART Learning Suite. If you are part of a group subscription, ensure your email is provisioned in the SMART Admin Portal.
To register for a SMART Account, you need an existing email account—ideally an account provided by your school for Google Suite or Microsoft Office 365.
Tip
Don’t have a Google or Microsoft account? You can create one using your existing email by visiting signup.live.com (Microsoft) or accounts.google.com/signin (Google). If you need help, visit the Microsoft or Google support pages.
Watch this video to help you choose the best account for setting up a SMART account:
To set up a SMART account as a teacher
In a web browser, go to lum.io and click Get started for free.
OR
From SMART Notebook software, click Account > Sign in on the Notebook menu.
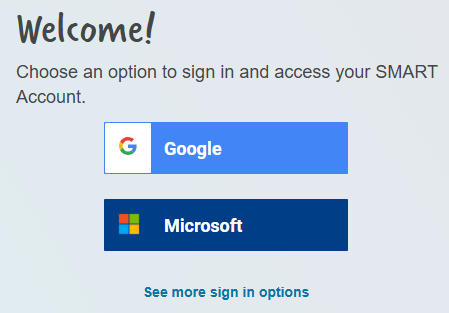
The SMART Account sign in page opens.

Choose from the available sign-in options based on your service region.
Note
If you're in the European Service Region, you can select See more sign in options.
European Service Region only.

SMART will use the account you choose (and the associated email and password) to create your SMART Account.
Tip
Ask an IT person at your school if your school email address is already connected to one of the account providers shown above. If it is, that’s the account and email address you should use to set up your SMART Account.
Follow the on-screen instructions to sign in to your email account. You’ll be asked to enter or select your email address and then enter your password.
After you sign in to your email account, you’re returned to SMART’s account creation page, where you’re asked to provide some basic information.
Fill out the required information, agree to the terms of use, select whether you would like to receive communications from SMART, and then click Finish.
Note
The display name you provide here will be visible to your students. Choose a name that you want your students to see and use to address you. You can change this name later if you need.
Your account setup is now complete.
After you’ve set up a SMART Account, you can visit your SMART Account settings page to manage the following:
Note
Need to change or reset your SMART Account password? Since your SMART Account is linked to your chosen email account, you’ll need to use those services to recover or change your password.
Keywords |
|