About your SMART Board 6000S or 6000S Pro
The SMART Board
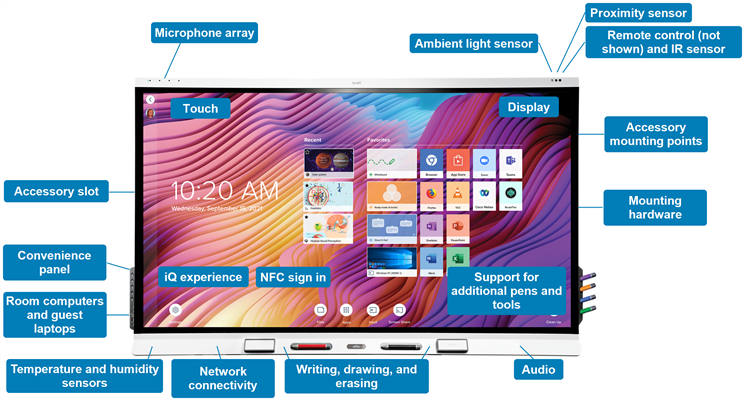
The display includes an extensive set of features and components.
Tap a feature’s label in the below diagram to learn more about the feature:
Note
The following features are available on the SMART Board 6000S (V3) models. SMART Board 6000S and 6000S (C) models don’t include a microphone array, and the sensors are located in the top-left corner of the display’s frame.
The display includes an extensive set of features and components.