Components
The display consists of the following components:
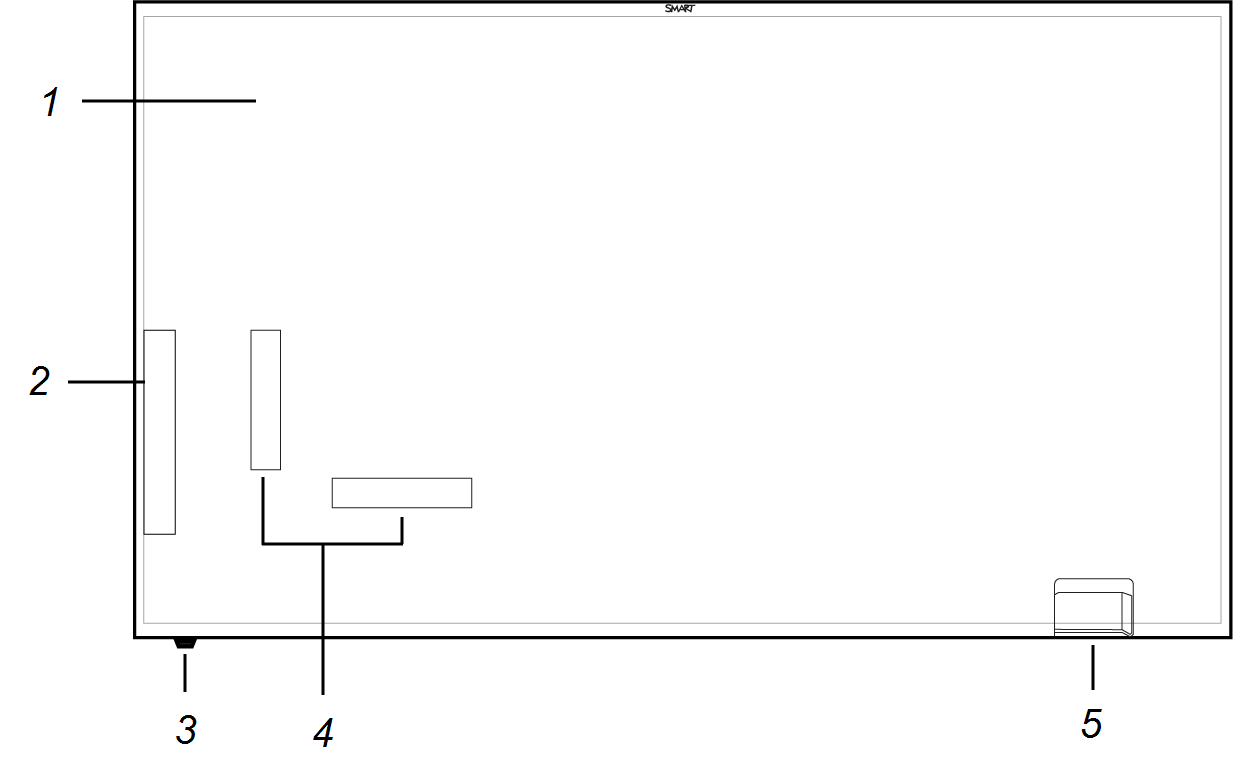
No. | Name | More information |
|---|---|---|
Pictured | ||
1 | Screen | |
2 | Control panel | |
3 | Remote control IR sensor | |
4 | Connector panel (rear surface) | |
5 | Power panel (rear surface) | [N/A] |
Not pictured | ||
6 | Remote control | |
7 | Speakers | |
The display comes in the following screen sizes:
Model | Diagonal | Width | Height | Aspect ratio |
|---|---|---|---|---|
SBD-2075 and SBD-2075P | 74 5/8" (189.7 cm) | 65 1/16" (165.3 cm) | 36 5/8" (93.1 cm) | 16:9 |
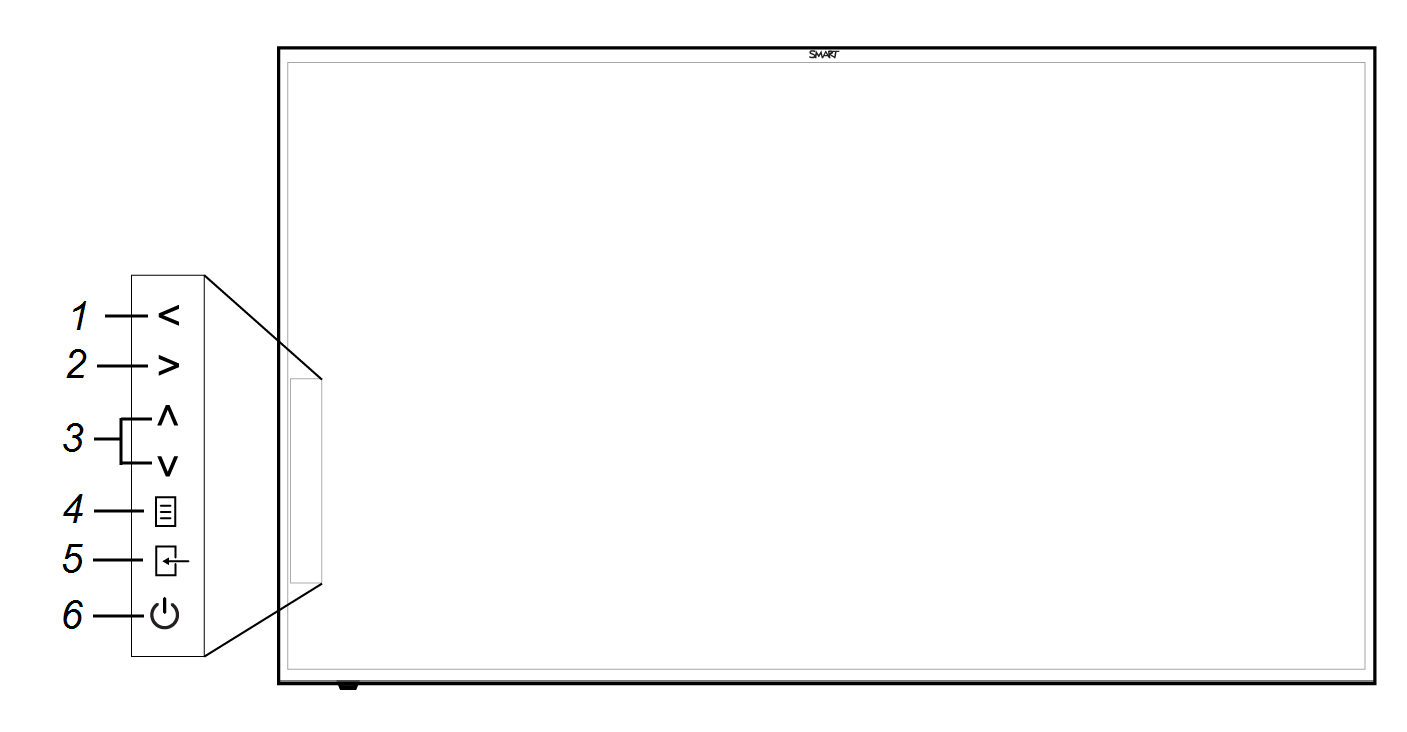
The control panel located on the side of the display enables you to turn on the display, change inputs and use the on-screen display menu. It includes buttons for Power, Input Select, on-screen display (OSD) menu and menu navigation.
No. | Name | Procedure |
|---|---|---|
1 | Volume decrease, change selection. | Press to decrease volume and change a menu selection. |
2 | Volume increase, change selection | Press to increase volume and change a menu selection. |
3 | Navigate menu | Press up and down to navigate Input and OSD menus. |
4 | OSD menu | Press to open or close the OSD menu. |
5 | Input select | Press to open or close the Input select menu. |
6 | Power | Press to turn the display on or off. |
The sensor detects input from the remote control. For best performance, maintain line-of-sight between the remote control and the sensor on the display.
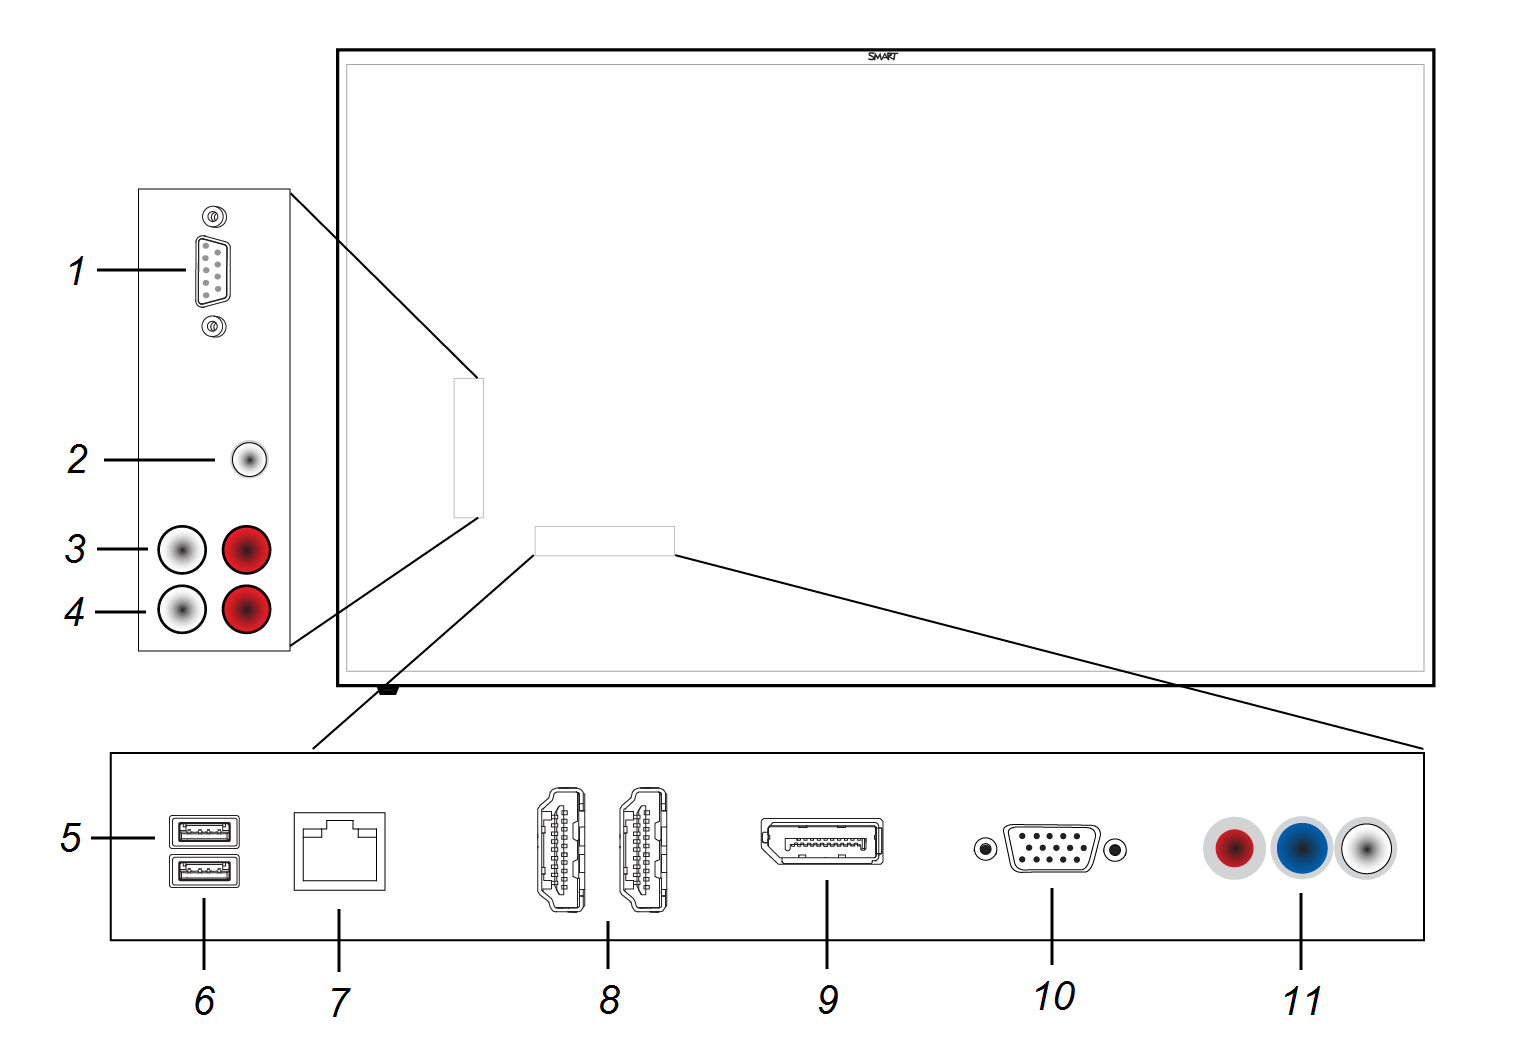
The connector panel enables you to connect the display to your computer, external speakers and other devices. The following connections are available on 2000 series displays:
No. | Name |
|---|---|
1 | Room control RS-232 in |
2 | Stereo 3.5 mm audio line in |
3 | RCA audio in |
4 | RCA audio out |
5 | USB 2.0 user port. Input for a human interface device (HID), such as a keyboard or mouse for use during initial setup. |
6 | USB 2.0 service port |
7 | Ethernet RJ45 |
8 | HDMI in (×2) |
9 | DisplayPort in |
10 | VGA in |
11 | Component video in |
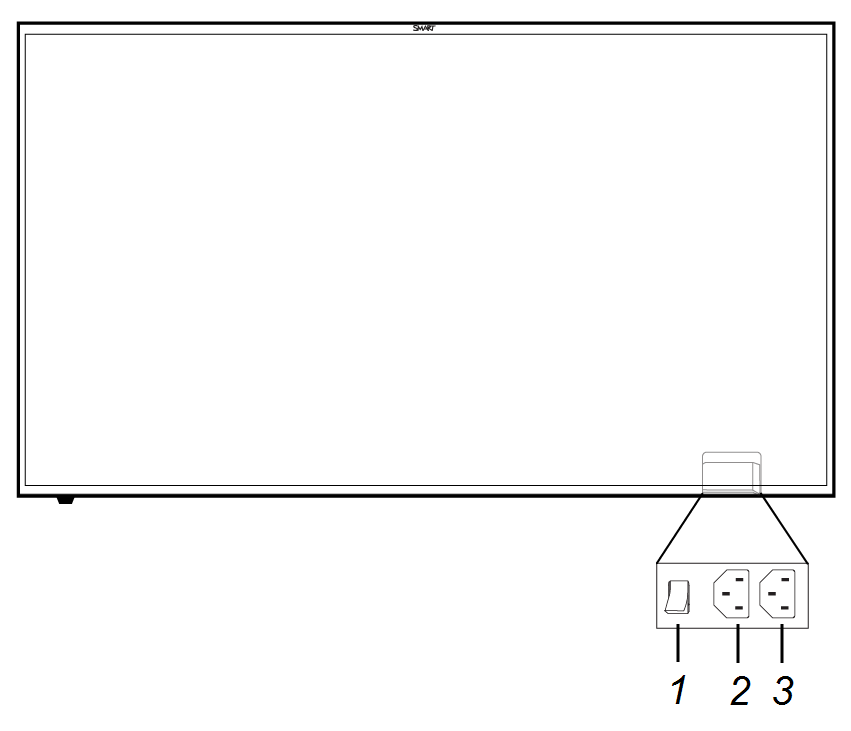
Use the power panel to connect the display’s power cable, connect a mini computer’s power to the display and operate the power switch.
No. | Name |
|---|---|
1 | Power switch |
2 | Display power outlet |
3 | Mini computer power inlet |
Use the remote control to turn the display on or off, adjust the volume, select input, access SMART Board Settings, and adjust the OSD settings. The remote control features the following buttons:

No. | Function | More information |
|---|---|---|
1 | Power | Turn the display on or off |
2 | OSD menu | Open or close the OSD menu |
3 | OK | Select a menu option |
4 | Back | Navigate back |
5 | Brightness decrease | Decrease display brightness |
6 | Volume decrease | Decrease the volume |
7 | Input select | Open or close the Input select menu |
8 | Navigation buttons | Navigate Input select, SMART Board Settings and the OSD menu |
9 | Freeze screen | Freeze the displayed image |
10 | Brightness increase | Increase display brightness |
11 | Volume increase | Increase the volume |
12 | Volume mute | Mute the volume |
The display has two 10 W integrated speakers. You can use the RCA or 3.5 mm audio output connectors to connect to an external sound system.
Models | |
Keywords |
|
Related documents |