Using Tool Explorer (V2) stamps and cubes
The Tool Explorer (V2) platform lets teachers and students manipulate real-world objects that are automatically recognized by the display, combining the learning benefits of manipulatives with the flexibility and scalability of digital materials. Kinesthetic and tactile learners can get the hands-on activity and fine motor experiences they need to explore, learn and retain.
Notes
The tools work best when they’re separated by at least 8 inches (20 cm).
Performance may vary with different tools and different sizes of display.
You might experience unexpected behavior if:
Two stamps are pressed at the same time
The stamp is not depressed enough to activate the switch
The pens, cubes, or stamps are too close to each other
Some Tool Explorer (V2) tools work only with the iQ system’s whiteboard and not with input from a connected computer.
Tool Explorer (V2) tools and manipulatives are not compatible with the 6000S series Tool Explorer (V1) tools and manipulatives.
Support for the different pens, objects, and manipulatives varies depending on the model of display, as described in the following descriptions of each tool.
 Using Tool Explorer (V2) stamps
Tool Explorer (V2) stamps feature various emojis that are inserted as objects when you press the stamp’s face on the display’s screen. You can move, resize, rotate, delete the object. Stamps are ideal for younger children and early learners.
Tip
You can store the stamps in place of the erasers at the bottom of the display’s frame. Two stamps fit on each magnetic holder.
Note
For information about the iQ system software or SMART software version required for each Tool Explorer (V2) tool
To insert an object using a Tool Explorer (V2) stamp
Open the iQ Whiteboard app on the display.
Pick up a stamp.
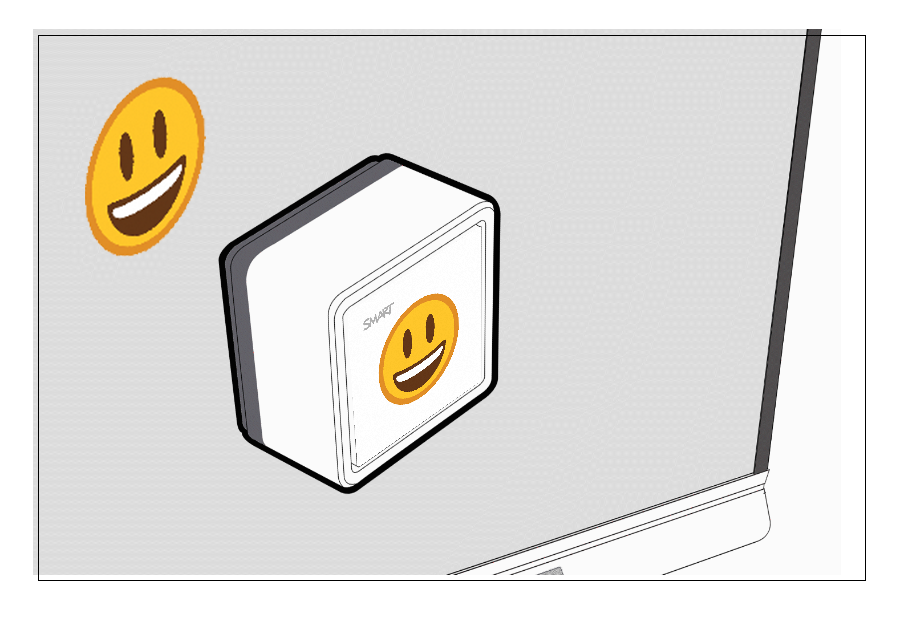
Make sure the stamp is flush with the screen and depress the stamp’s face until you hear a click.
The image on the stamp is inserted onto the Whiteboard as an object.
Tip
The inserted object can be resized or rotated by tapping on the object to select it.
Tip
The inserted object can be resized or rotated by tapping a portion or corner of the stamp’s face on the screen.
Using Tool Explorer (V2) cubesTool Explorer (V2) cubes feature various numbers and emojis that are inserted as objects when you tap the cube’s face on the display’s screen. You can move, resize, rotate, delete the object. Cubes are ideal for younger children and early learners.
Tip
You can store the cubes in place of the erasers at the bottom of the display’s frame. Two cubes fit on each magnetic holder.
Note
For information about the iQ system software or SMART software version required for each Tool Explorer (V2) tool
To insert an object using a Tool Explorer (V2) cube
Open the iQ Whiteboard app on the display.
Pick up a cube and choose the image you want to insert.
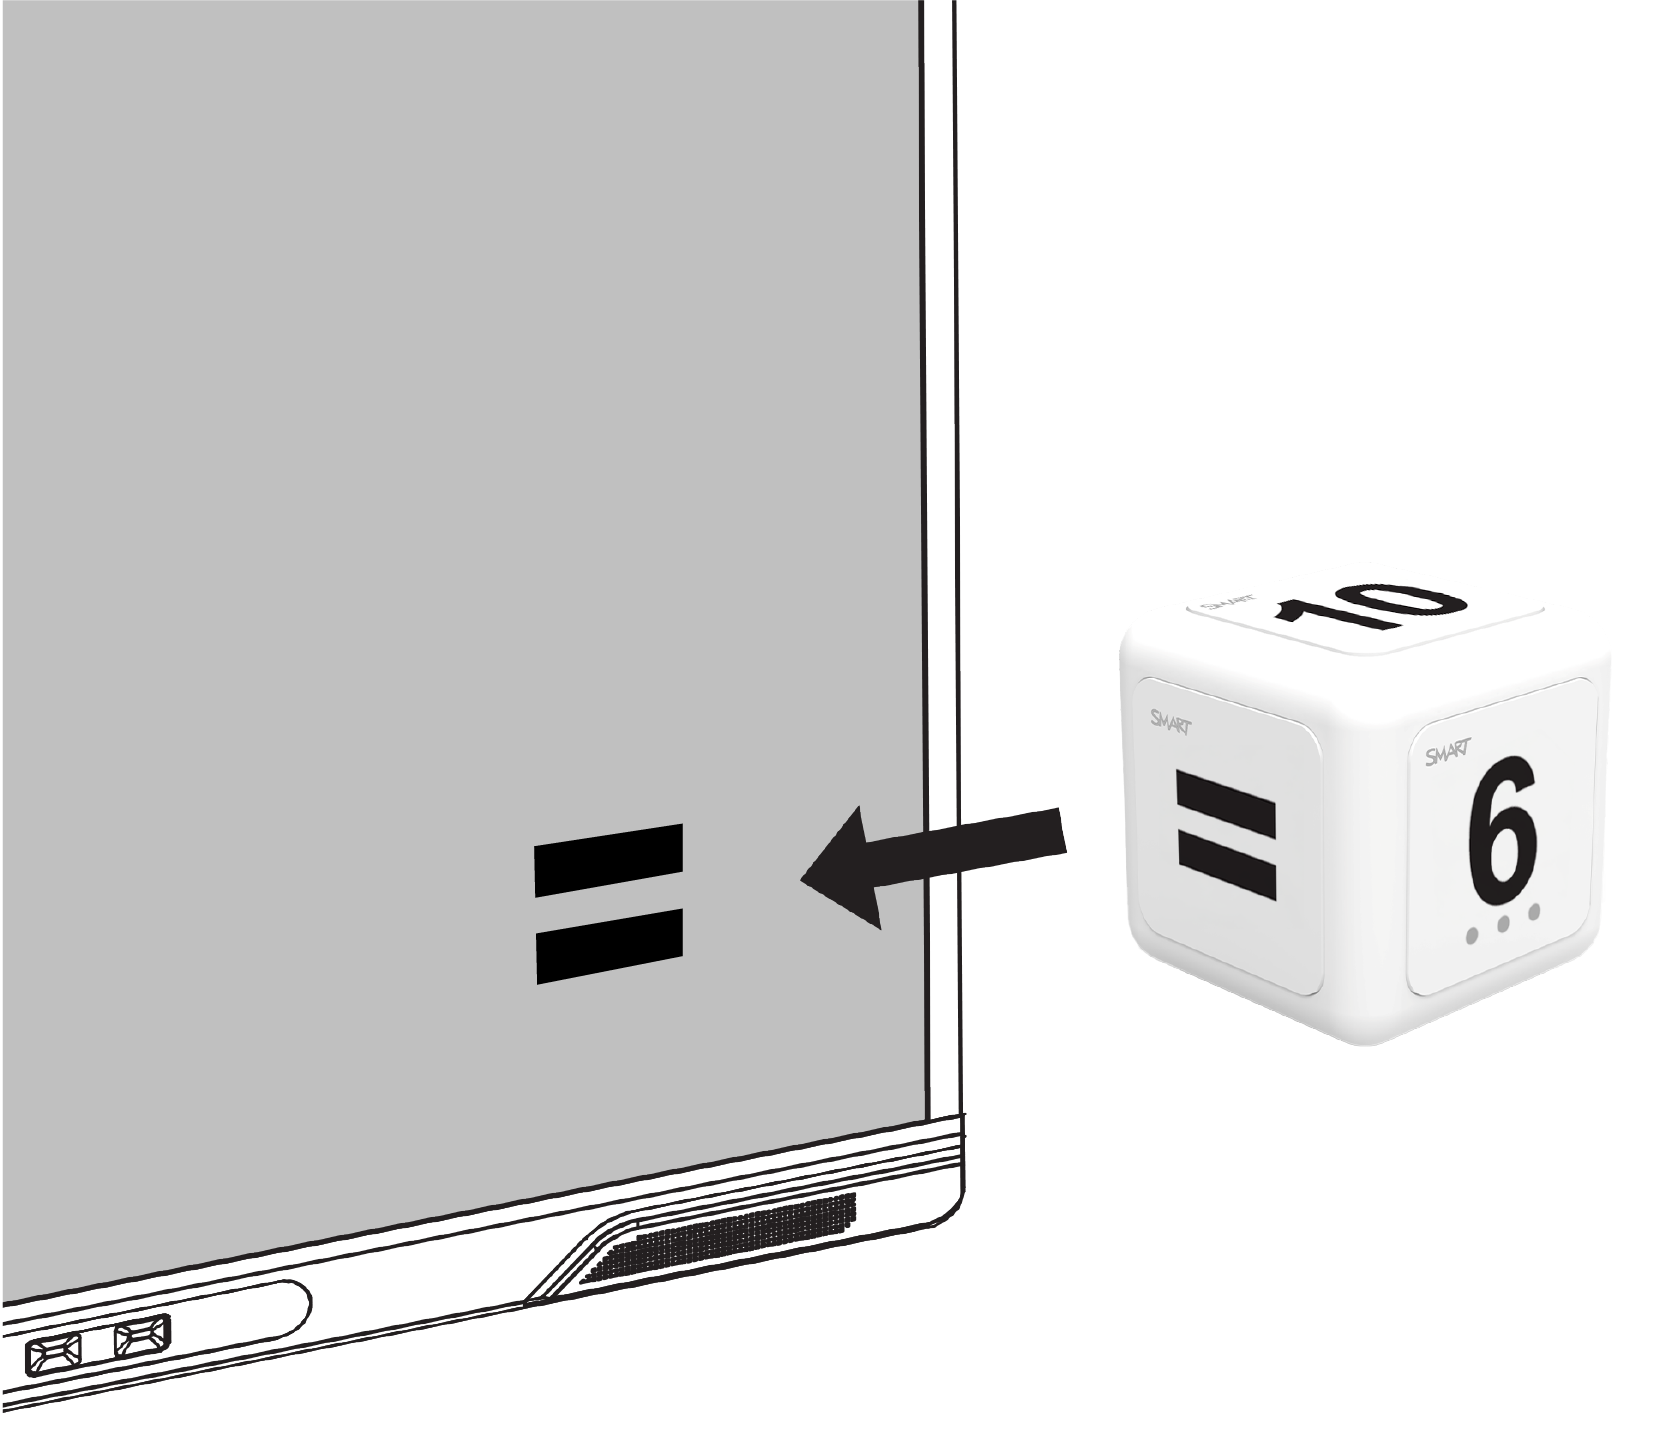
Tap that cube’s face against the screen, making sure the cube face is flush with the screen.
The image on the cube is inserted into the Whiteboard as an object.
Tip
The inserted object can be resized or rotated by tapping on the object to select it.
To manipulate or delete an inserted objectTo move, resize, and rotate an object
Tap the object you want to manipulate.
A selection rectangle appears around the object.
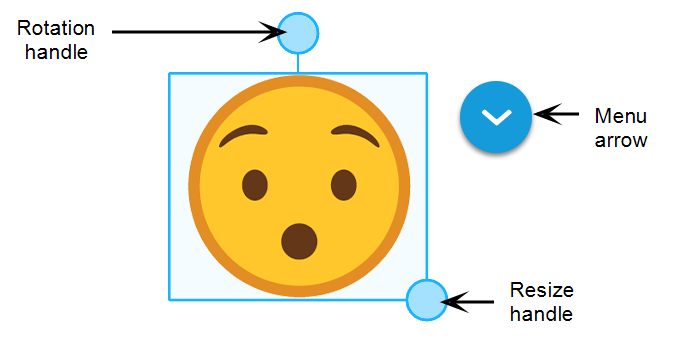
To manipulate the object, you can:
drag the object to a new position on the screen.
drag the object’s resize handle (bottom right circle) to make the object larger or smaller.
drag the object’s rotation handle (top circle) in the direction you want to rotate the object.
delete an object by pressing the object’s menu arrow, and then tapping Delete.
To delete an object
Tap the object.
A selection rectangle appears around the object.
Press the object’s menu arrow, and then select Delete.