Assembling the stand
Tools the assembler needs to supply:
Phillips No. 2 screwdriver
Phillips No. 3 screwdriver
13 mm wrench or socket
17 mm wrench or socket
3 mm hex key
To assemble the stand
Step | Required tools and items | Instructions | Diagram |
|---|---|---|---|
1 |
| Flip the stand base upside down. Connect each caster to the stand base using four screws a. | 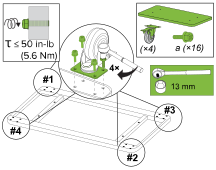 |
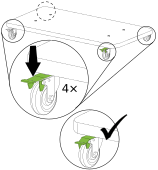
2 | N/A | Flip the stand base back over and lock all four casters. |
|
3 |
| Insert the supports into the stand base. | 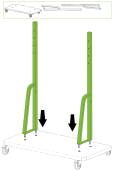 |
4 |
| Secure the four support studs to the bottom of the stand base using washer j, washer k, and then tightening nut i. | 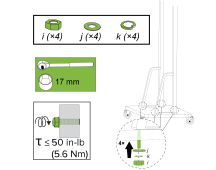 |
5 |
| Insert the shelf between the supports. Insert screw c into the plastic screw cover m, then secure the shelf to the supports using the Phillips No. 3 screwdriver. Snap the cover in place after the screw is tightened. Repeat for the remaining three screws c and plastic screw covers m. | 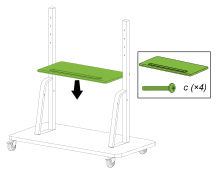 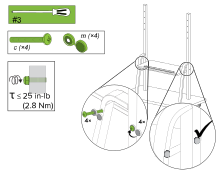 |
| While keeping in mind the height of the users and the size of the display, secure the bracket to the supports. Insert screw b on the front of the mount. Then use washer g and nut h on the rear of the screw. Tighten the nut with the wrench or socket. Repeat for the remaining three screws b. | 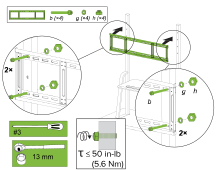 | |
7 |
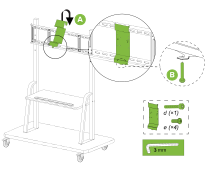
| Note Required only if mounting a computer to the stand. Place the computer mounting bracket in the middle of the bracket you installed in Step 6. Using screw d and the hex key, secure the computer mounting bracket to the bracket.
|  |
| SMART Board MX and MX Pro series interactive displays Loosen the screws that secure the included bracket to the display and remove the bracket Loosen the screws that secure the vertical brackets to the display and remove the vertical brackets. Proceed to Step 10. | 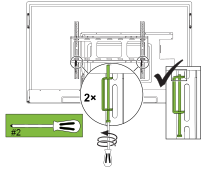 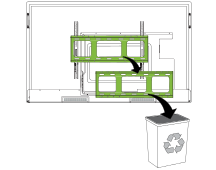 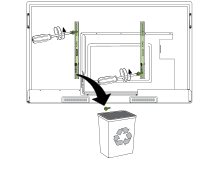 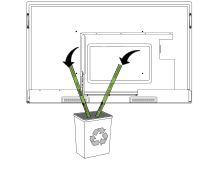 | |
N/A | SMART Board 6000S and 6000S Pro series interactive displays
| N/A | |
| Using screws f and the Phillips No. 2 screwdriver or 13 mm wrench or socket, attach the two vertical brackets to the back of the display. | 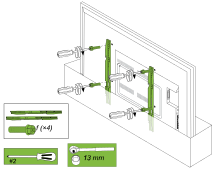 | |
11 |
| Place the display onto the stand’s horizontal mounting bracket, making sure the display is centered on the bracket. | 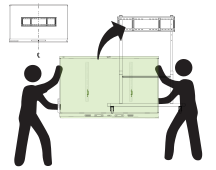 |
12 |
| Tighten the screws that secure the vertical brackets to the stand’s horizontal mounting bracket. | 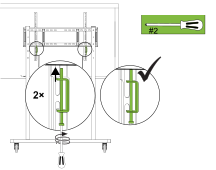 |
Models |
|
Keywords |
|
Related documents |