Using the on-screen display menu in Camera mode
Use the OSD menu to adjust settings for your document camera in Camera mode.
The following OSD menu options are available when your document camera is in Camera mode.
Tab | Options |
|---|---|
Image | Brightness, Contrast, Mode, Effect, Mirror, Advance, Focus |
Presentation | Spotlight, Visor, Split Screen, Picture in Picture (PIP), Timer, Miracast |
Setting | Capture, Storage, Format, USB to PC, Flicker, Saturation, Date/Time |
WiFi | AP, Dongle Mac ID, Current Status, Machine Name, Use Passcode |
System | Language, Output Display, Backup, Save Setting, Recall Setting, Information, Default |
Set your document camera to Camera mode.
Press the MENU button on the control panel or remote control.
The OSD menu appears.
Press the left
 and right arrow
  buttons on the control panel or remote control to toggle between tabs.
Press the down
 and up arrow
  buttons on the control panel or remote control to choose a selection in the menu list.
Press the
 button on the control panel or remote control to make a selection.
Press the
button on the control panel or remote control to enter a sub-menu.Press the
button on the control panel or remote control to return to the previous menu level.Press the MENU button on the control panel or remote control to exit the menu.
Set your document camera to Camera mode.
Press the MENU button on the control panel or remote control.
The OSD menu appears.
Use the right arrow
button on the control panel or remote control to navigate to the Image tab.Image setting options
Description
Brightness
Adjust the image brightness level manually.
Contrast
Adjust the image contrast level manually.
Mode
Select an option from three image display settings:
 Text – adjust the contrast to make text appear more visible.
  Graphic – adjust the gradient of image.
 Microscope – adjust the optical zoom for microscopic view.
Effect
Convert the image to color, black/white, or film negative.
Mirror
Select to flip the image:
ON – displays a mirrored image.
OFF – displays a normal image.
Advanced
Adjust the advanced image settings:
Auto Image – Select to automatically adjust white balance and exposure, and to correct color and exposure compensation.
Exposure – Select the exposure settings:
AUTO – automatically adjust the camera exposure.
MANUAL – manually adjust the camera exposure.
White Balance – Select the White Balance settings for various light conditions:
AUTO – automatically adjust the white balance.
MANUAL – manually adjust the red and blue color levels.
Focus
Adjust the focus manually.
Set your document camera to Camera mode.
Press the MENU button on the control panel or remote control.
The OSD menu appears.
Use the right arrow
button on the control panel or remote control to navigate to the Presentation tab. For WiFi and Miracast setup instructions see Connecting to a wireless network.
Presentation setting options
Description
Spotlight
Select to highlight an area on the presentation screen.
Set and move the overlay frame on the presentation screen.
- Select Execute to access the Spotlight sub-menu settings:
ON/OFF – turn the Spotlight on or off.
Shade – adjust the opacity level of the spotlight frame.
Color – select and change the color of the spotlight frame.
Visor
Select to covers the presentation screen. The top part of the presentation screen remains slightly exposed.
Use the arrow buttons on the control panel or remote control to adjust and move the covered area.
Select Execute to access the Visor sub-menu settings:
ON/OFF – Turn the Visor on or off.
Shade – Adjust the opacity level of the spotlight frame.
Split Screen
Select to divide the screen into two parts. Half of the screen displays eight thumbnail images and the other half displays the image from your document camera.
Select the display location: left, right, top, or bottom.
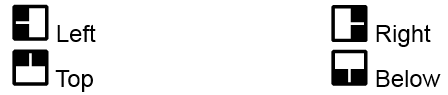
Select OFF to cancel Split Screen.
Picture in Picture (PIP)
Select to show captured pictures or videos as thumbnails in the corner of the screen in Camera mode. PIP displays an image from stored memory within the live camera image.
Select the thumbnail playback screen location: lower left, upper left, upper right, lower right.
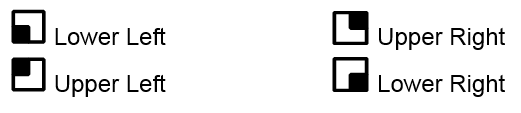
Select OFF to cancel PIP.
Note
The PIP feature is for display only. You can’t capture an image while in PIP mode.
Timer
Select to control presentation time management.
Start/Pause/Stop the timer.
Set the timer duration.
Miracast
Select Setup and enter device information to connect to Miracast.
Set your document camera to Camera mode.
Press the MENU button on the control panel or remote control.
The OSD menu appears.
Press the right arrow
button on the control panel or remote control to navigate to the Setting tab. Setting options
Description
Capture Select to set the capture resolution, quality, type, and interval settings.
Resolution – select image capture size. In 2 M setting, the capture resolution is 1920 × 1080p.
Quality – select image quality: Finest, High, Normal.
Type – select image capture type:
Single – capture one picture at a time.
Continuous – capture consecutive pictures.
Interval – Set the time interval for continuous capture. The length can be up to 600 sec (10 min).
Storage Change the storage location.
Audio and video recording can be saved only on an SD/SDHC card.
Format Delete all the data in the selected memory. USB to PC Select the status of your document camera when it’s connected to the computer using a USB cable.
Camera – can be used as a computer webcam to record videos or capture images.
Storage – transfer captured images or videos from the memory to a computer hard drive.
Flicker Select refresh rate:
50 Hz
60 Hz
Saturation Adjust the saturation setting.
Date/Time Set the time and date.
Set your document camera to Camera mode.
Press the MENU button on the control panel or remote control.
The OSD menu appears.
Press the right arrow
button on the control panel or remote control to navigate to the WiFi tab.WiFi setting options
Description
AP
WiFi connection options:
WiFi Setup – Connect to a network by entering the IP information.
ScanQR – Connect to a network by scanning the QR code.
Advance – Import a certificate and choose whether to set a static IP.
Dongle Mac ID
Displays the connected WiFi dongle Mac ID.
Current Status
Displays the status of the connection mode.
Machine Name Displays the name of your document camera, which you can select and change.
Use Password
Select to enter a password for your document camera.
Set your document camera to Camera mode.
Press the MENU button on the control panel or remote control.
The OSD menu appears.
Press the right arrow
button on the control panel or remote control to navigate to the System tab. System setting options
Description
Language Select or change the language.
Output Display Set the resolution to display an image on the screen:
1024 × 768
1280 × 720
1280 × 800
1280 × 1024
1600 × 1200
1920 × 1080
Select TV System to switch between NTSC and PAL video systems.
Note
This selection is disabled in TV output mode.
Backup Copy images and presentations from the built-in memory to an SD/SDHC card.
Save Setting
Save current settings in the selected profile number.
Note
Only effect, mode, brightness, and contrast settings can be saved.
Recall Setting Restore the setting to the selected profile number.
Information Display the product information.
Default Restore all the settings to the factory default settings.
Models |
|
Keywords |
|
Related documents |